How to add your Facebook Pixel to Shopify (plus 5 tips to maximize it)


Bold Editors
Copywriter
Mar 26, 2020

Wondering how to add your Facebook pixel to your Shopify store?
This guide will teach you how to install your Shopify Facebook pixel in 3 steps.
Let’s jump right into this Facebook Pixel tutorial!
How to add your Facebook Pixel ID to Shopify (3 steps)
To keep things simple, I’ve broken down how to find, add, and use your Facebook pixel on Shopify into three simple steps.
Step 1: Find your Facebook Pixel ID
First up, navigate to your Facebook Business Manager.
Click on the hamburger menu in the top left hand corner, then click on “All Tools” in the bottom right of this menu.
From here, you’re looking for “Pixels”, which is right under “Measure & Report”.
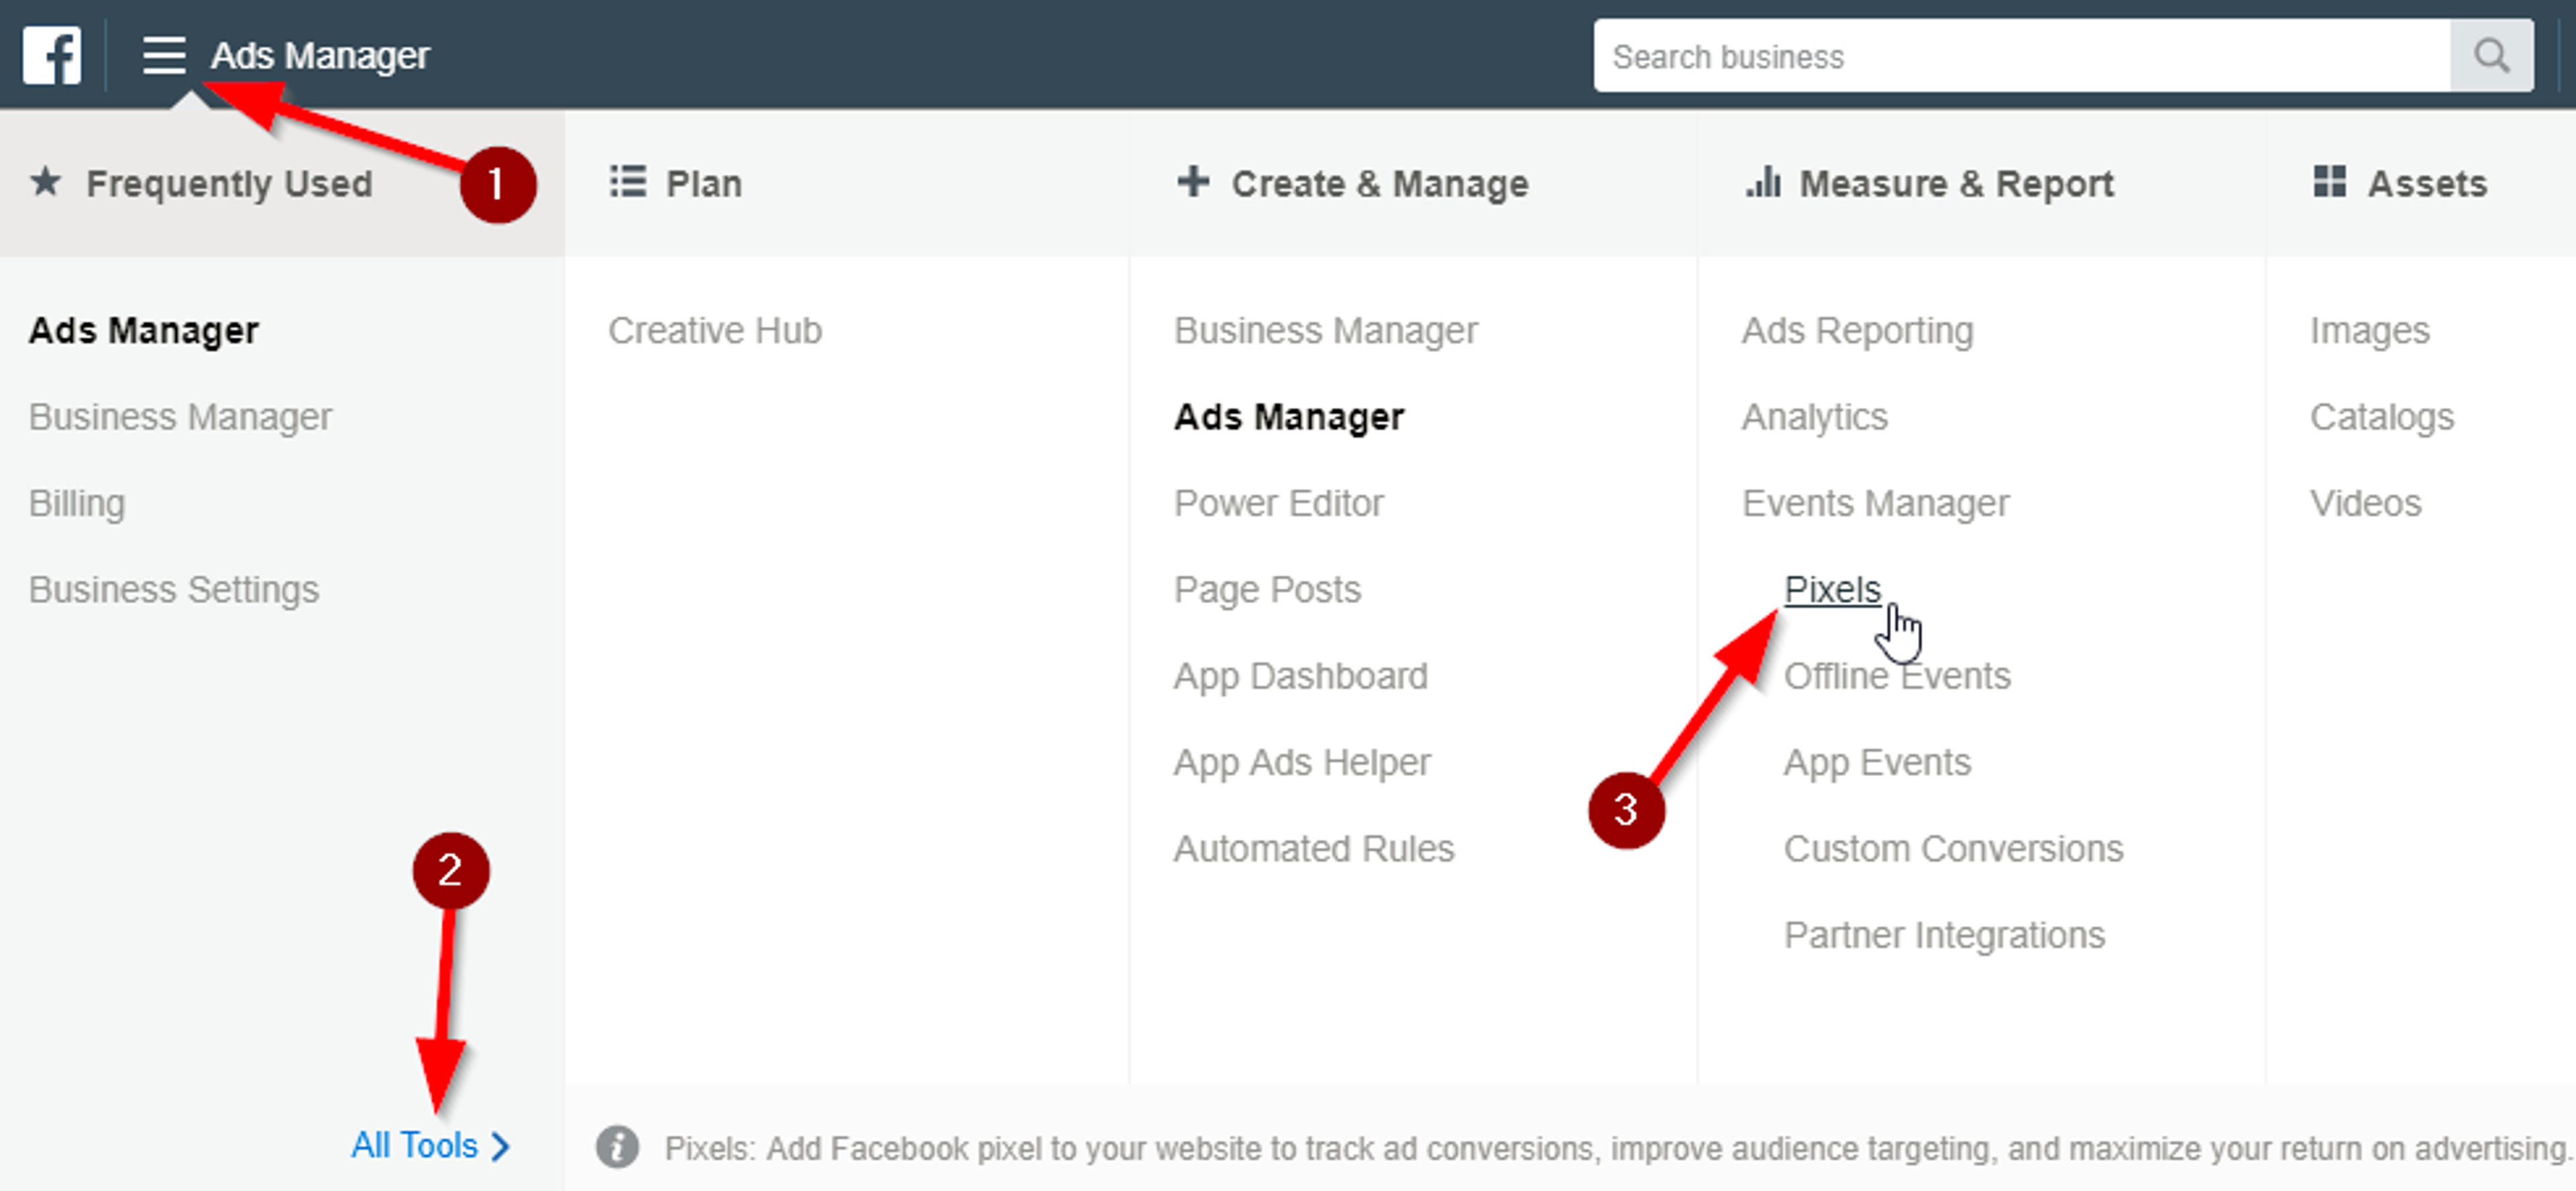
Click on it, and you’ll get access to your Facebook Pixel ID!
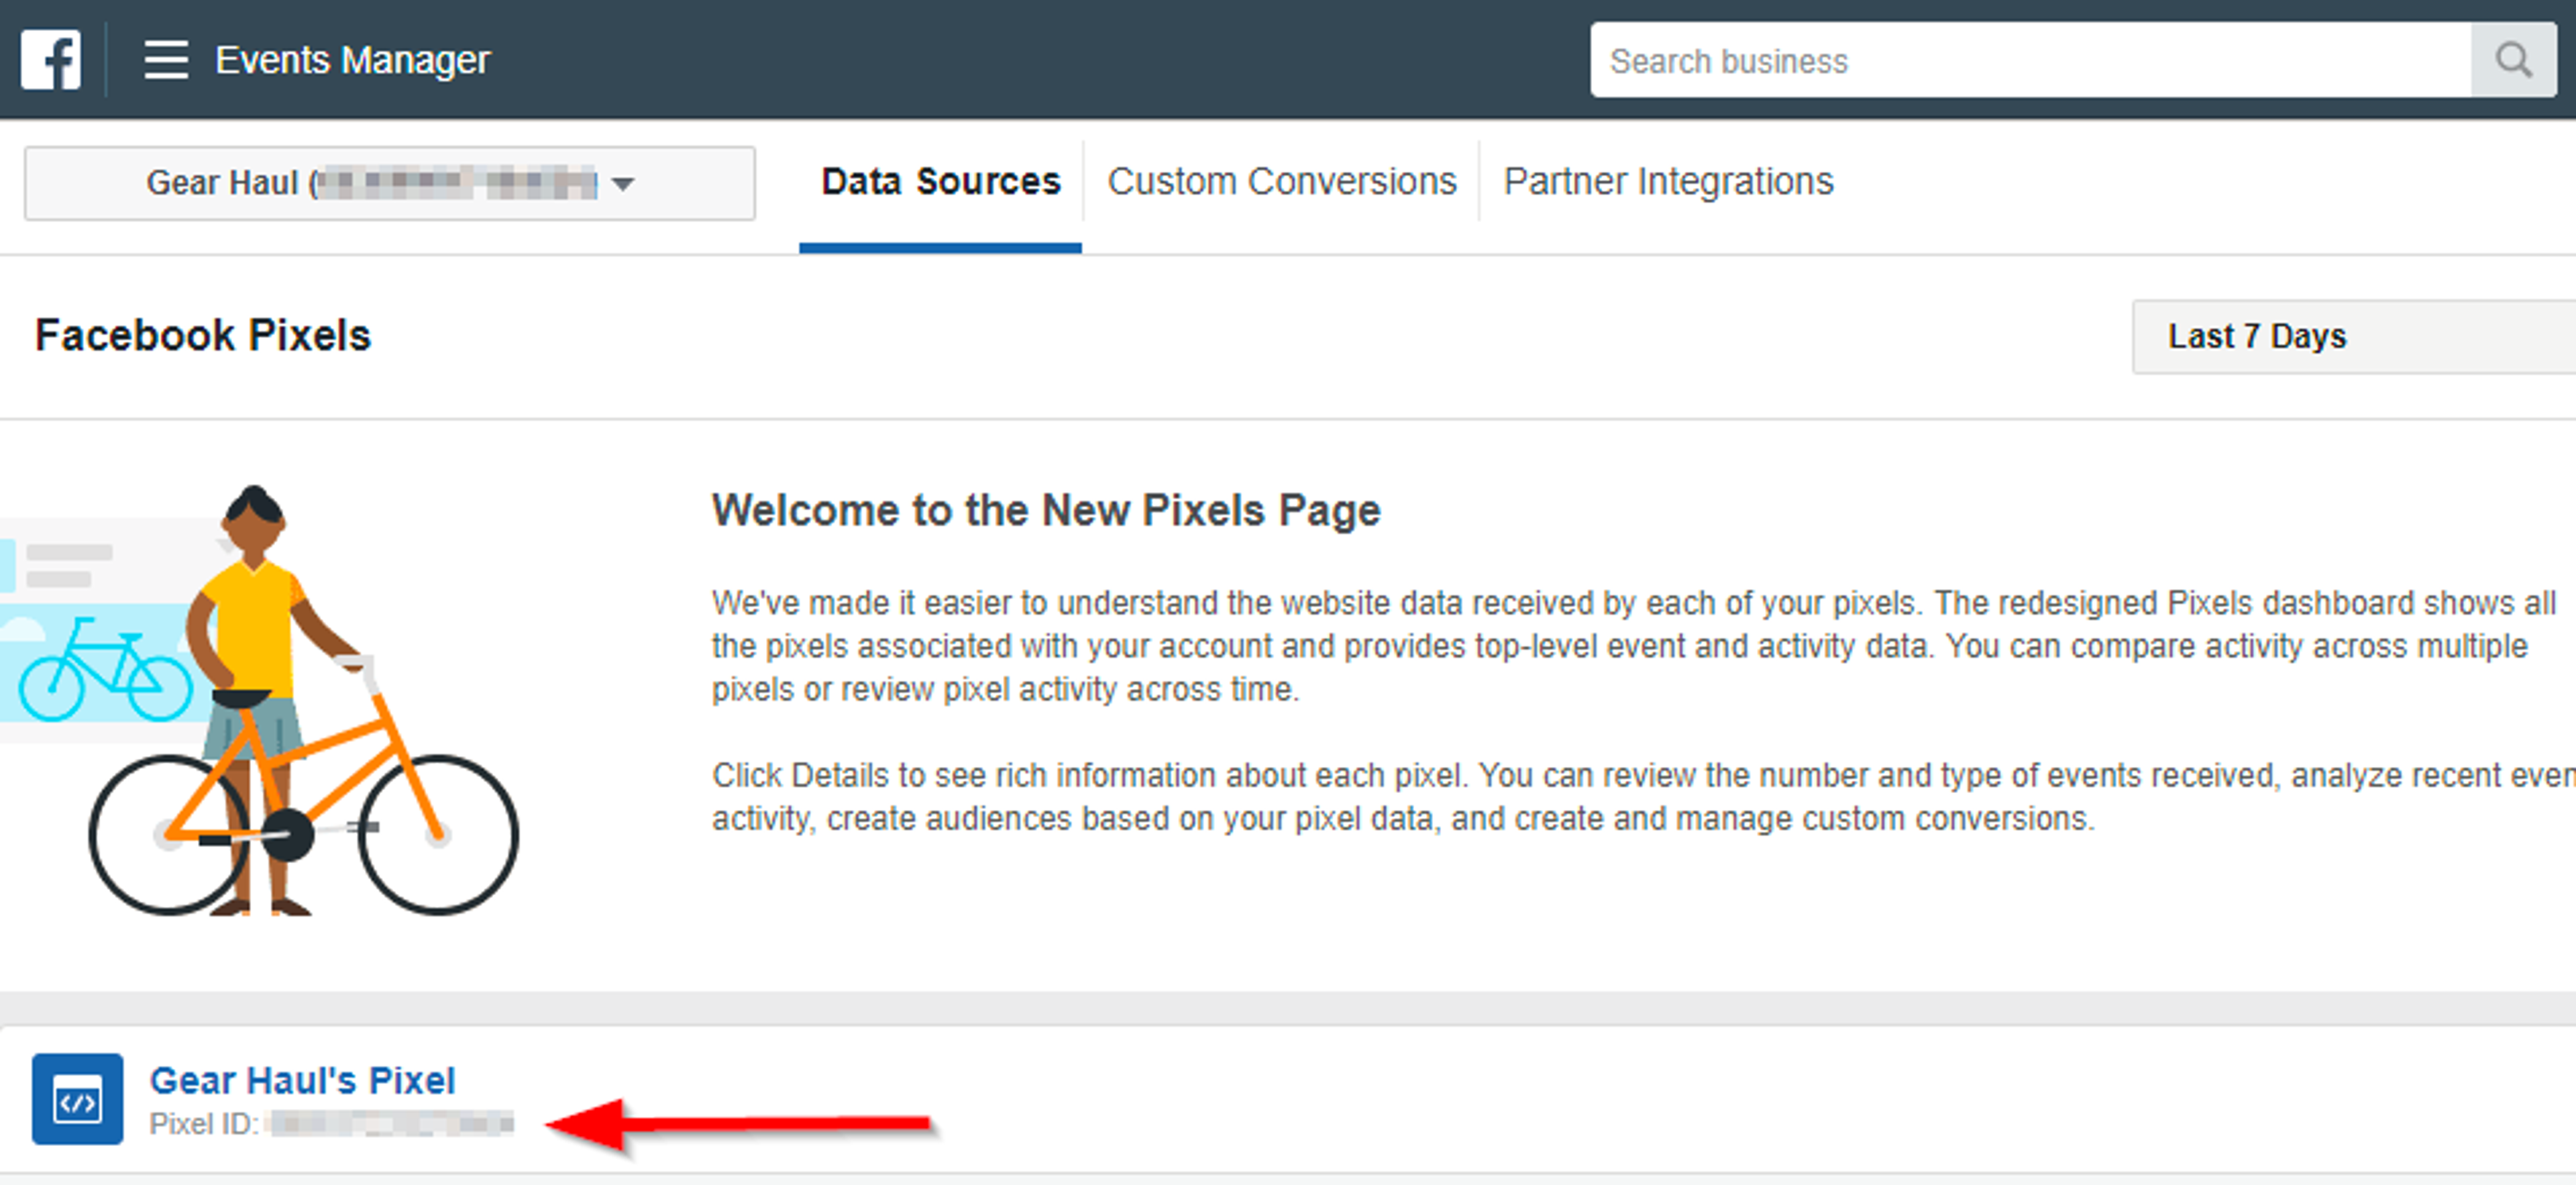
Psst: if you see the screen below instead…
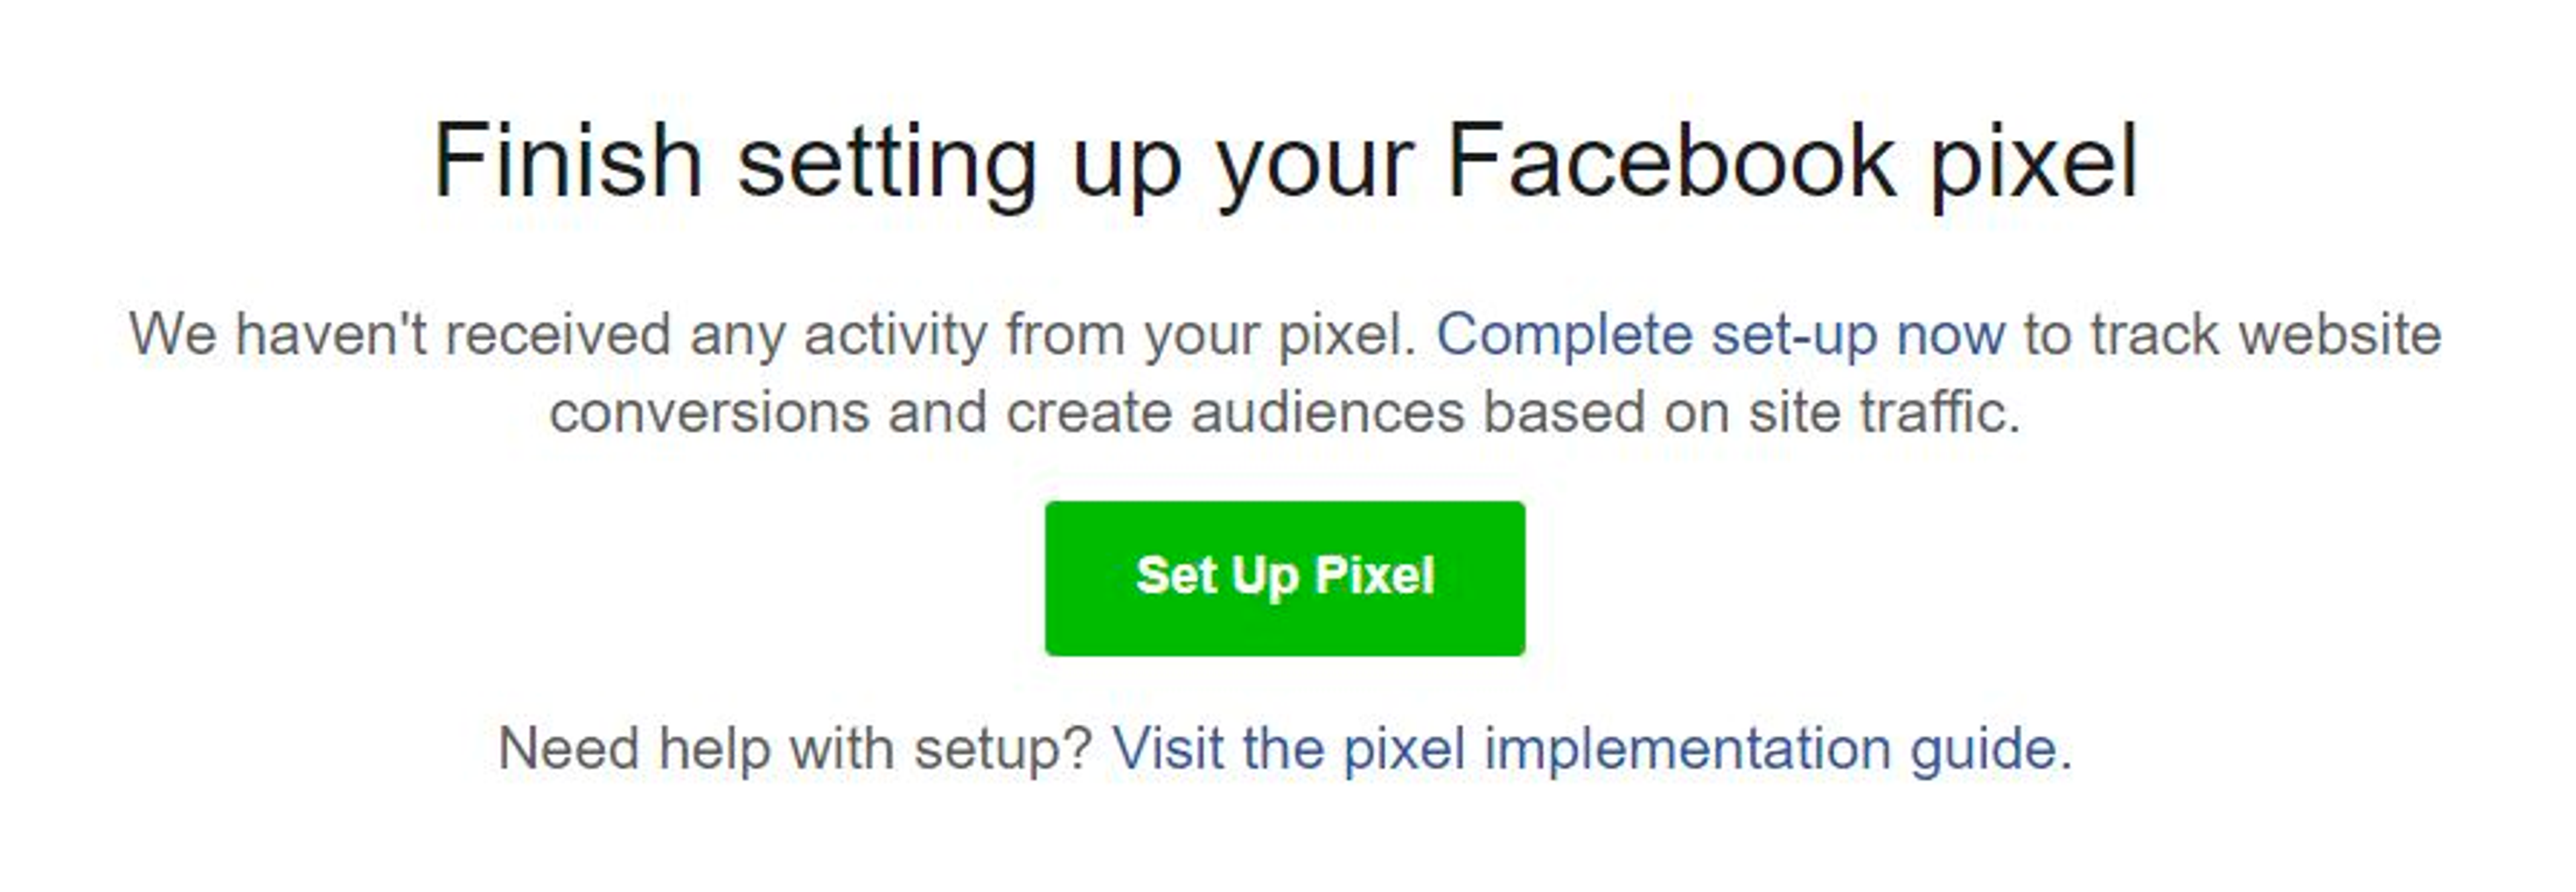
...it means that you probably tried to create a Facebook pixel previously, but never got around to setting it up properly on your online store (happens to the best of us).
If this is you, you’ll need to finish installing your pixel code on your website before you can get your pixel ID.
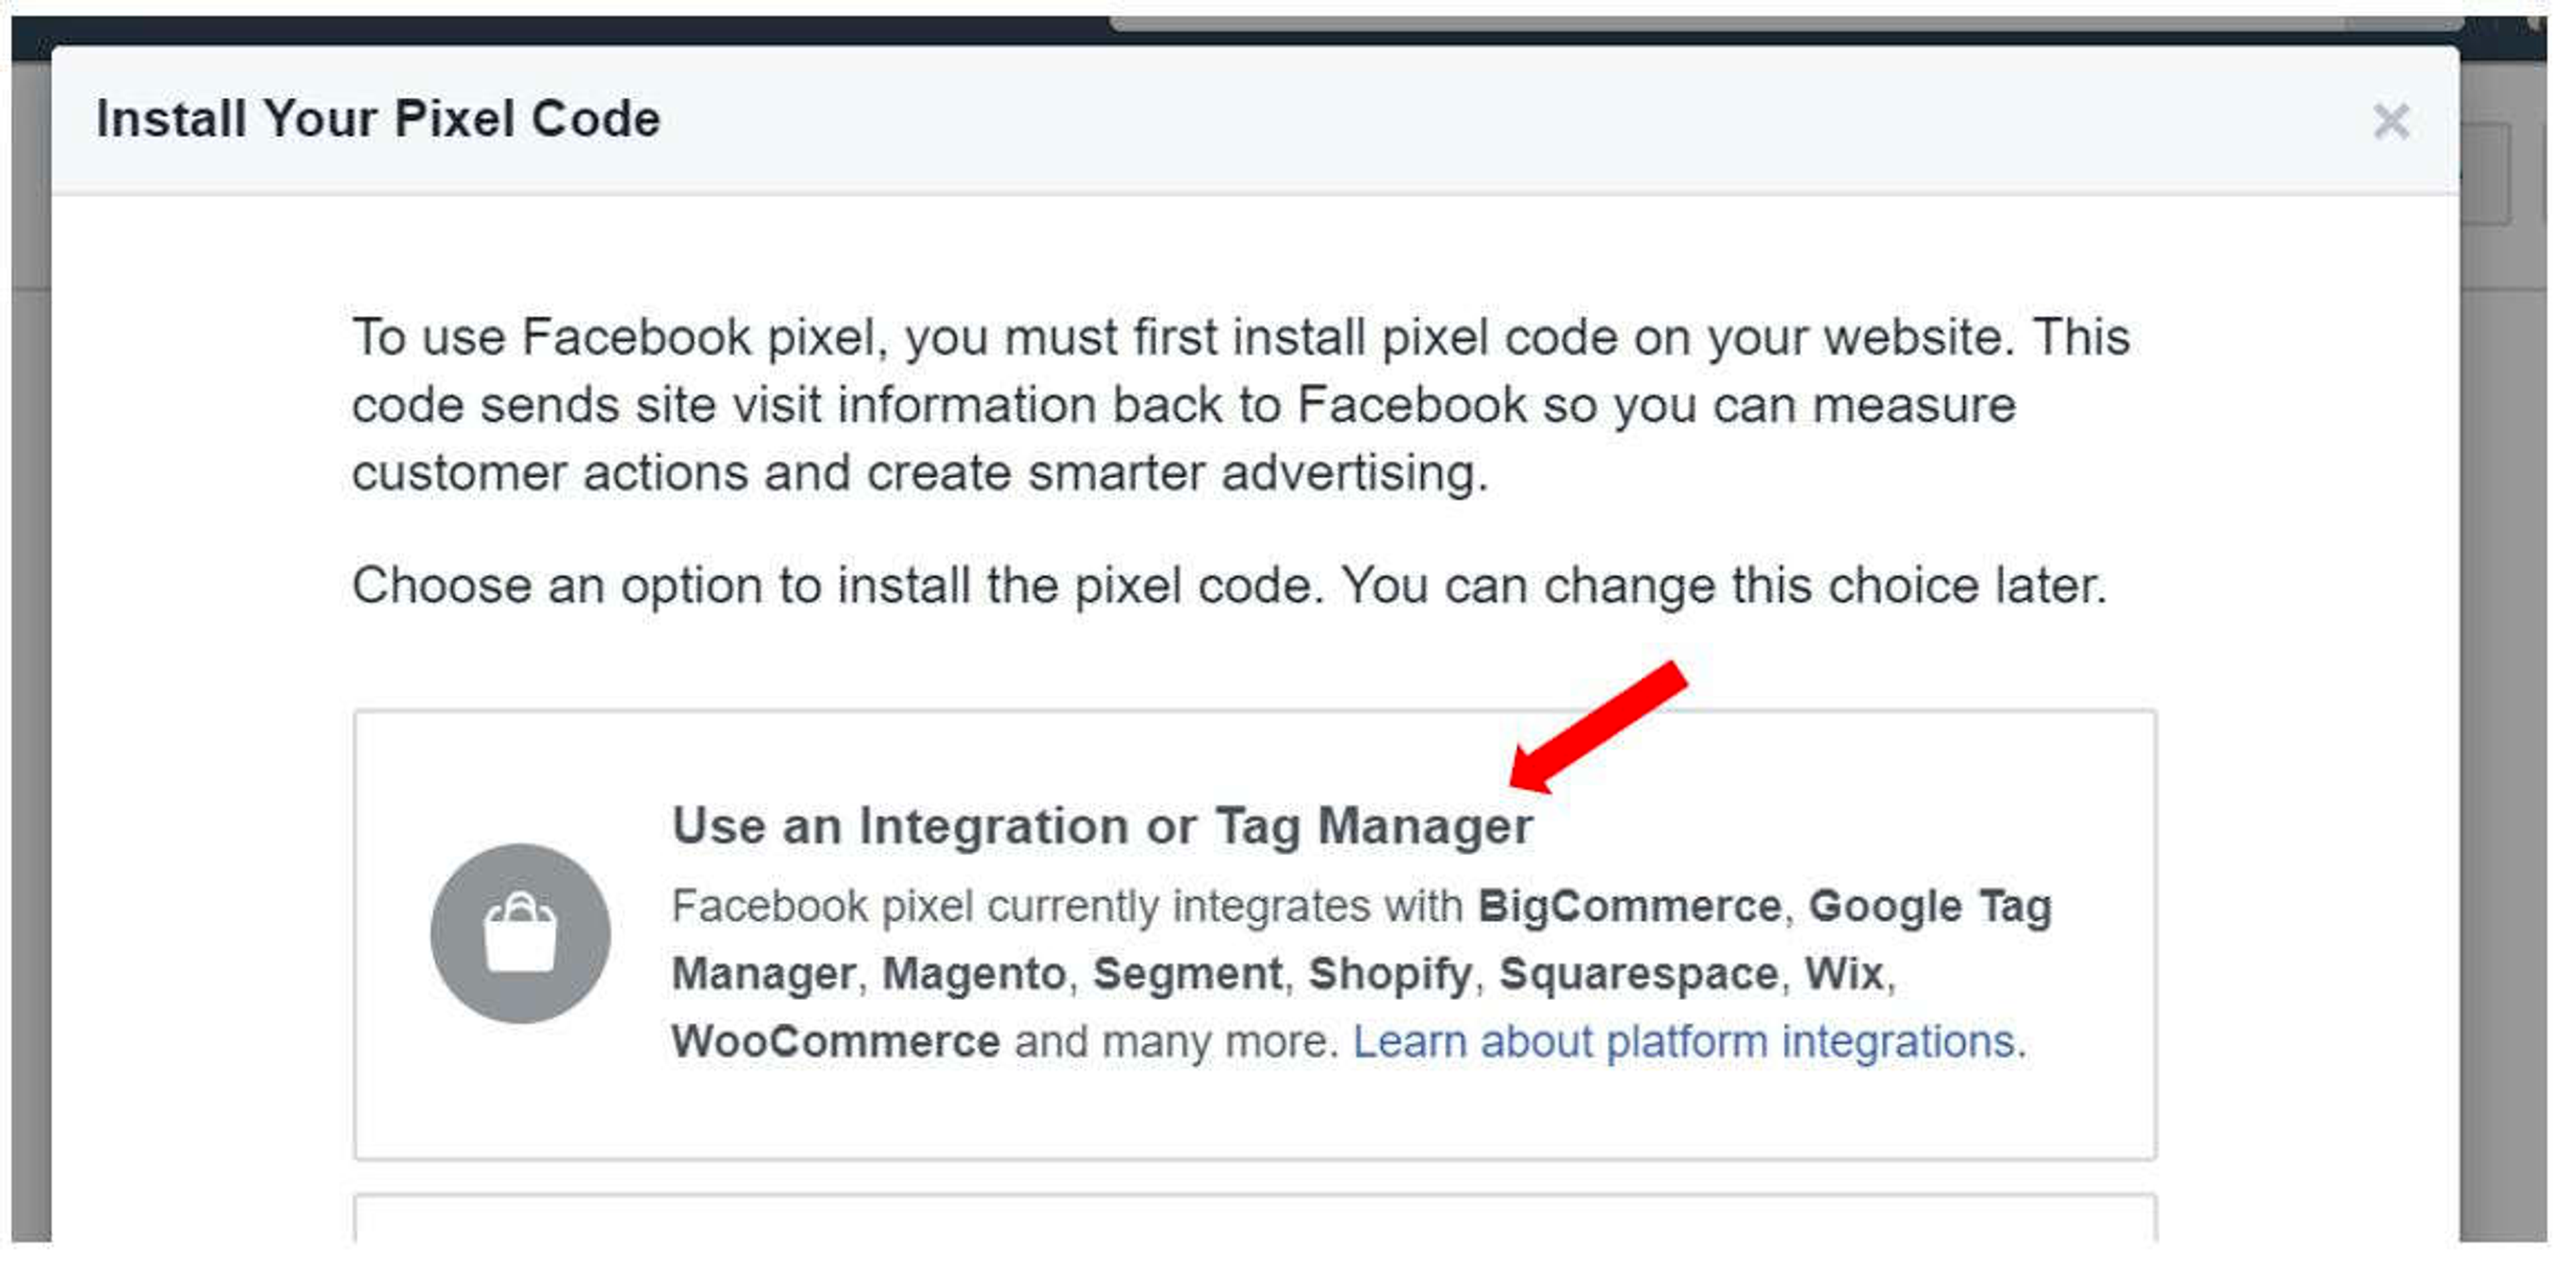
You can either:
- Use an Integration or Tag Manager
- Manually install the code by yourself, or
- Get a developer to do it for you
The easiest method, by far, is to use the Tag Manager.
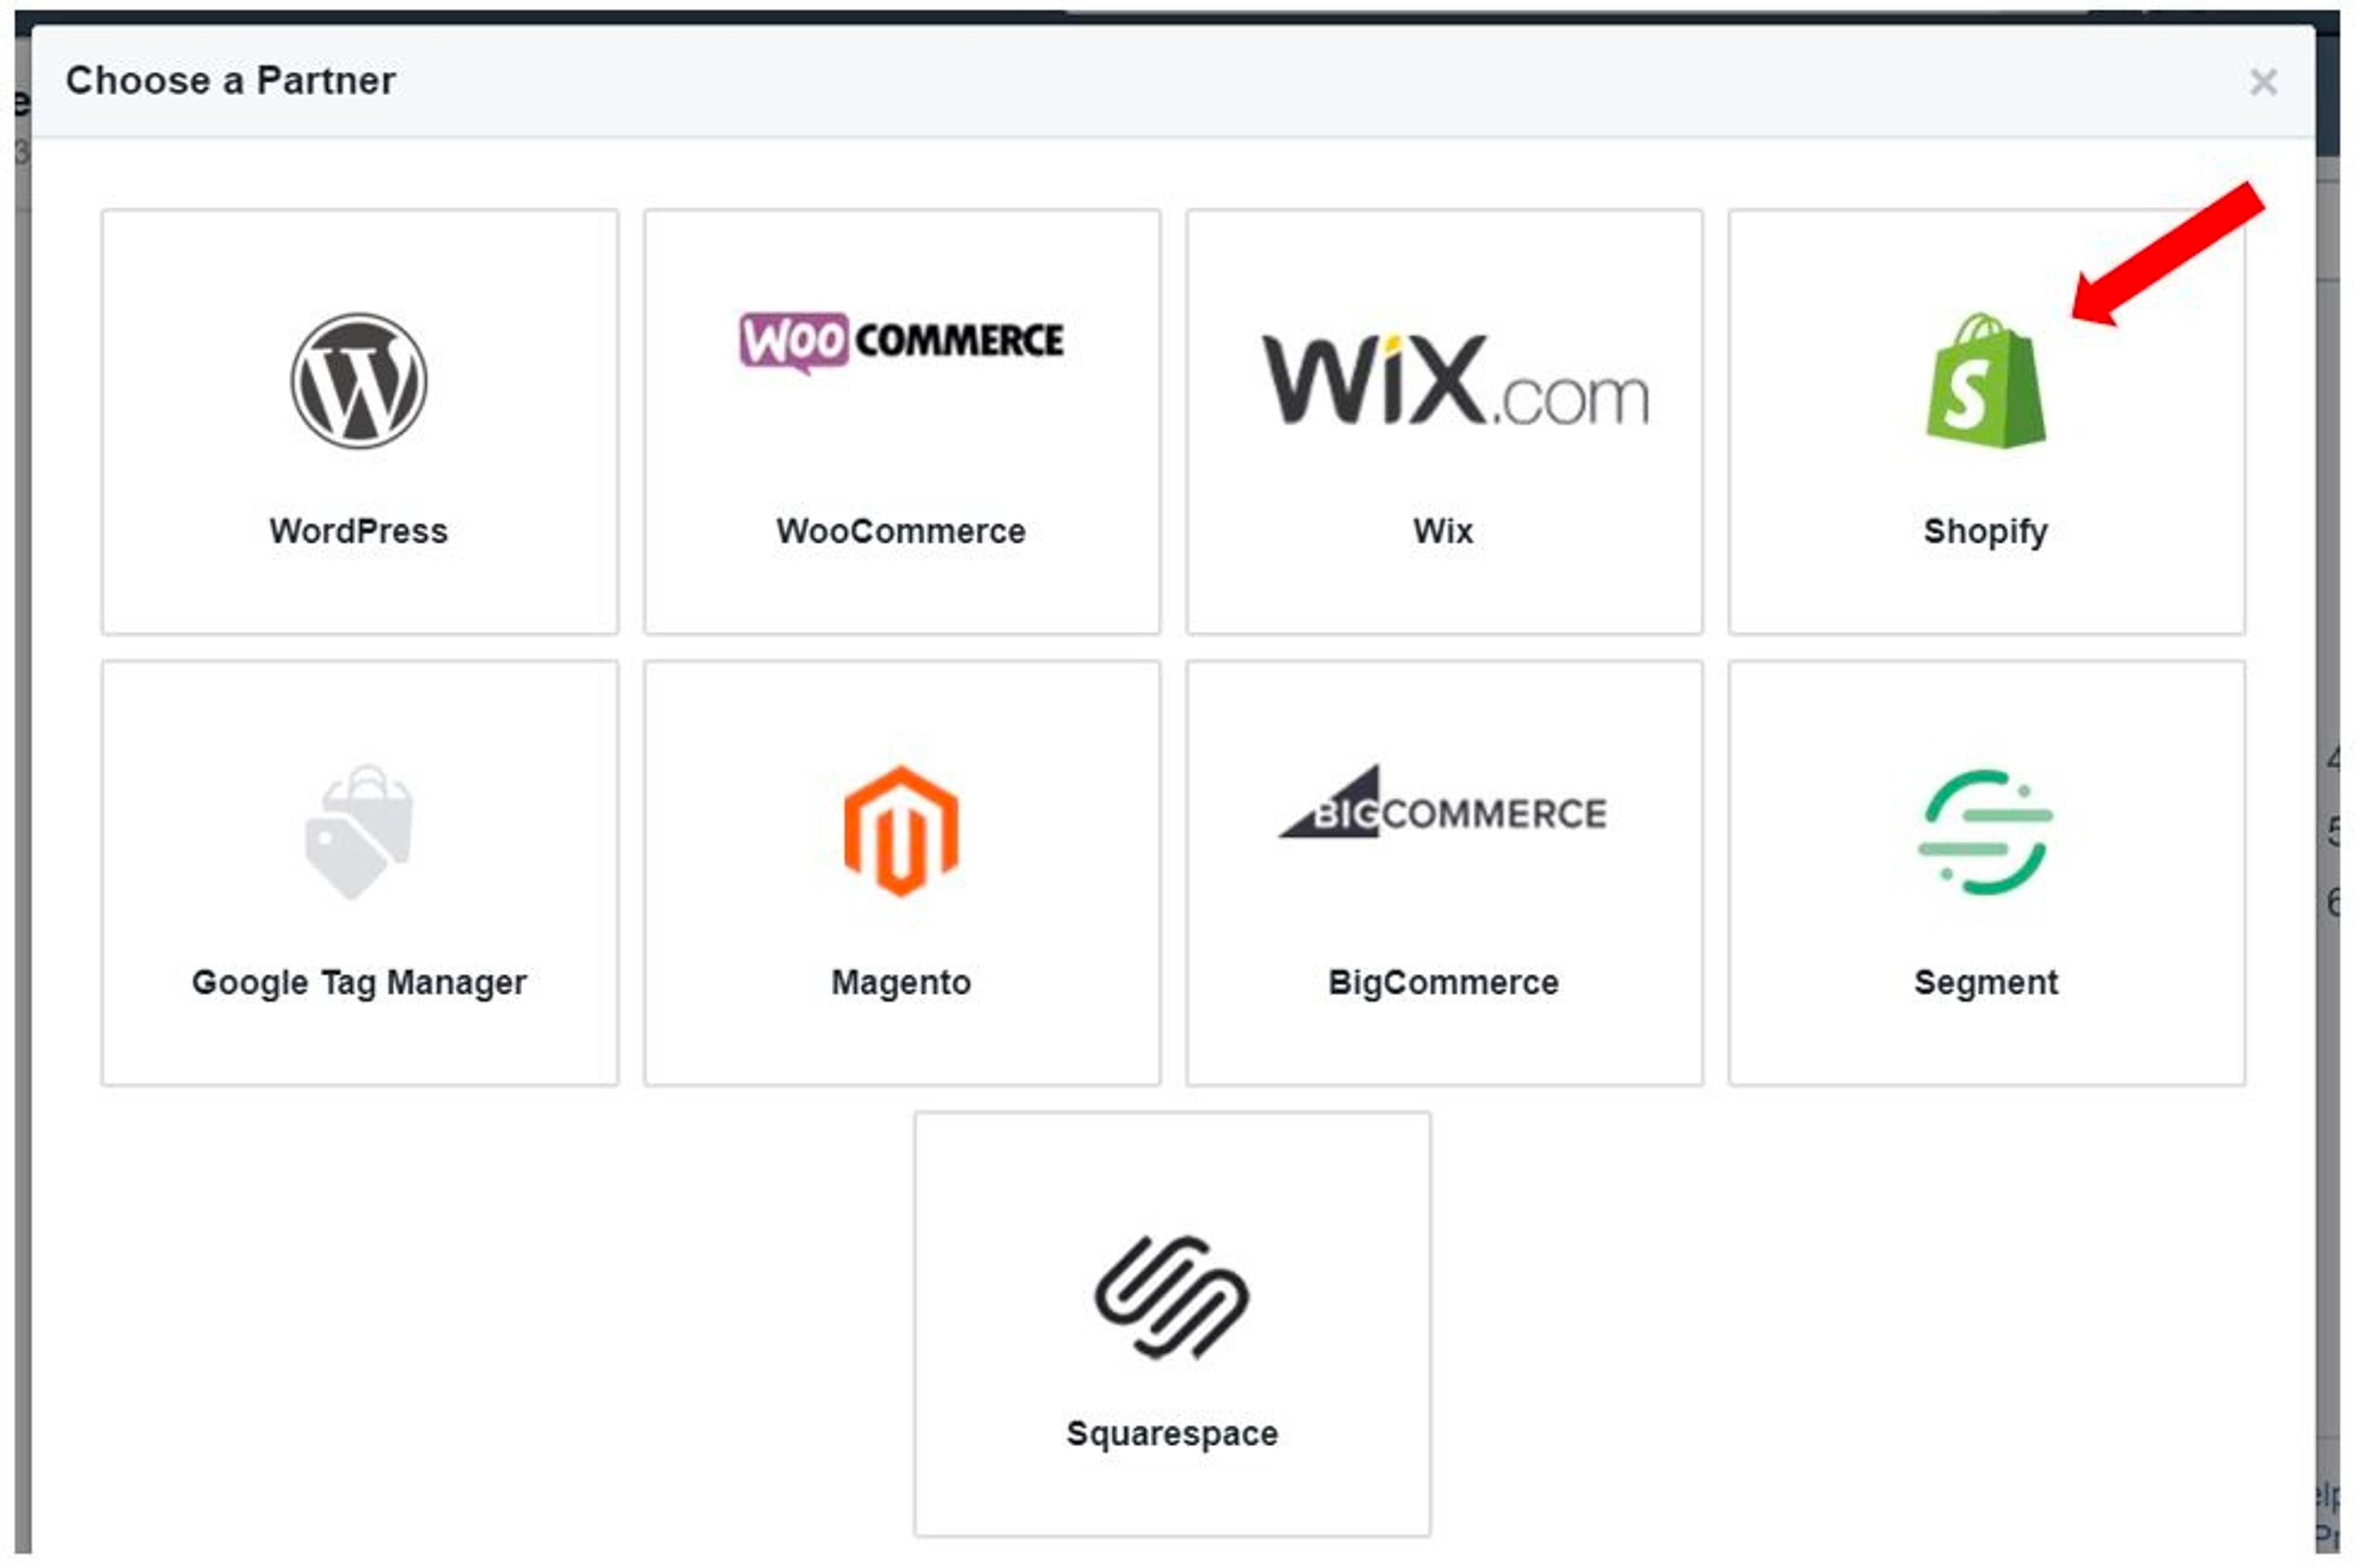
Go ahead and click on that option…
And it’ll bring you to this page, where you can click on “Shopify”.
The next window gives you your Facebook Pixel ID…
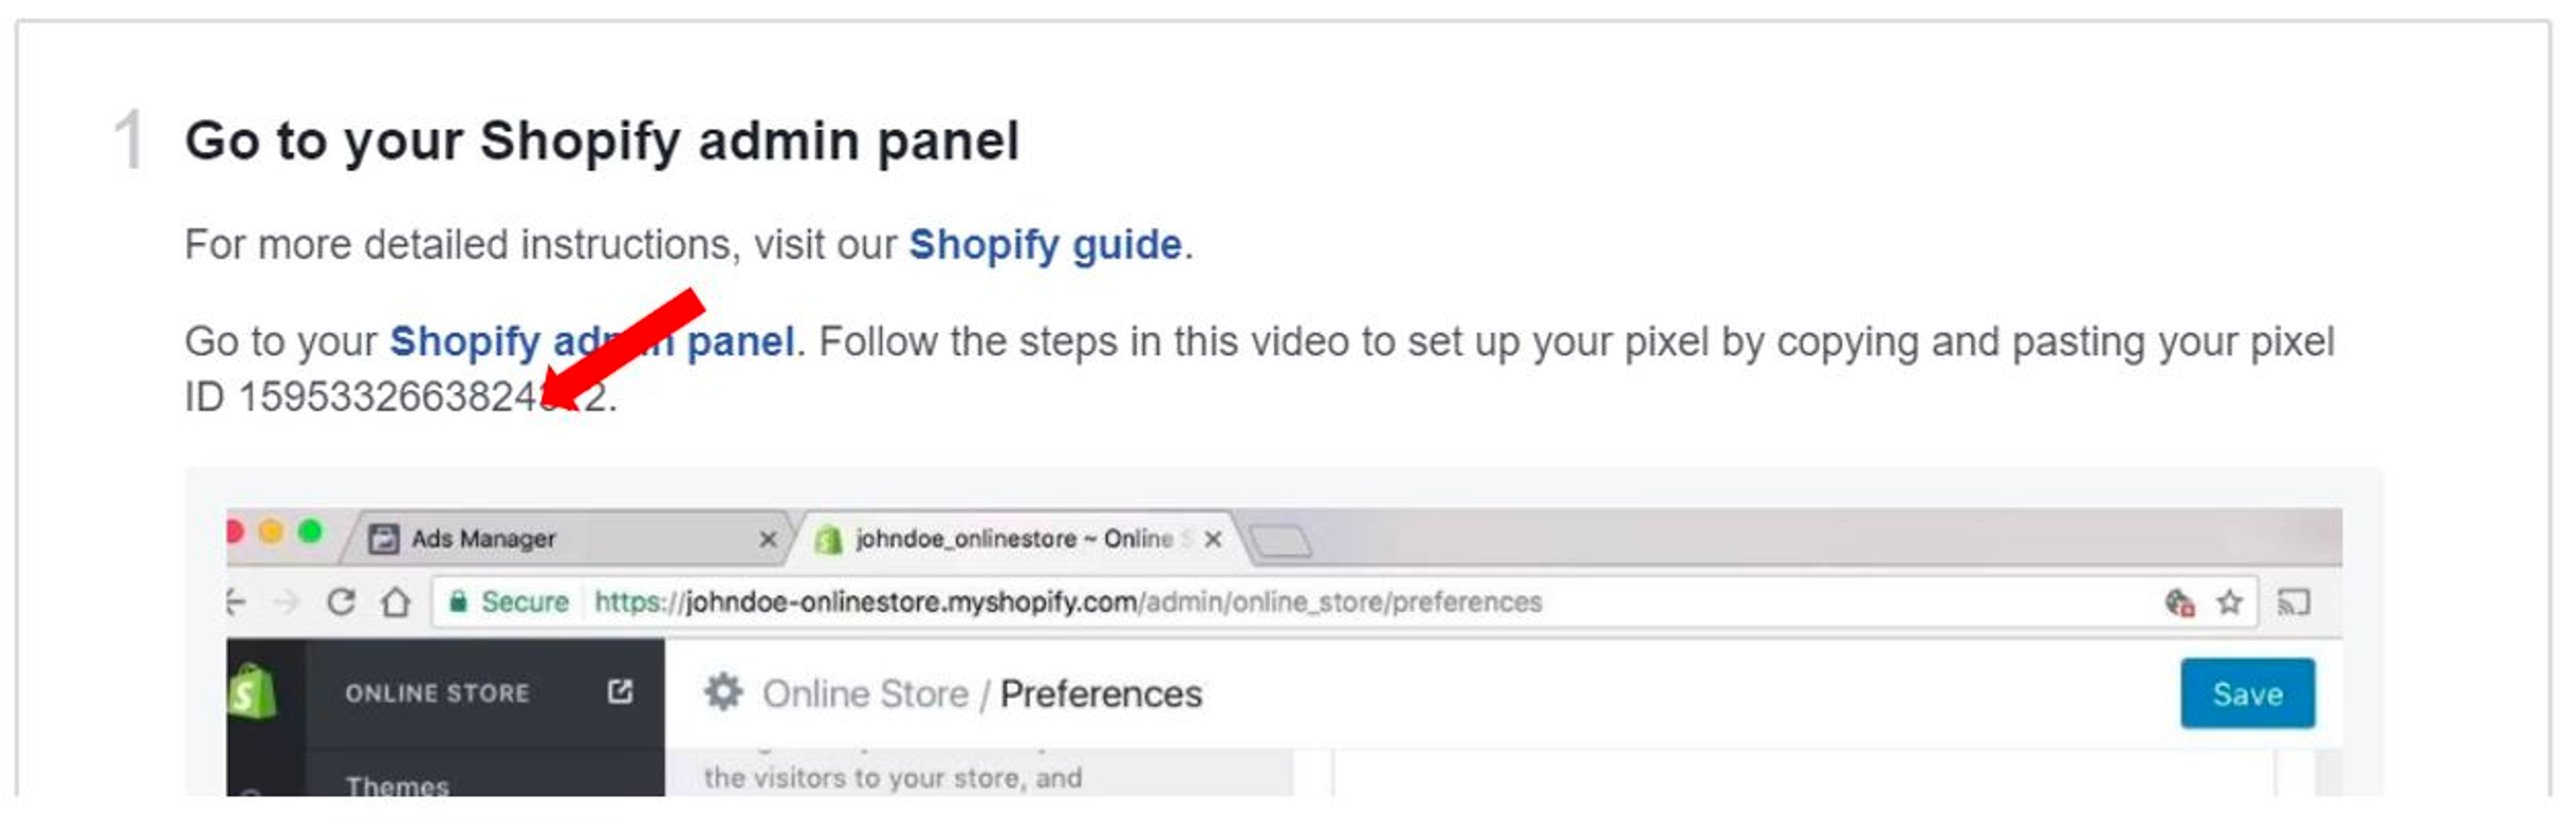
So note that down and proceed to the next step!
Step 2: Enter your Pixel ID on your Shopify store
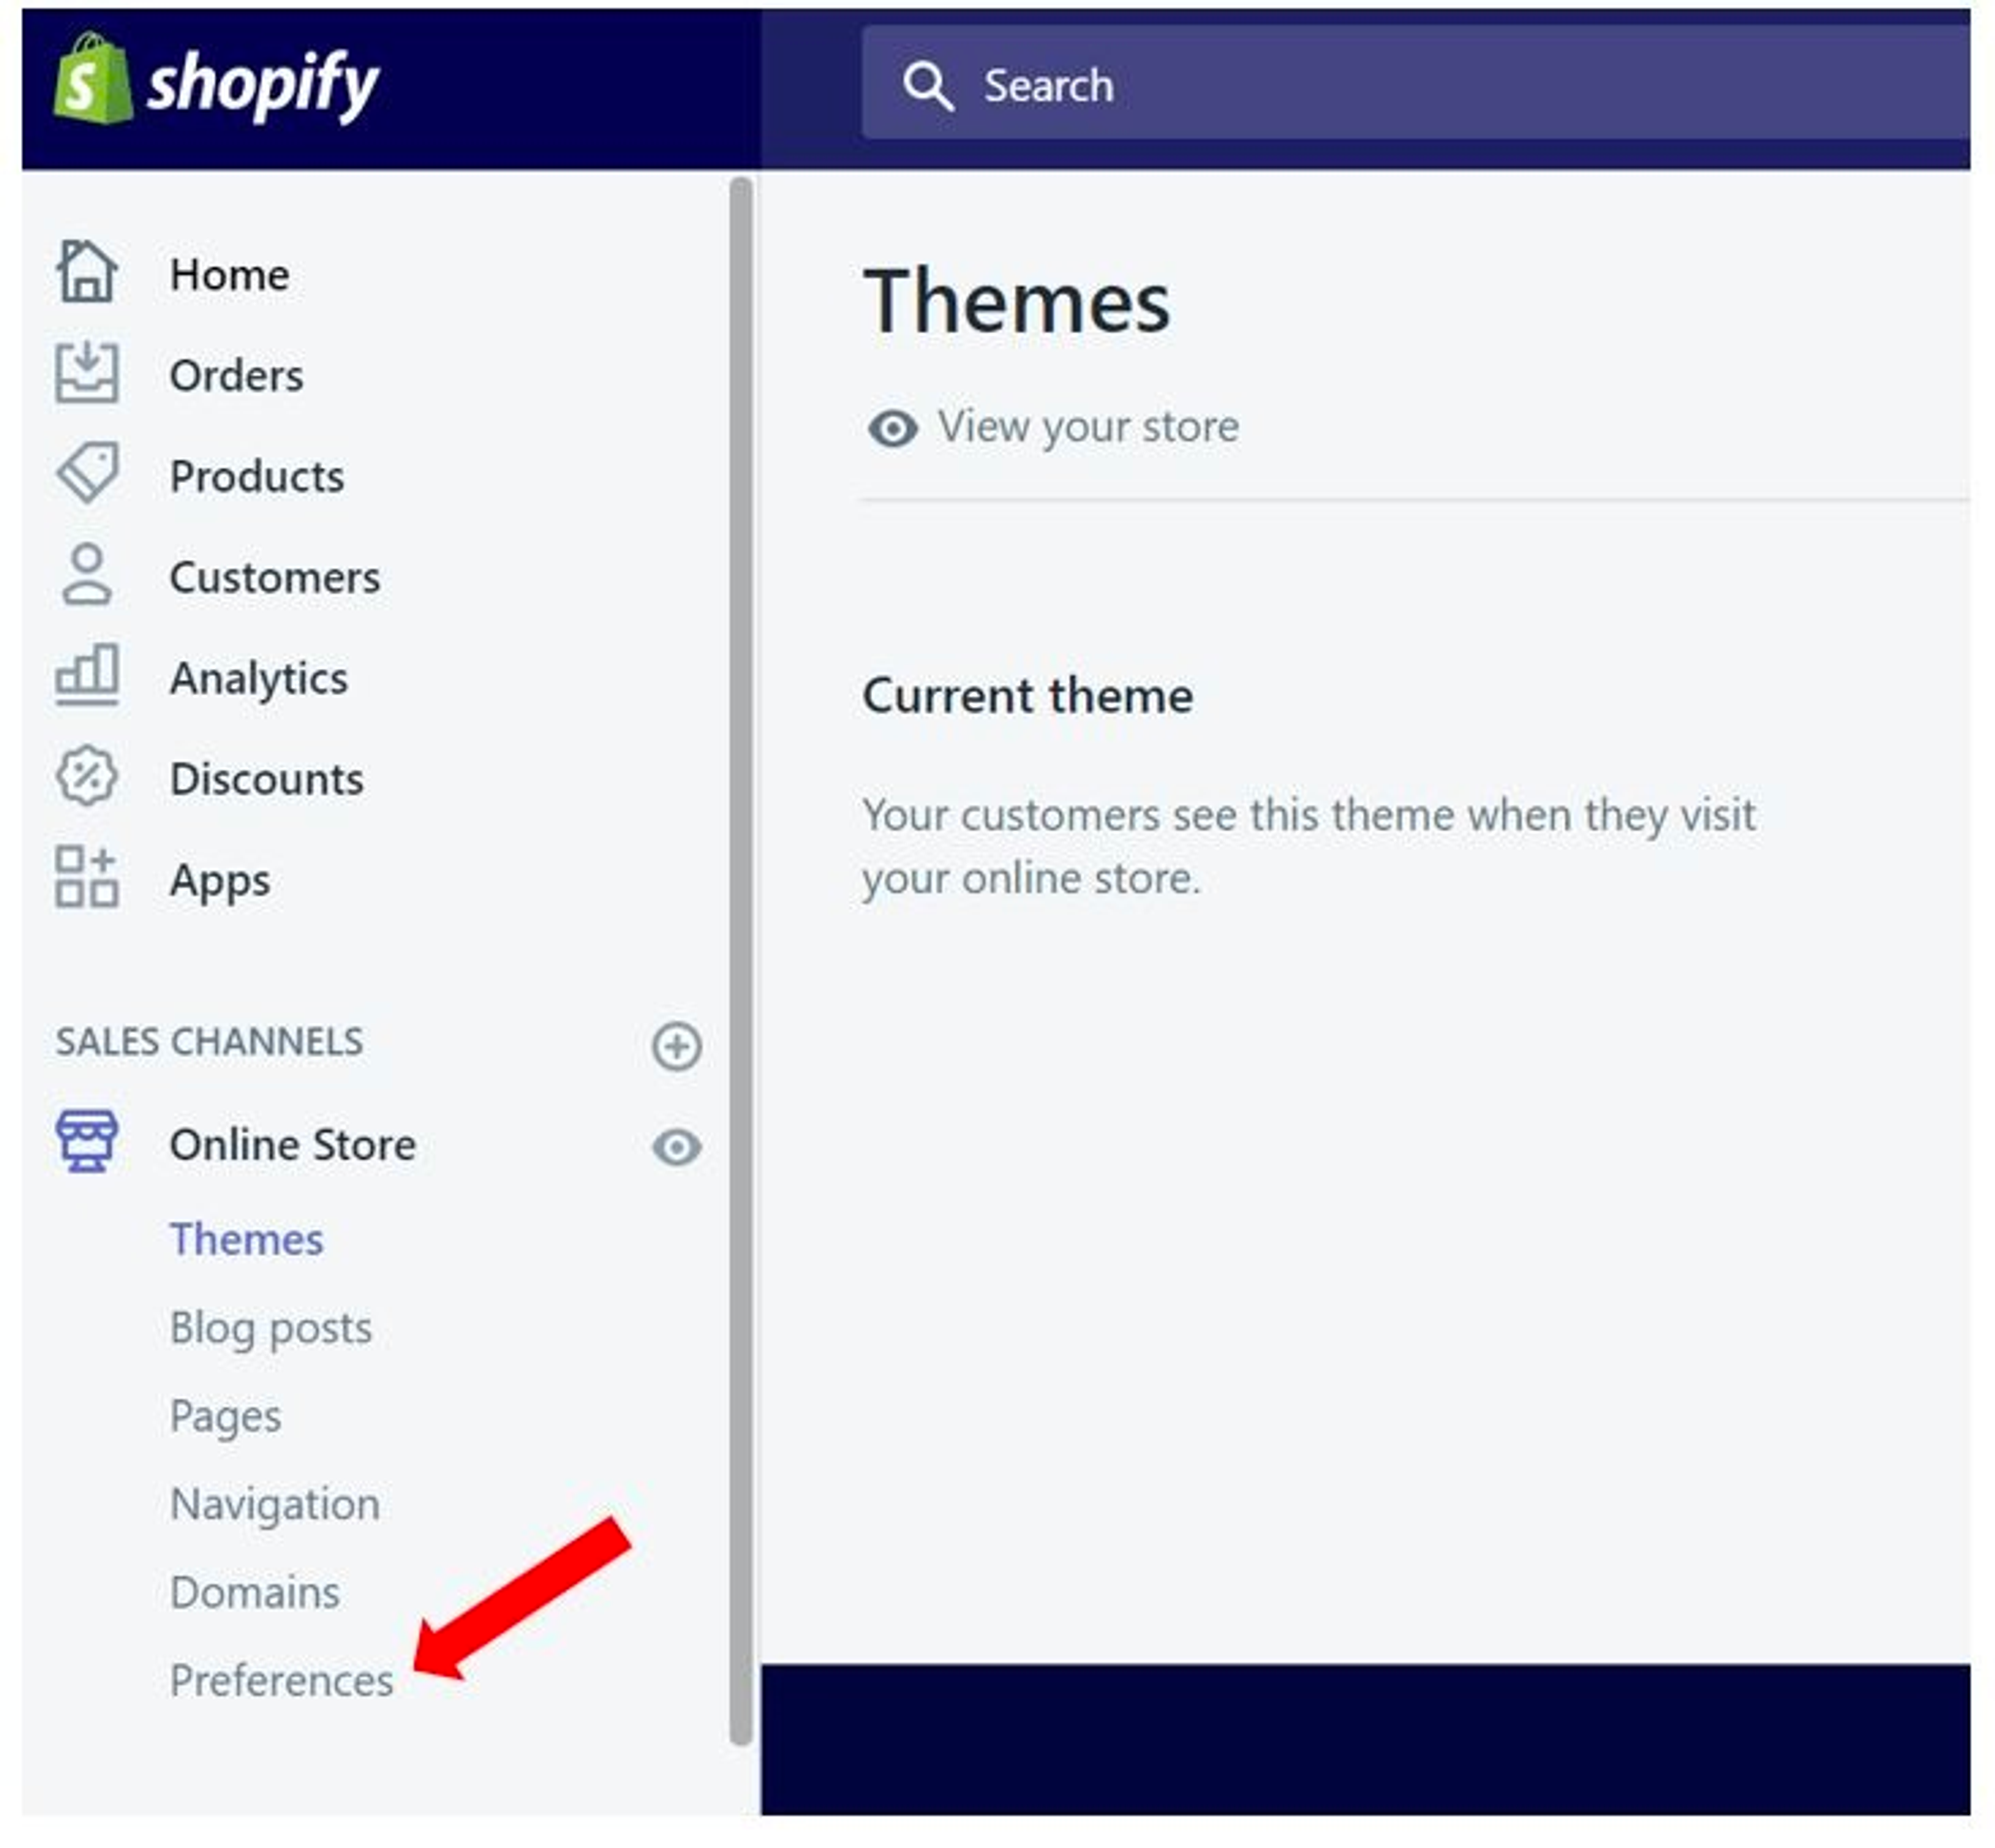
Navigate to the “Preferences” section of your Shopify store.
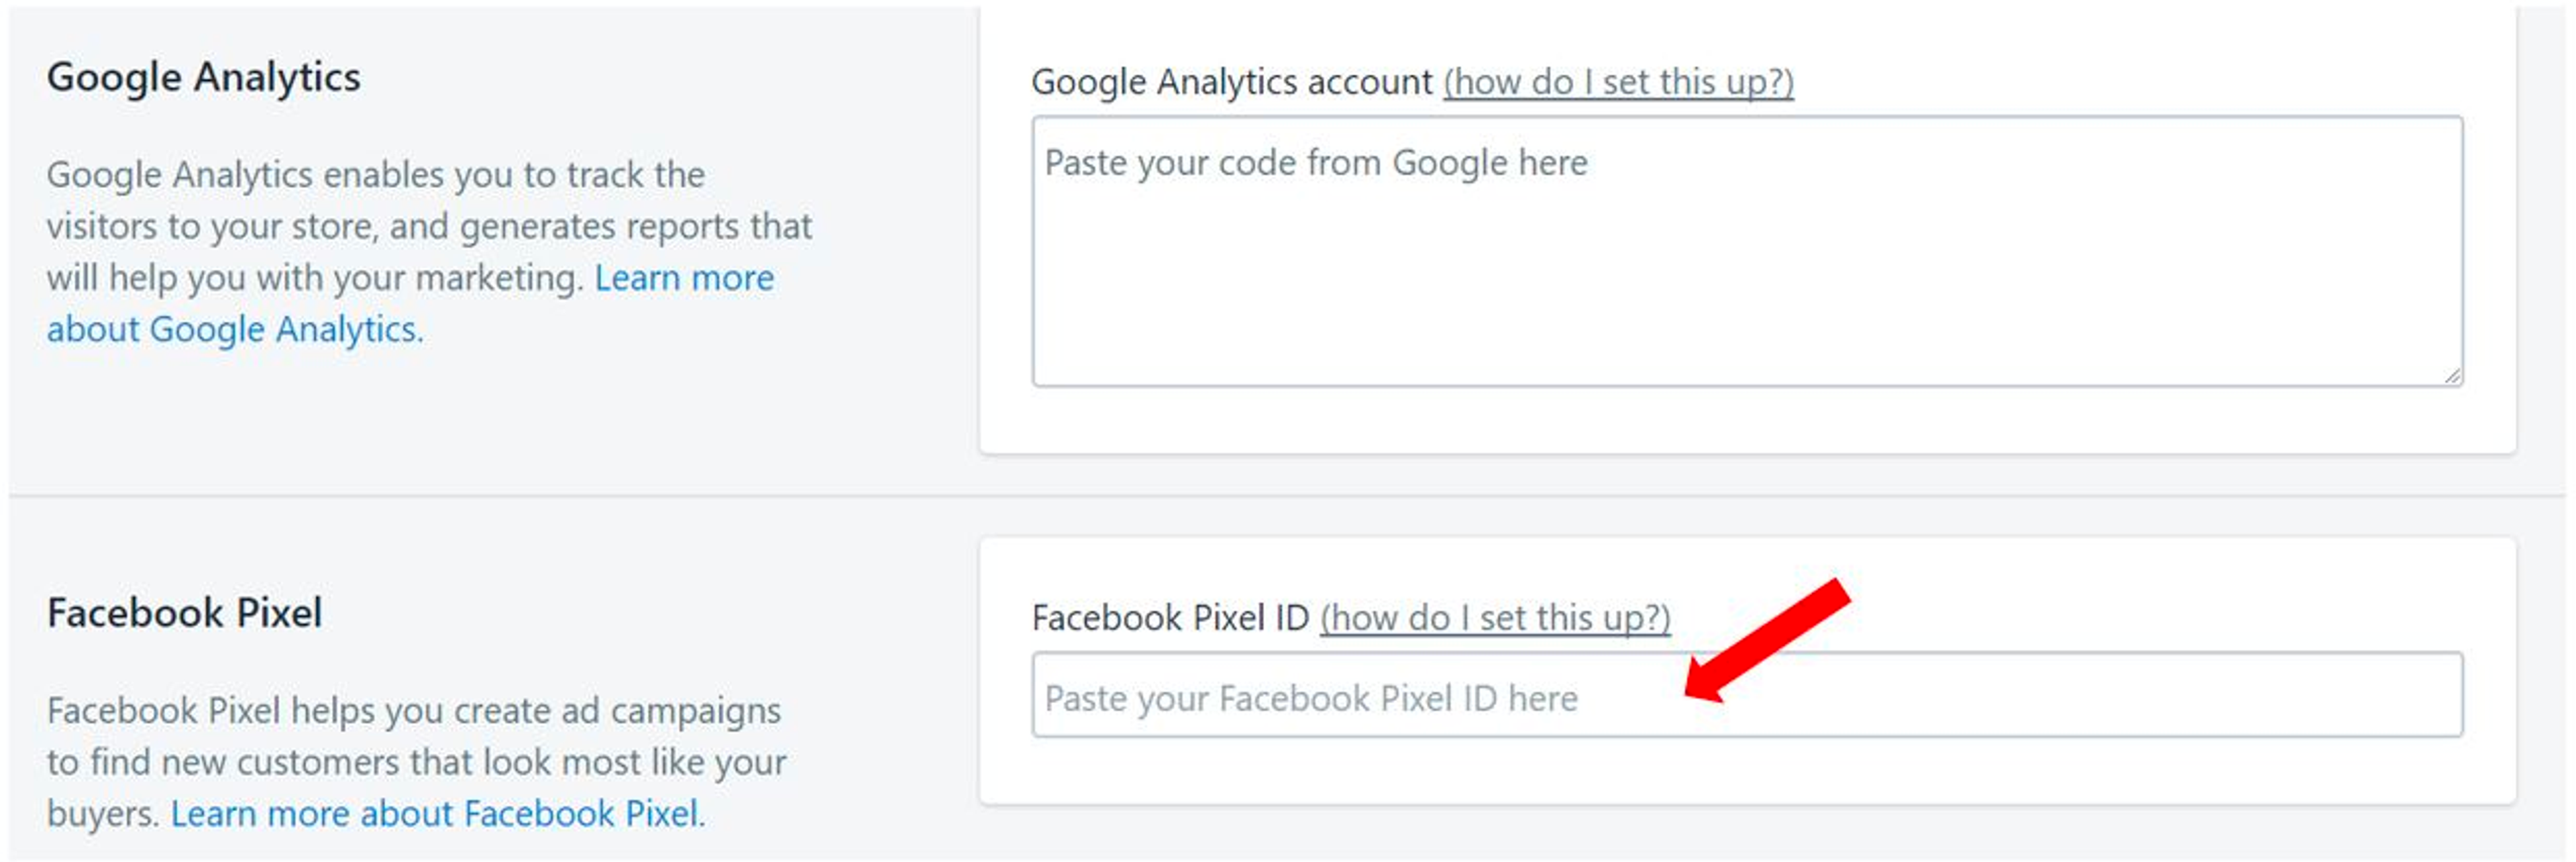
Scroll down and you’ll find a “Facebook Pixel ID” section where you can input your pixel ID.
Almost done!
Step 3: Check your Pixel status on Facebook
Again, select “Pixels” from the drop-down menu, and have a look…
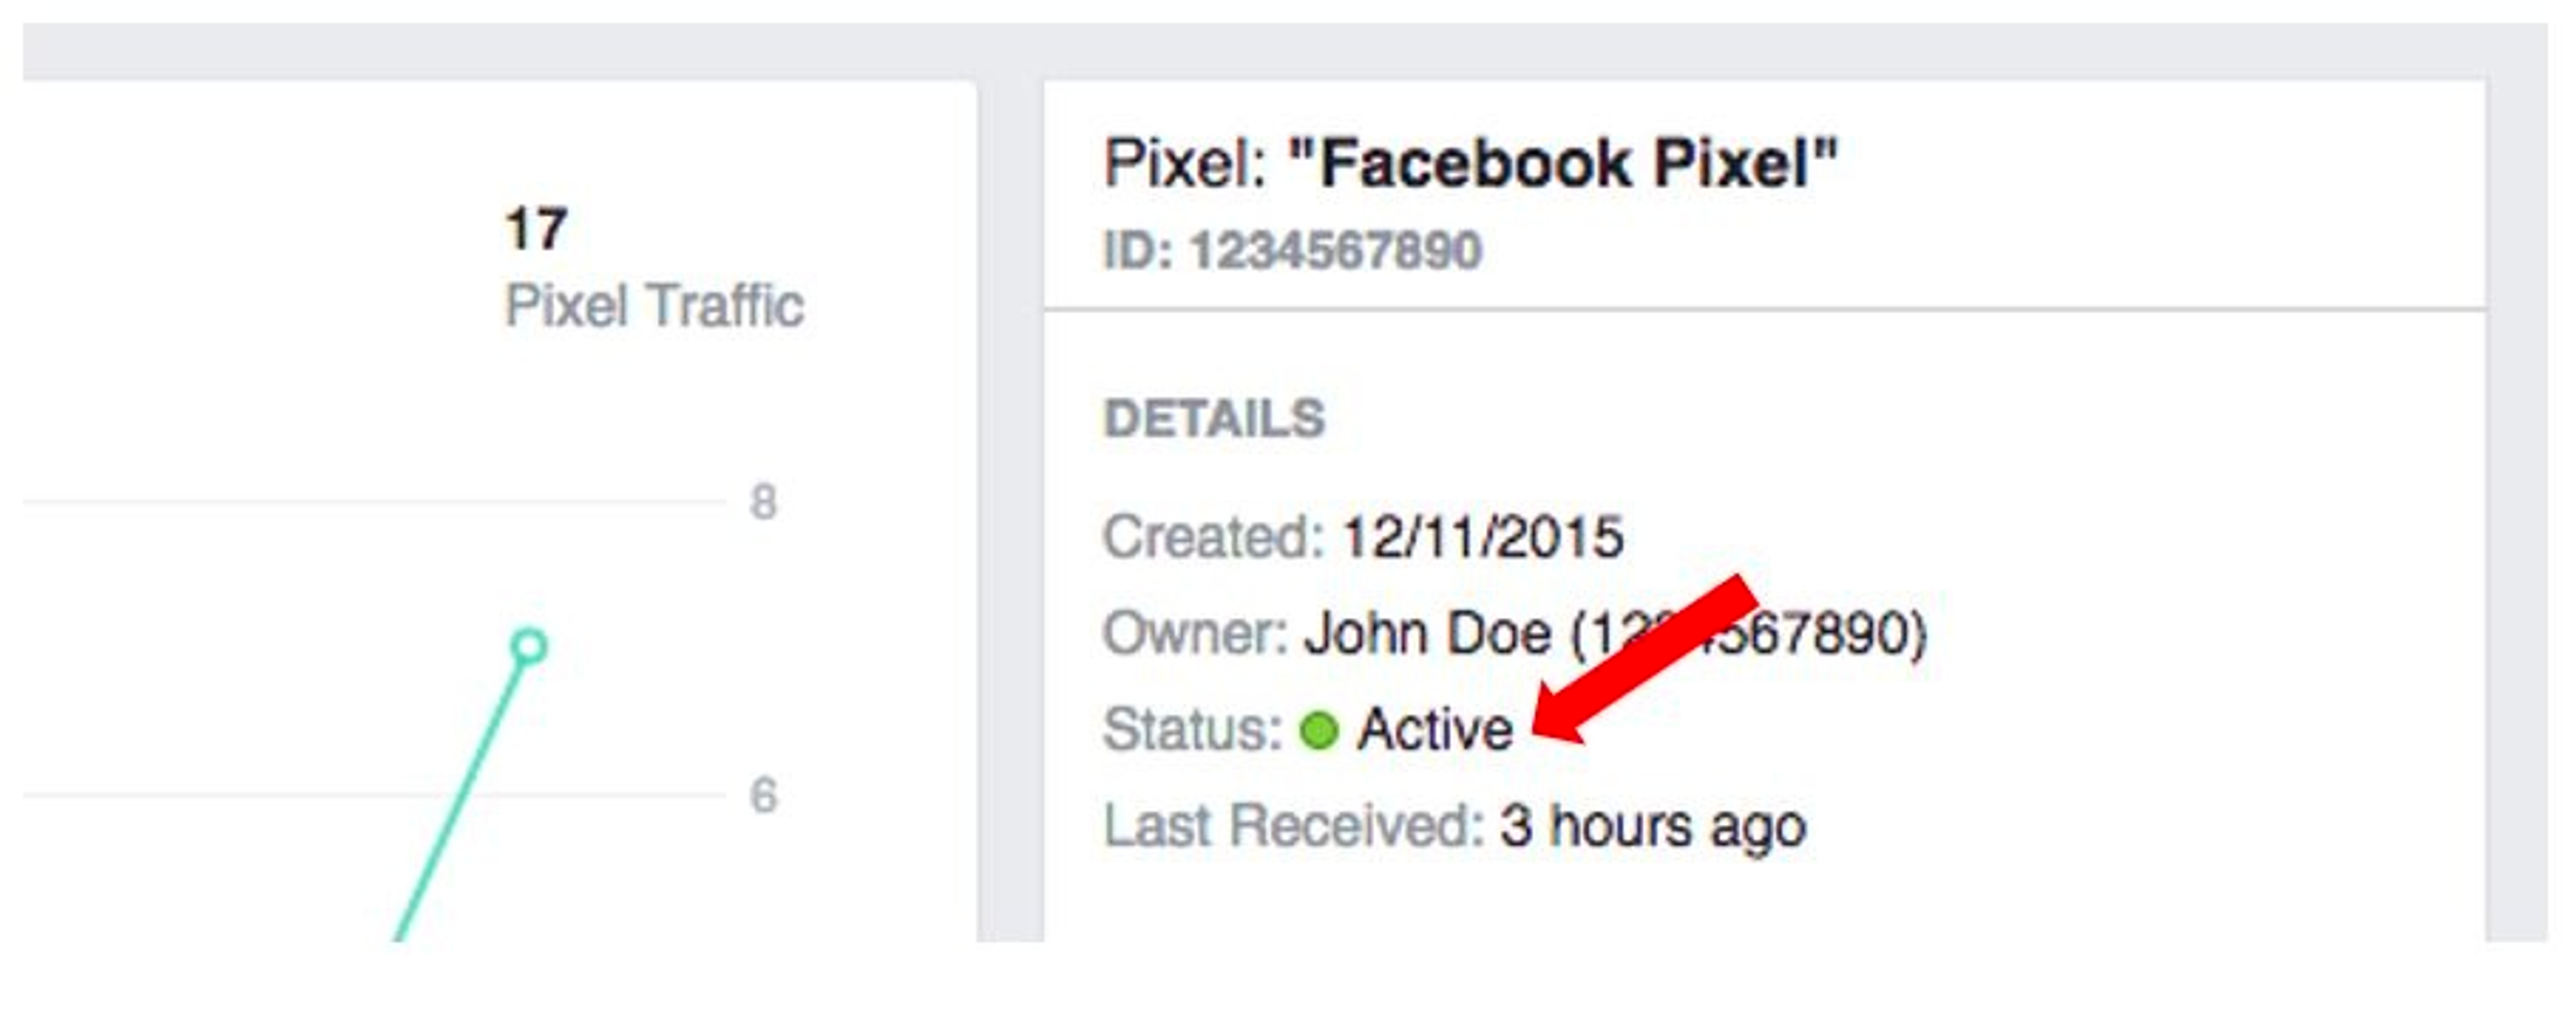
If the status reflects “Active”, you’re good to go.
But if your pixel status states “No Activity Yet”, this means your pixel isn't working (yet). It might take up to 20 minutes for changes to be reflected, so be patient!
If it’s STILL not working, there are some steps you can take. If it is working (congrats!)
Shopify Facebook Pixel not working? Try the Facebook Pixel Helper Chrome extension.
Here’s how to use the Facebook Pixel Helper Chrome Extension to troubleshoot your Facebook Pixel problems.
If you’re not already using Chrome, you’ll have to get that first.
Then access the Chrome Web Store, and search for the extension.

Click the “Add to Chrome” button.
Once it’s done, an “Added” banner will pop up on the top left hand corner...

And you’ll be able to see the icon on your address bar as well.
Next, navigate to your Shopify store, click on the icon, and it’ll tell you whether your pixel has been set up successfully.
If you see something like this:
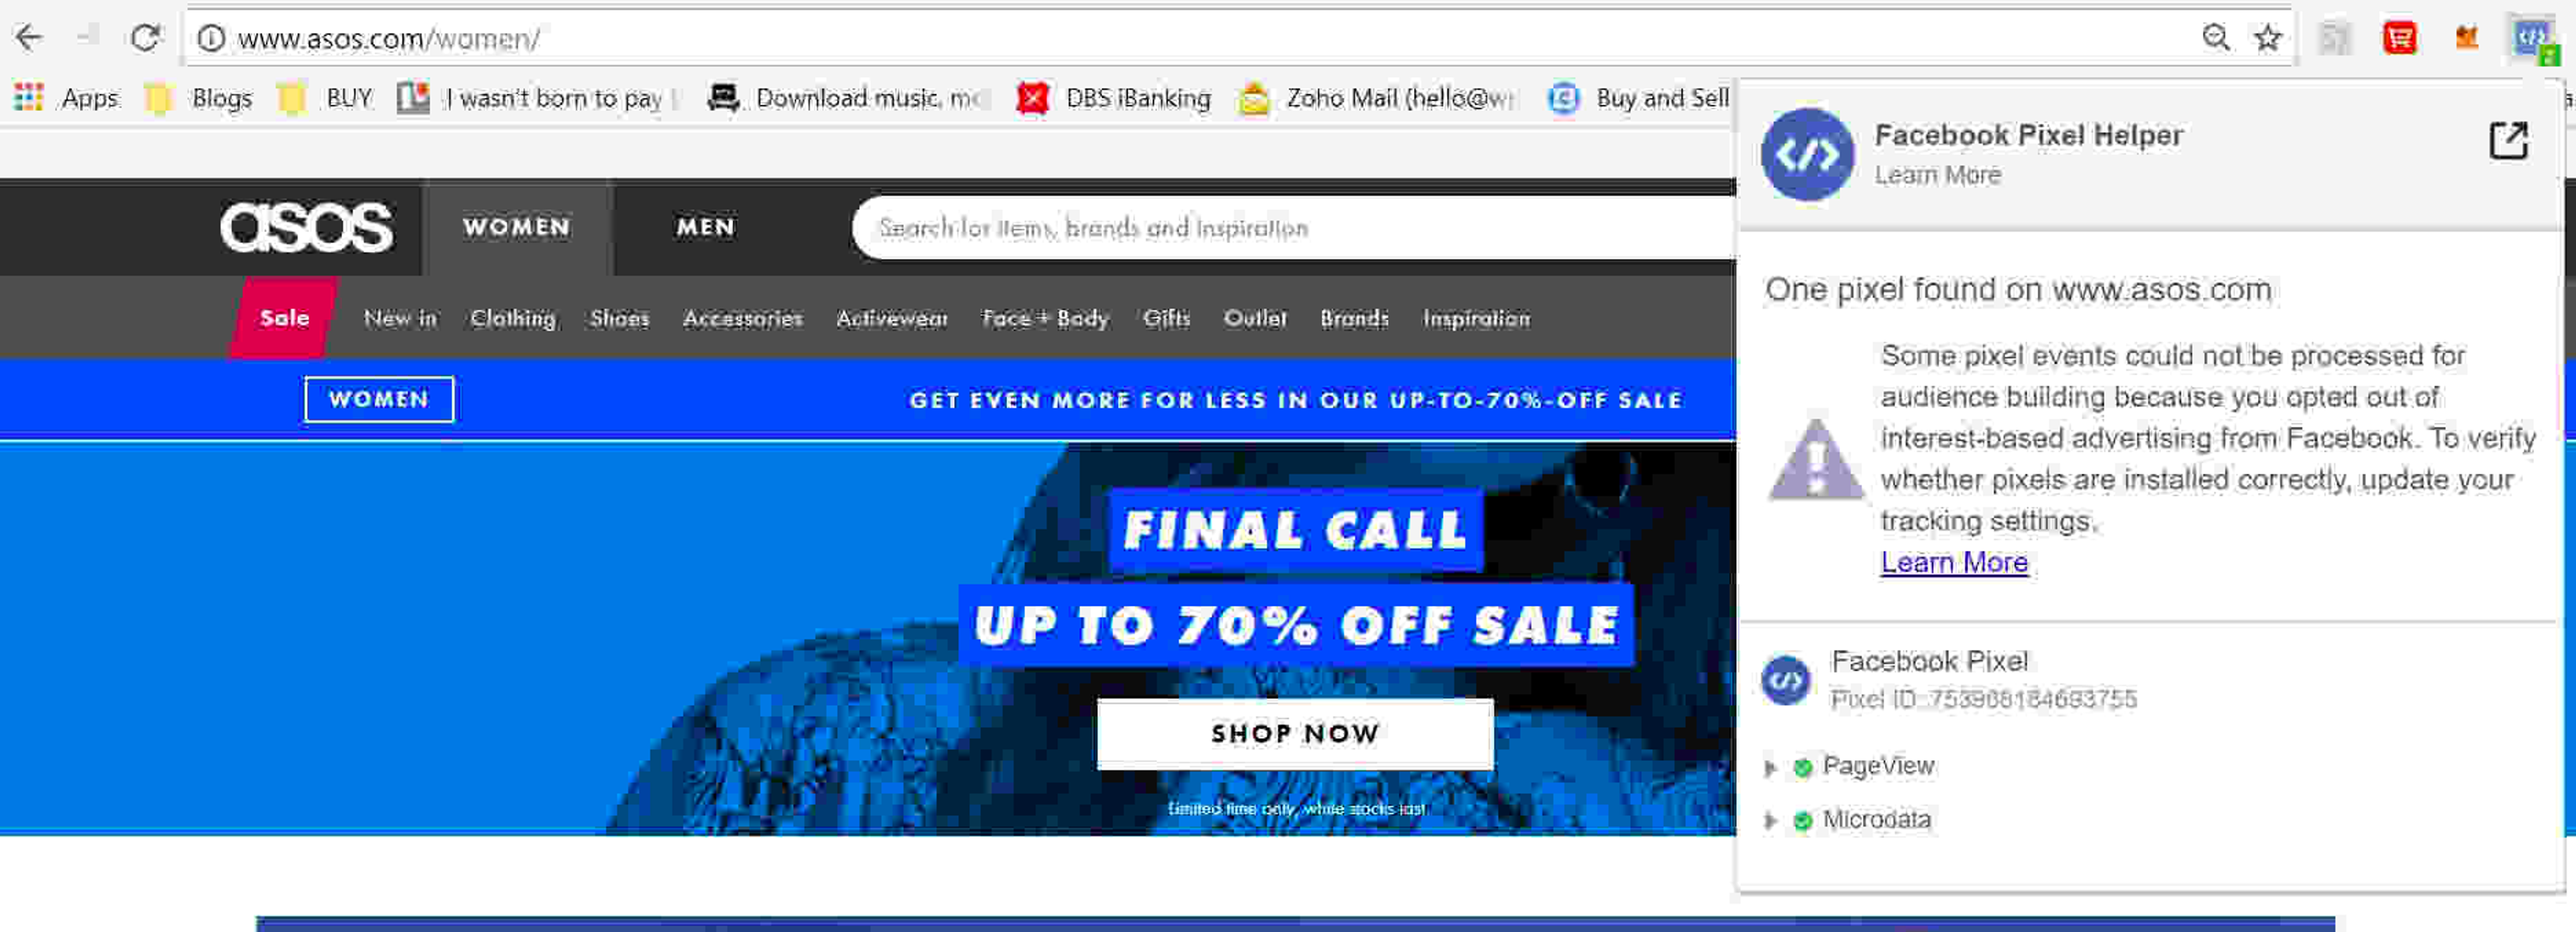
Then congrats, you’re all set!
But if the Facebook Pixel Helper reports that there were errors in your pixel, read on for more troubleshooting advice.
“Facebook Pixel did not load”
The good news? You did manage to get your Shopify Facebook pixel on your site.
The bad news? It isn't passing back any data.
There are two possibilities here:
Firstly, this could be happening because you’ve set up your pixel to fire on a dynamic event (meaning your pixel might only fire when someone clicks on a specific button on your page, instead of firing when they load the page).
If that's the case, remedying it is simple:
Go ahead and click on the button where you've attached your pixel code…
...and then click on the Pixel Helper again to see if everything’s a-ok.
If you’re still getting the same “Facebook pixel did not load” spiel, there’s likely an error in your pixel base code.
Here’s what you should do:
Delete the Facebook pixel code you've placed on your site and re-add it.
“Not a standard event”
If you get this message, it means that the Facebook Pixel Helper found event code on your site which doesn't match the 9 standard events.
Here’s a list of the 9 standard events for your reference:
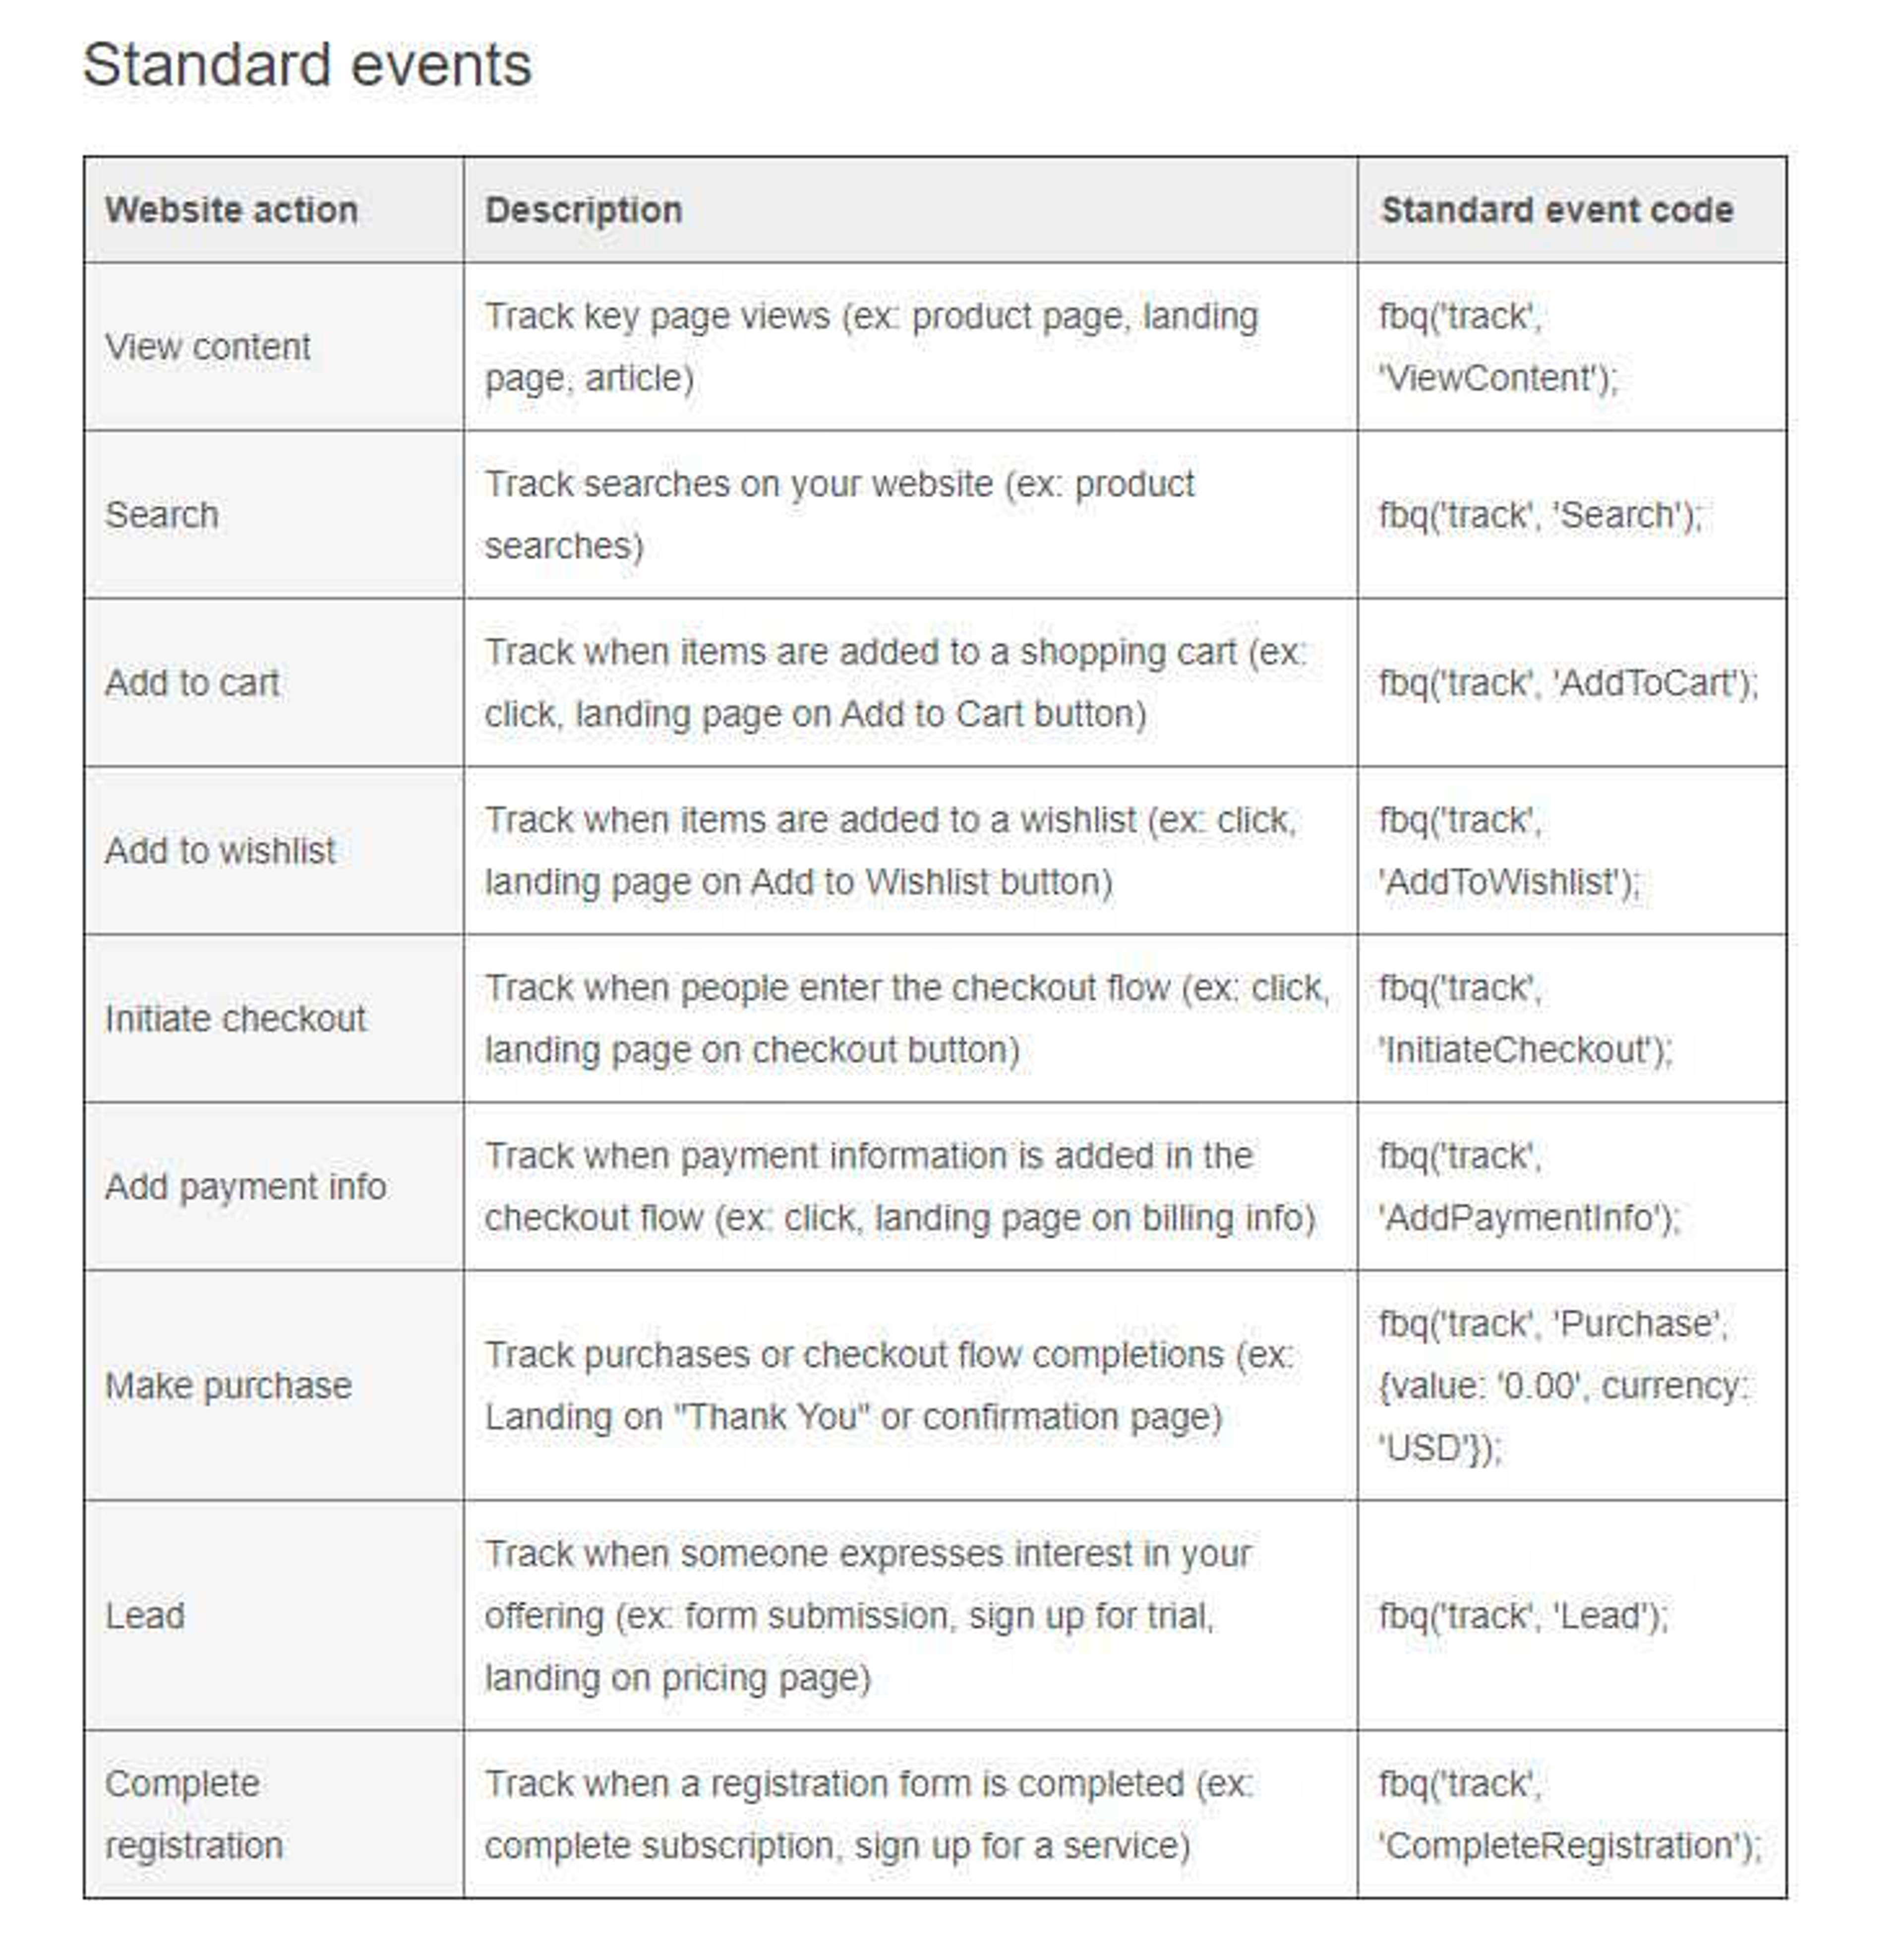
Because the standard event codes are case sensitive, you’ll need to copy the code snippet word for word.
Here’s an example:
The standard event code for tracking page views is fbq('track', 'ViewContent'); as you can see in the table above.
If you accidentally add fbq('track', 'viewcontent'); to one of the pages on your Shopify store instead, you’ll get an new event - “viewcontent” showing up in your ads…
...and this will be reported as a custom event rather than a standard event.
So make sure you copy your code carefully, and that should fix this issue!
“Pixel activated multiple times”
What this means is that your pixel is sending the same signal multiple times to Facebook, causing the numbers showing up on your Ad Manager to be inaccurate.
This is a common problem:
Many first-time Facebook advertisers make the mistake of adding the Facebook Pixel code to your checkout or product pages (on top of integrating the Shopify Facebook pixel to their stores)...
...which causes this issue.
If you’ve done this, don’t worry - it’s easily reversible.
Simply take the following steps to remove existing code from your Shopify pages:
First, navigate to the “Themes” section under your Shopify account.
Click on the “Actions” button and select “Edit Code” from the drop-down list.
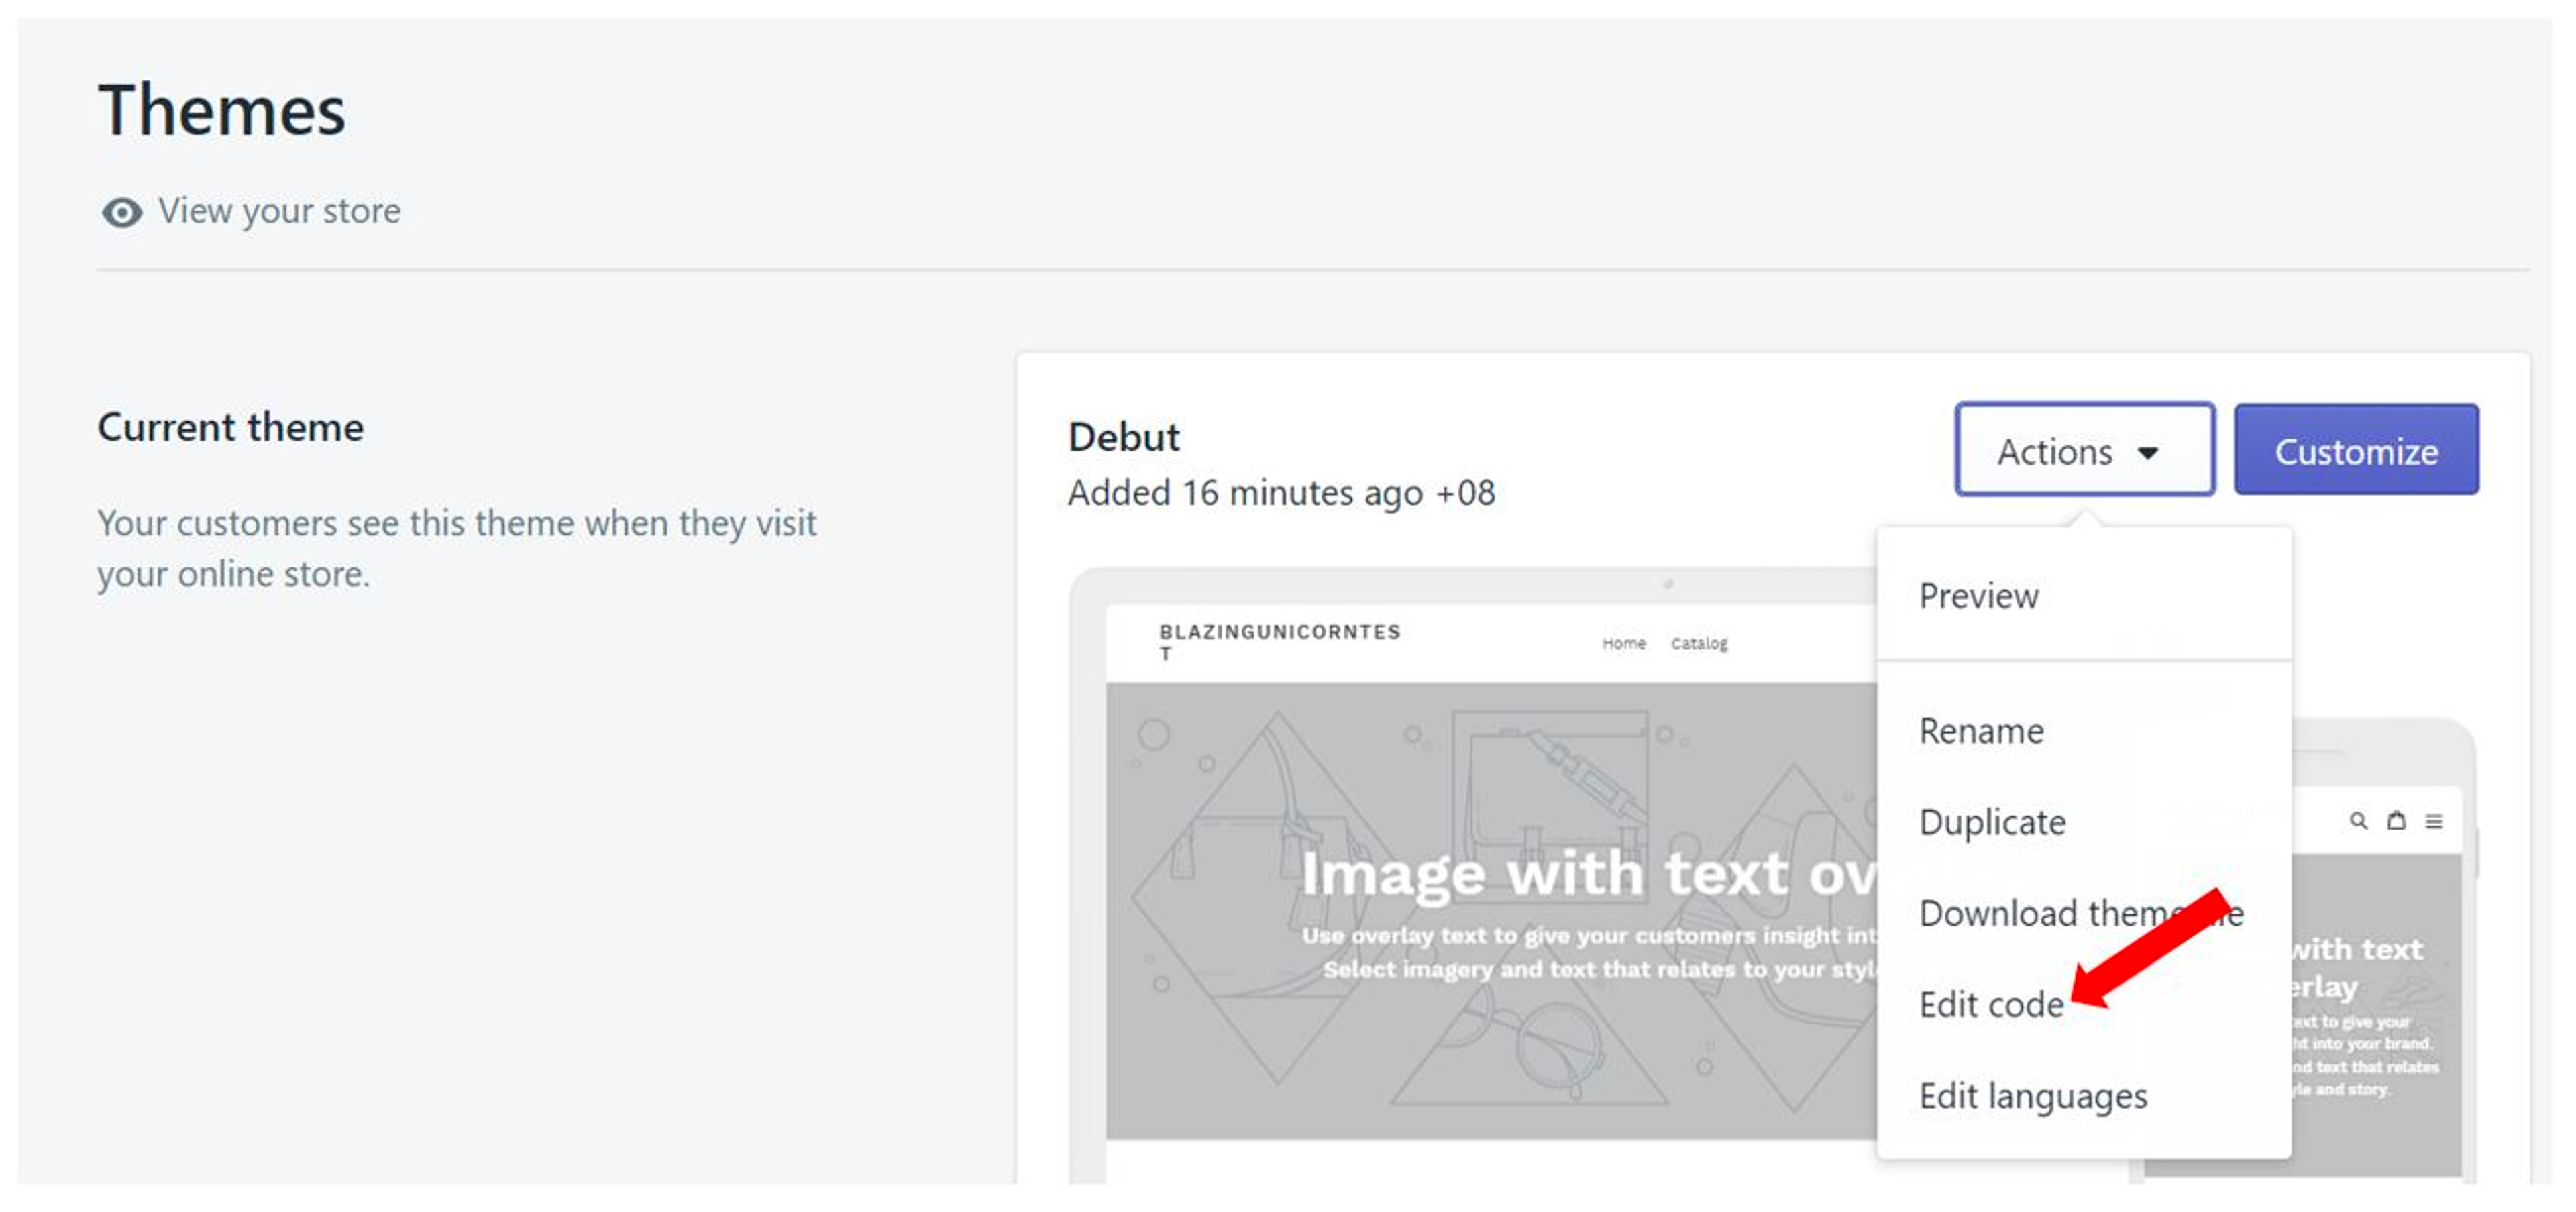
Click on the “theme.liquid” file, and ctrl+F “Facebook Pixel Code”.
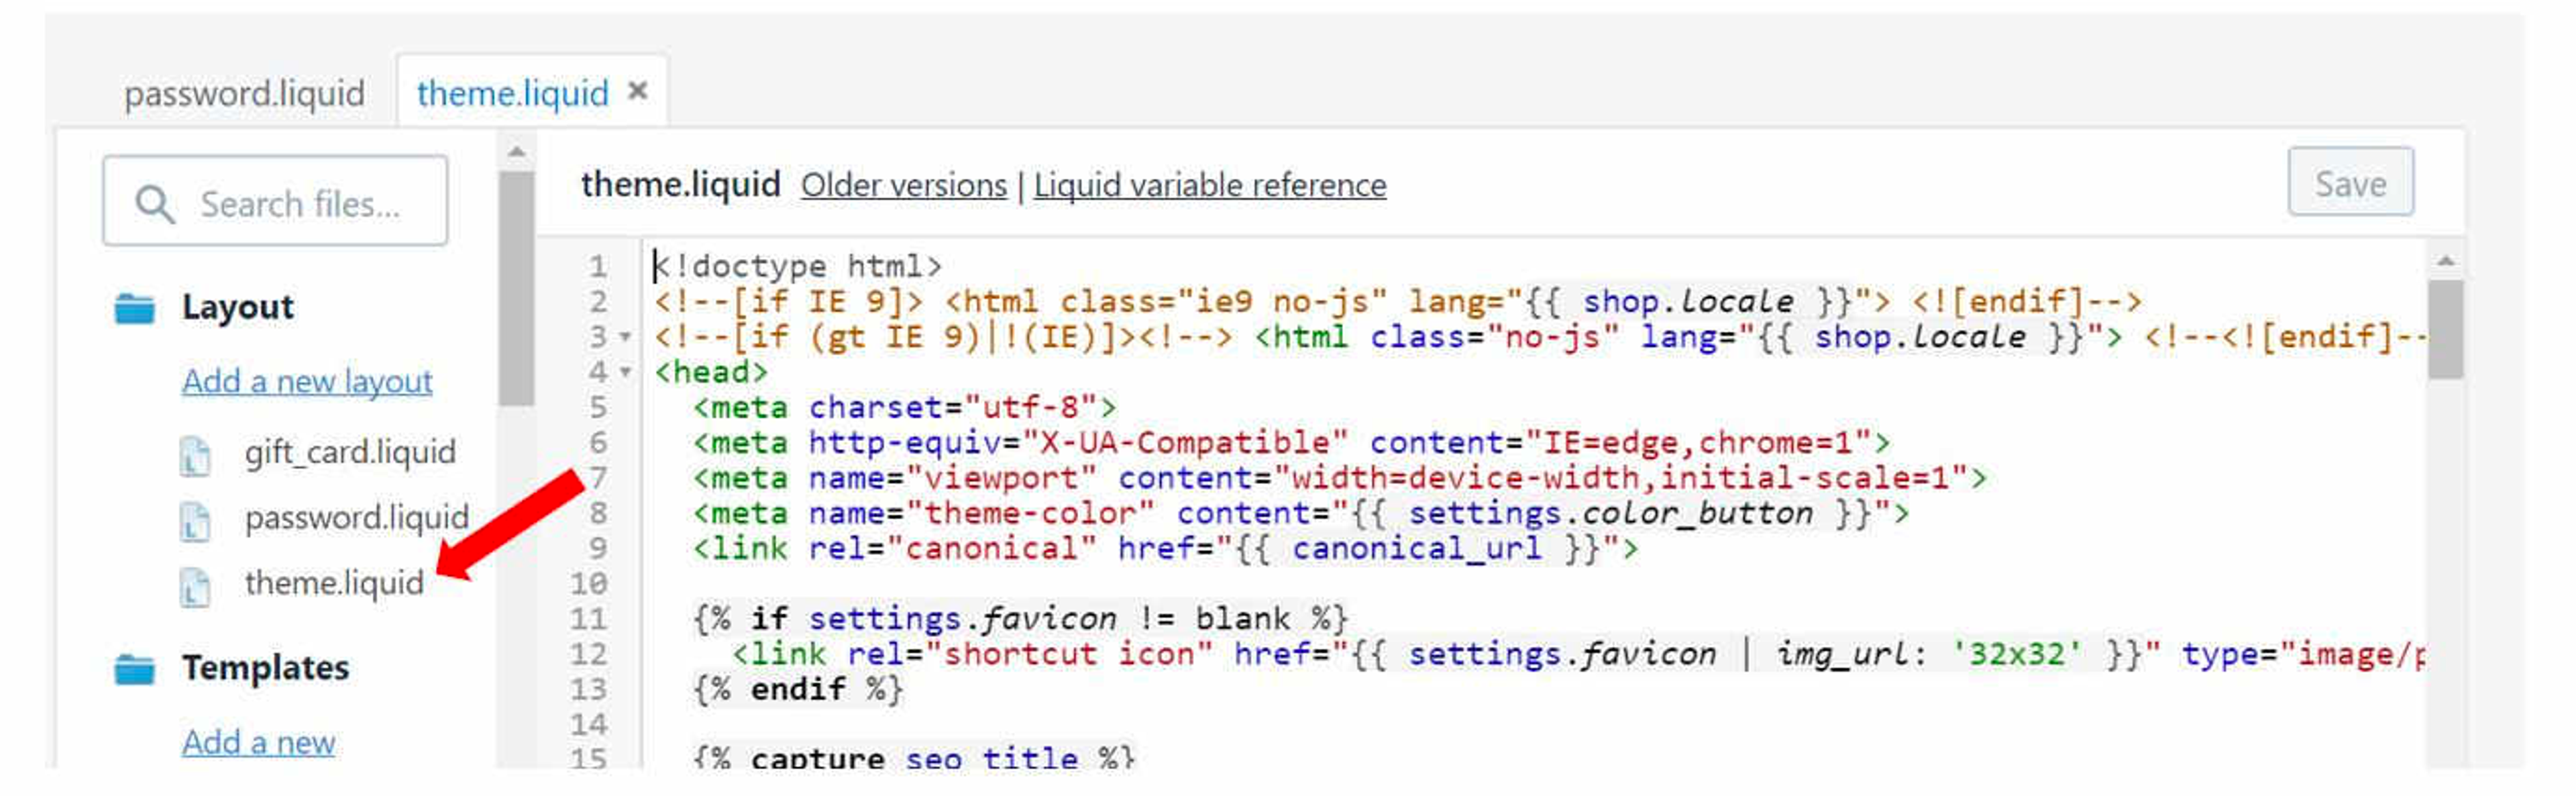
This will bring you to the section of the code that’s unnecessary, which will look something like the Facebook pixel code example (the entire #2 portion!) highlighted in the image below:
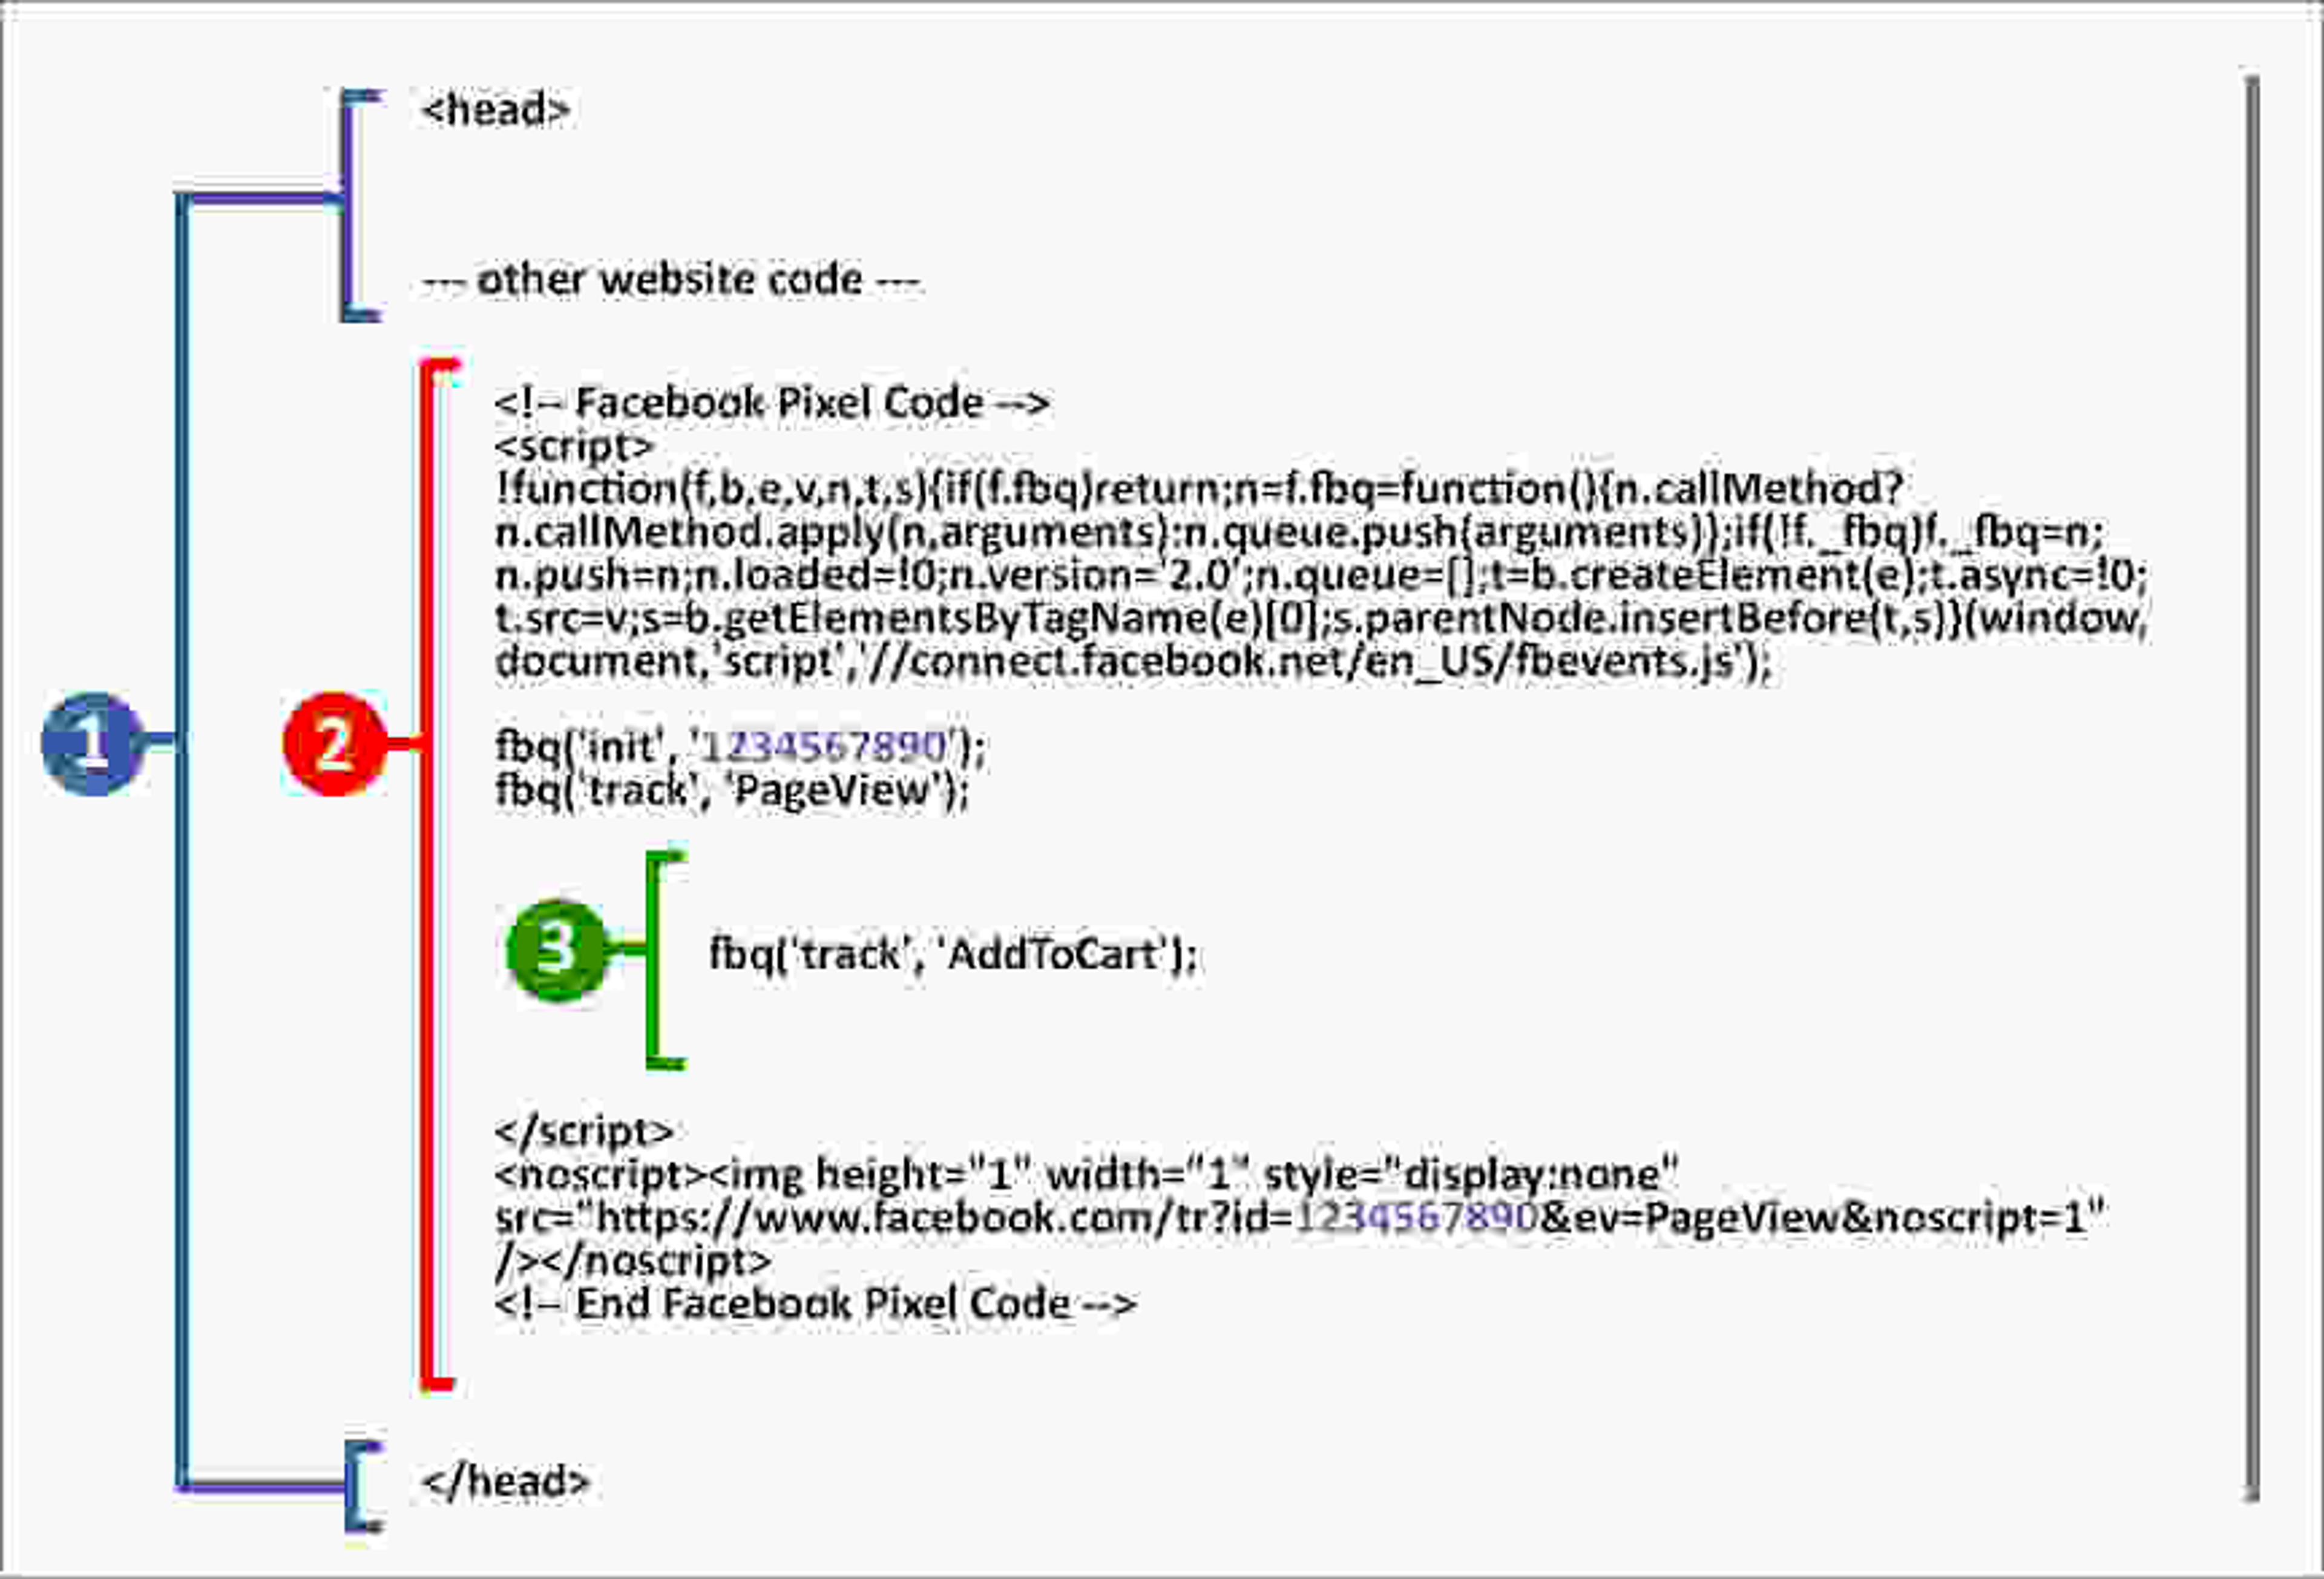
Delete this section of the code, then save the file.
You’re not done yet - you also have to remove any code that’s present in your admin panel.
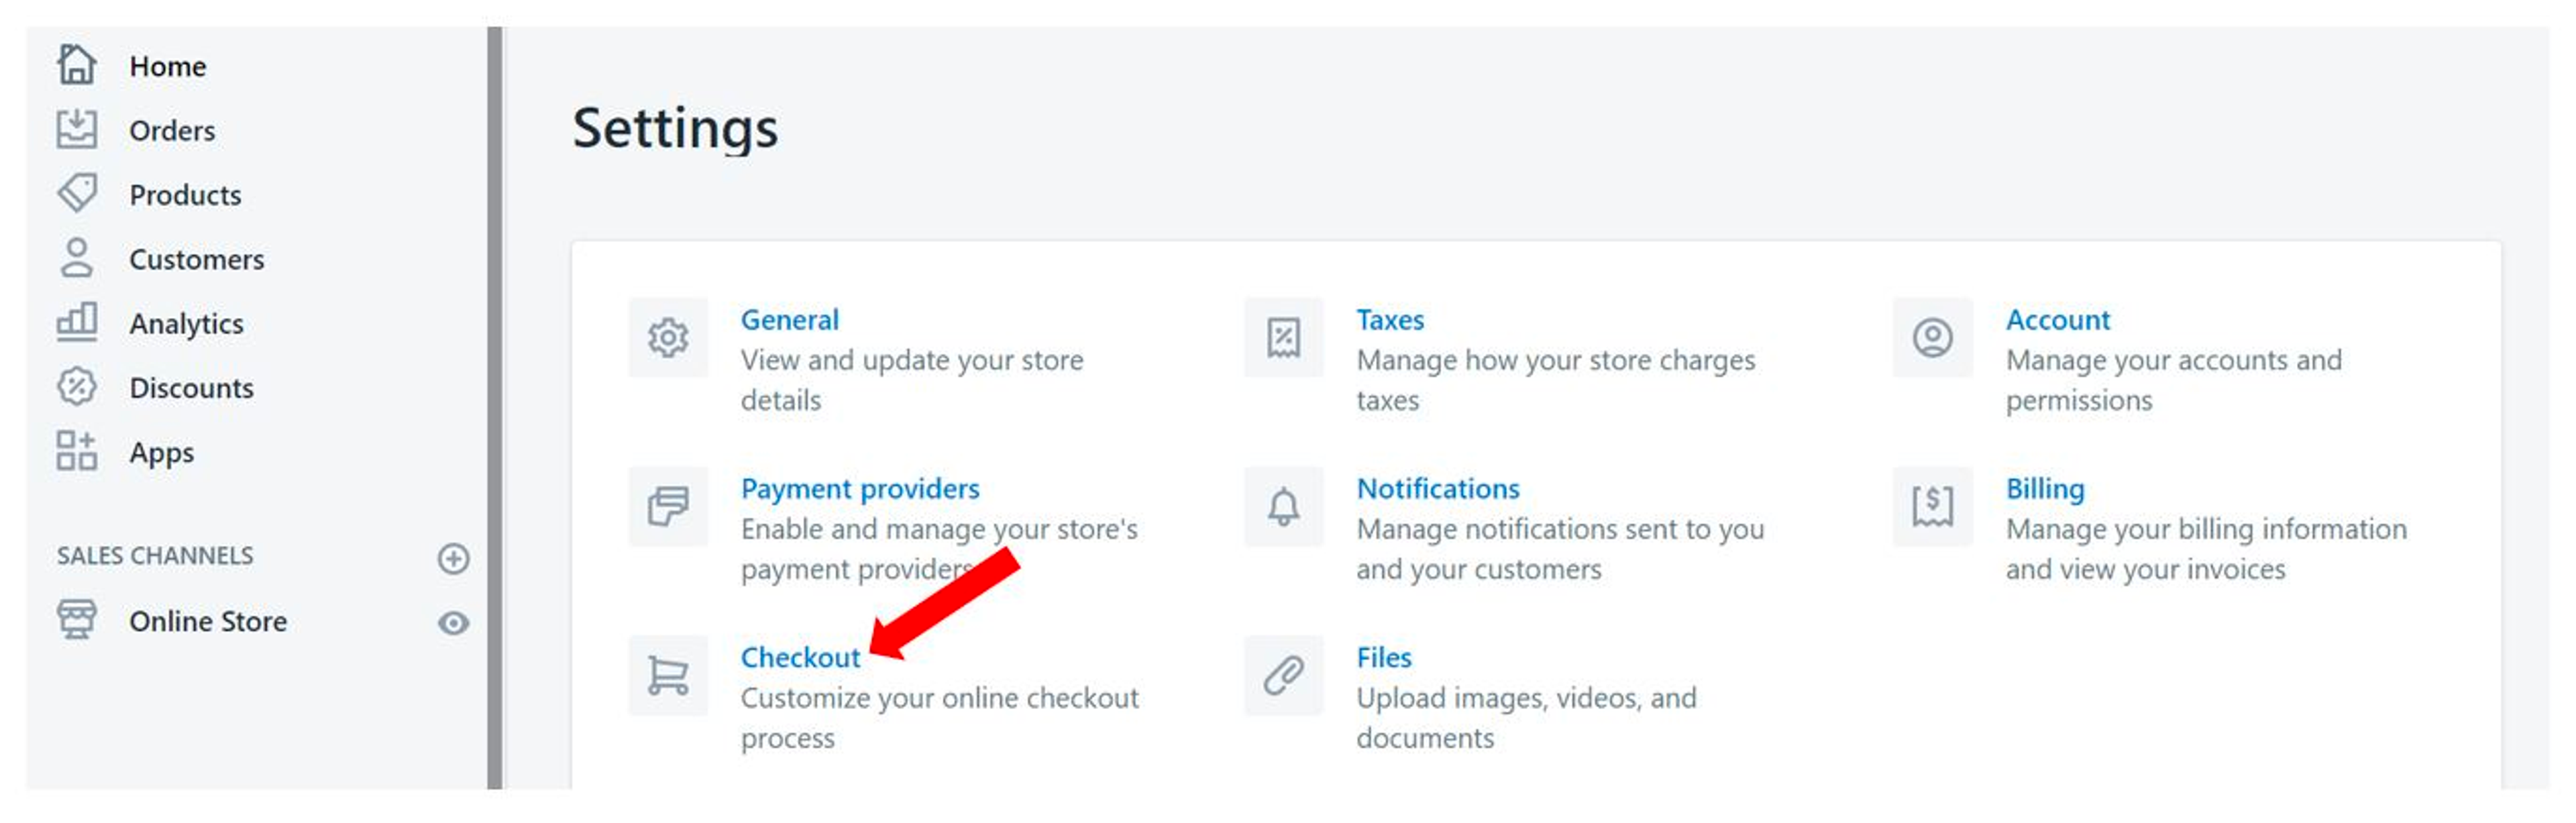
From your Shopify account, navigate to “Settings” and “Checkout”.
Then scroll down to the “Order Processing” section, and further down to where you’ll find your “Additional Scripts” text box.
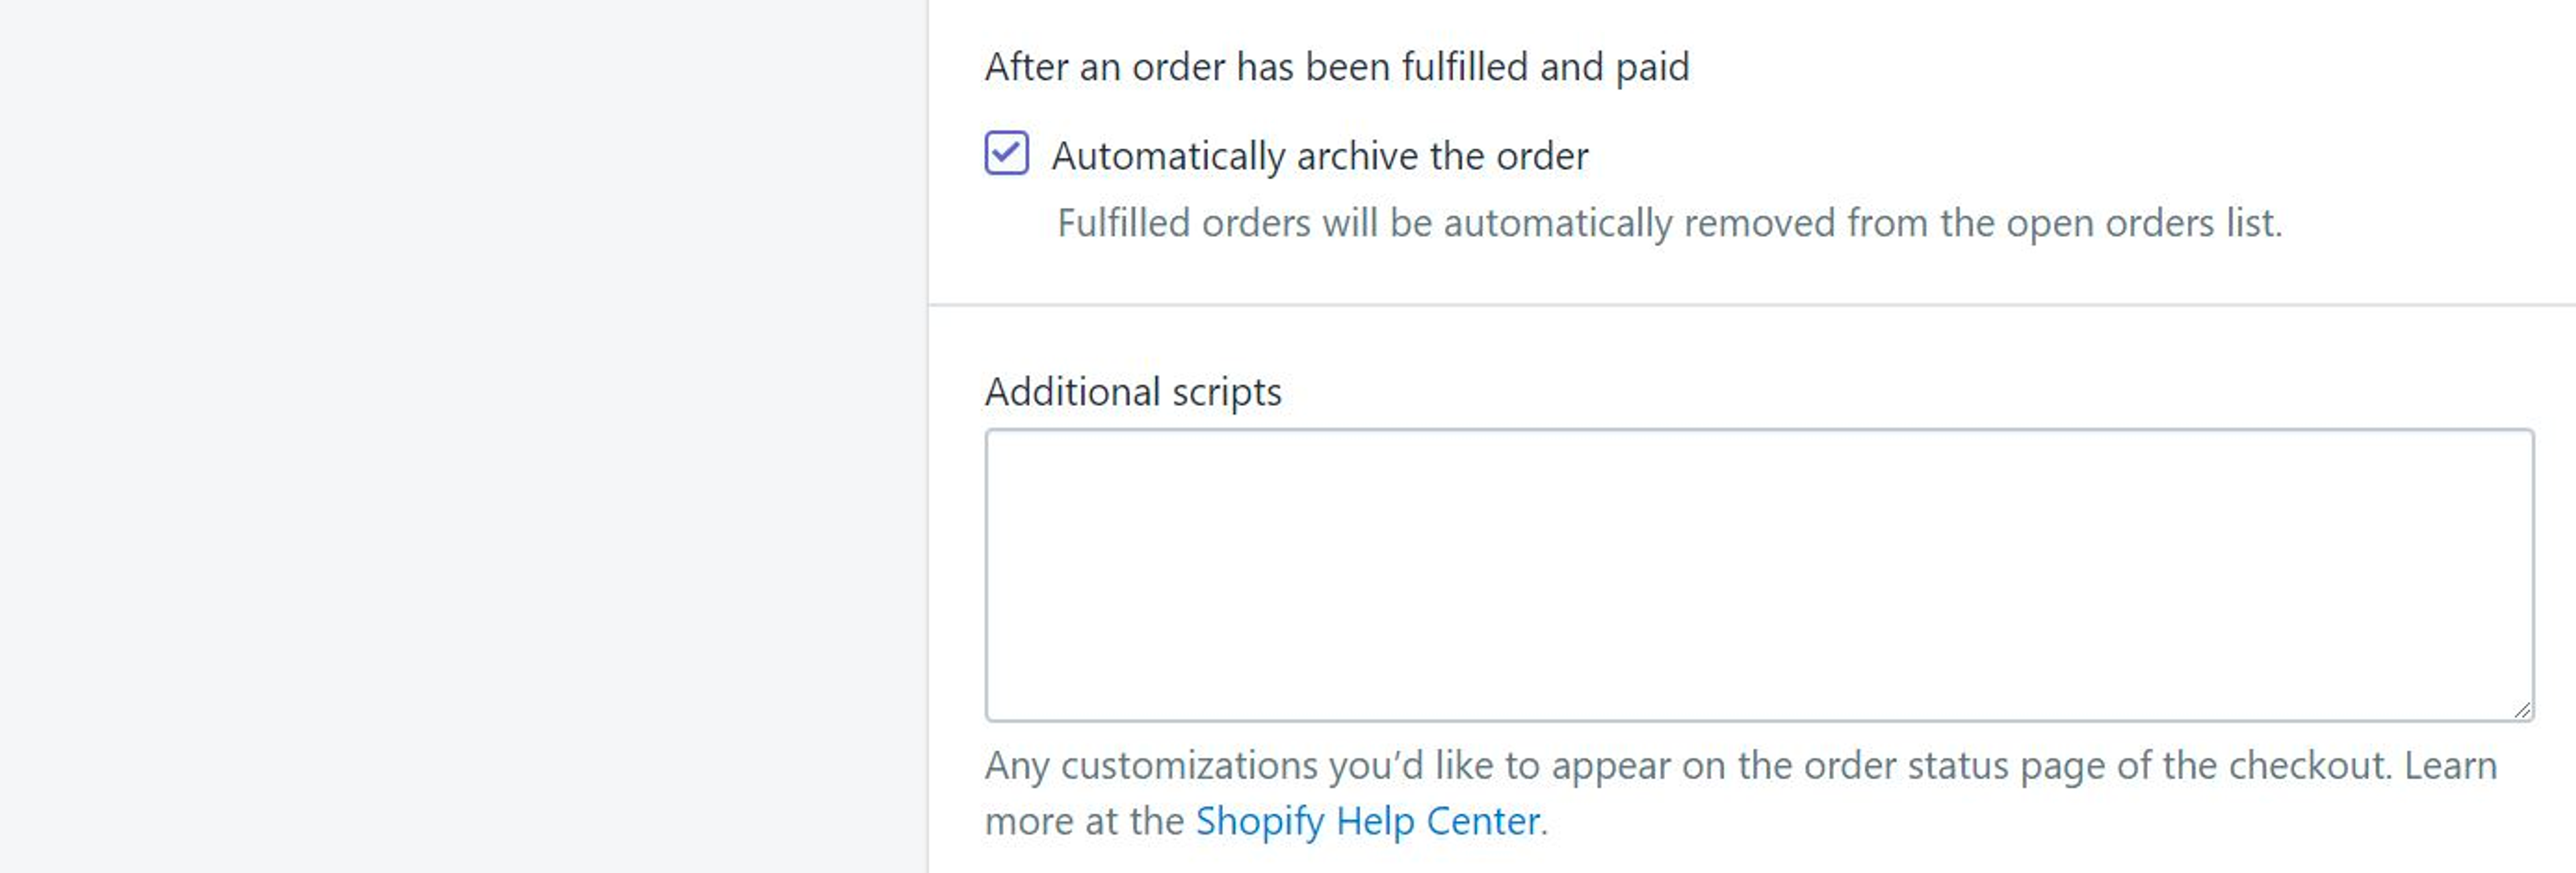
If it’s empty (like in the screenshot above), you’re in the clear.
If the Facebook Pixel code is present (again, ctrl+F and search for “Facebook Pixel Code”), then delete it before saving.
That’s it - you’re done!
“Facebook Pixel is not paired with any product catalog”
If you’re seeing the above message, or any of its other variations...
- No products found for given content
- Unable to Find Product Catalog
- Pixel Doesn’t Have a Product Catalog Pair
...this means that the product ID sent by your Shopify Facebook pixel is not found in a product catalog, or that no product catalog exists.
If you’re not running any Facebook Dynamic Ads, just ignore this message. (I actually recommend trying these ads, but I’ll touch on that more later).
But if you are running these ads, you’ll need to check your product feed and make sure everything is in order.
Here are some specific things to look out for:
- Your Shopify Facebook pixel, the product catalog ID, and the pixel content_ids parameter should be using the same logic
- The product ID should exist in your product catalog
- The catalog should be connected to the same pixel ID you are using on the Shopify site
“Pixel Took Too Long To Load”
This one is pretty self-explanatory, and easily fixable.
Basically, when your pixel takes too long to load, it’s typically because the location of your pixel isn’t optimum.
The explanation is a little bit technical, but bear with me:
If you place your pixel code later on in the web page, this means that all the other elements on your page will load before your pixel does.
This increases the chance that someone who visits your Shopify store might close it, click on a link, or somehow navigate away from your store before the pixel event gets to be activated…
...and under these circumstances, the Shopify Facebook pixel will not track the action.
If you want to get rid of this problem (and ensure you don’t lose out on any of your actions), here’s what you do:
Instead of placing your pixel code between the body and footer tags, place it just before the closing </head> tag.
That’s all there is to it!
“You Have Opted Out of Tracking”
This means that you have opted out of tracking from Facebook…
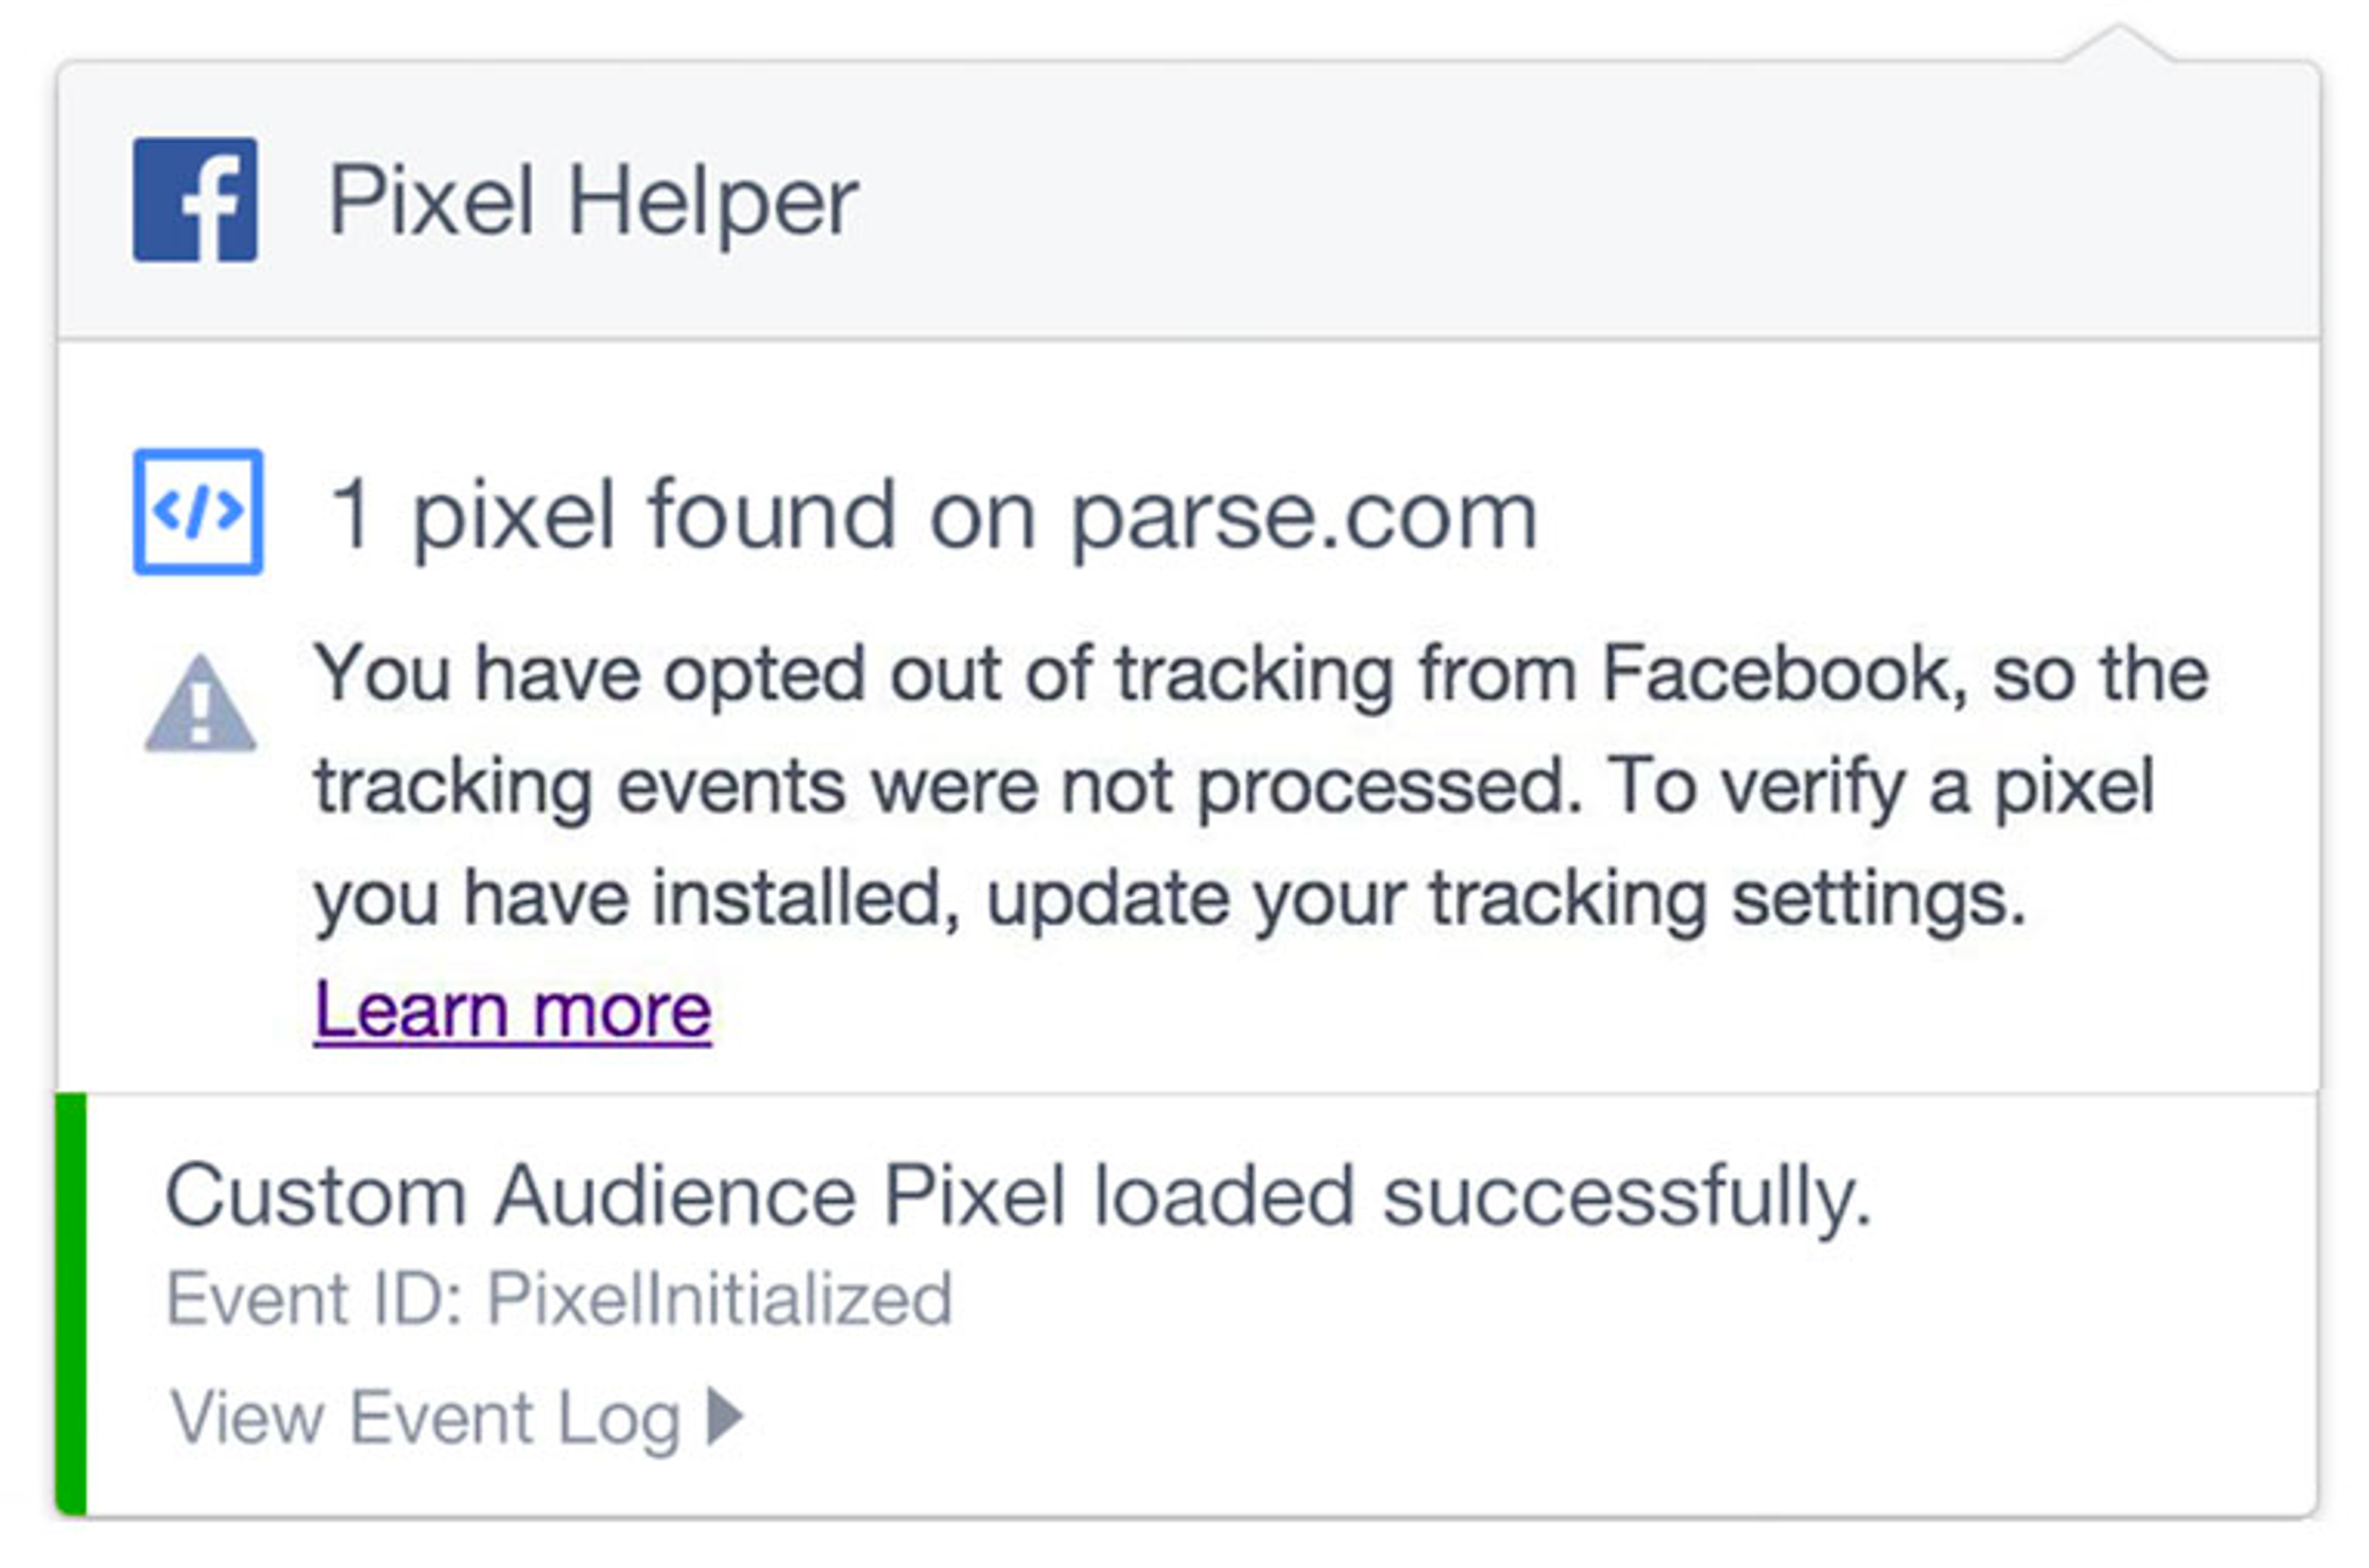
...and as a result, the Facebook Pixel Helper extension isn’t able to function properly.
Fixing it is simple:
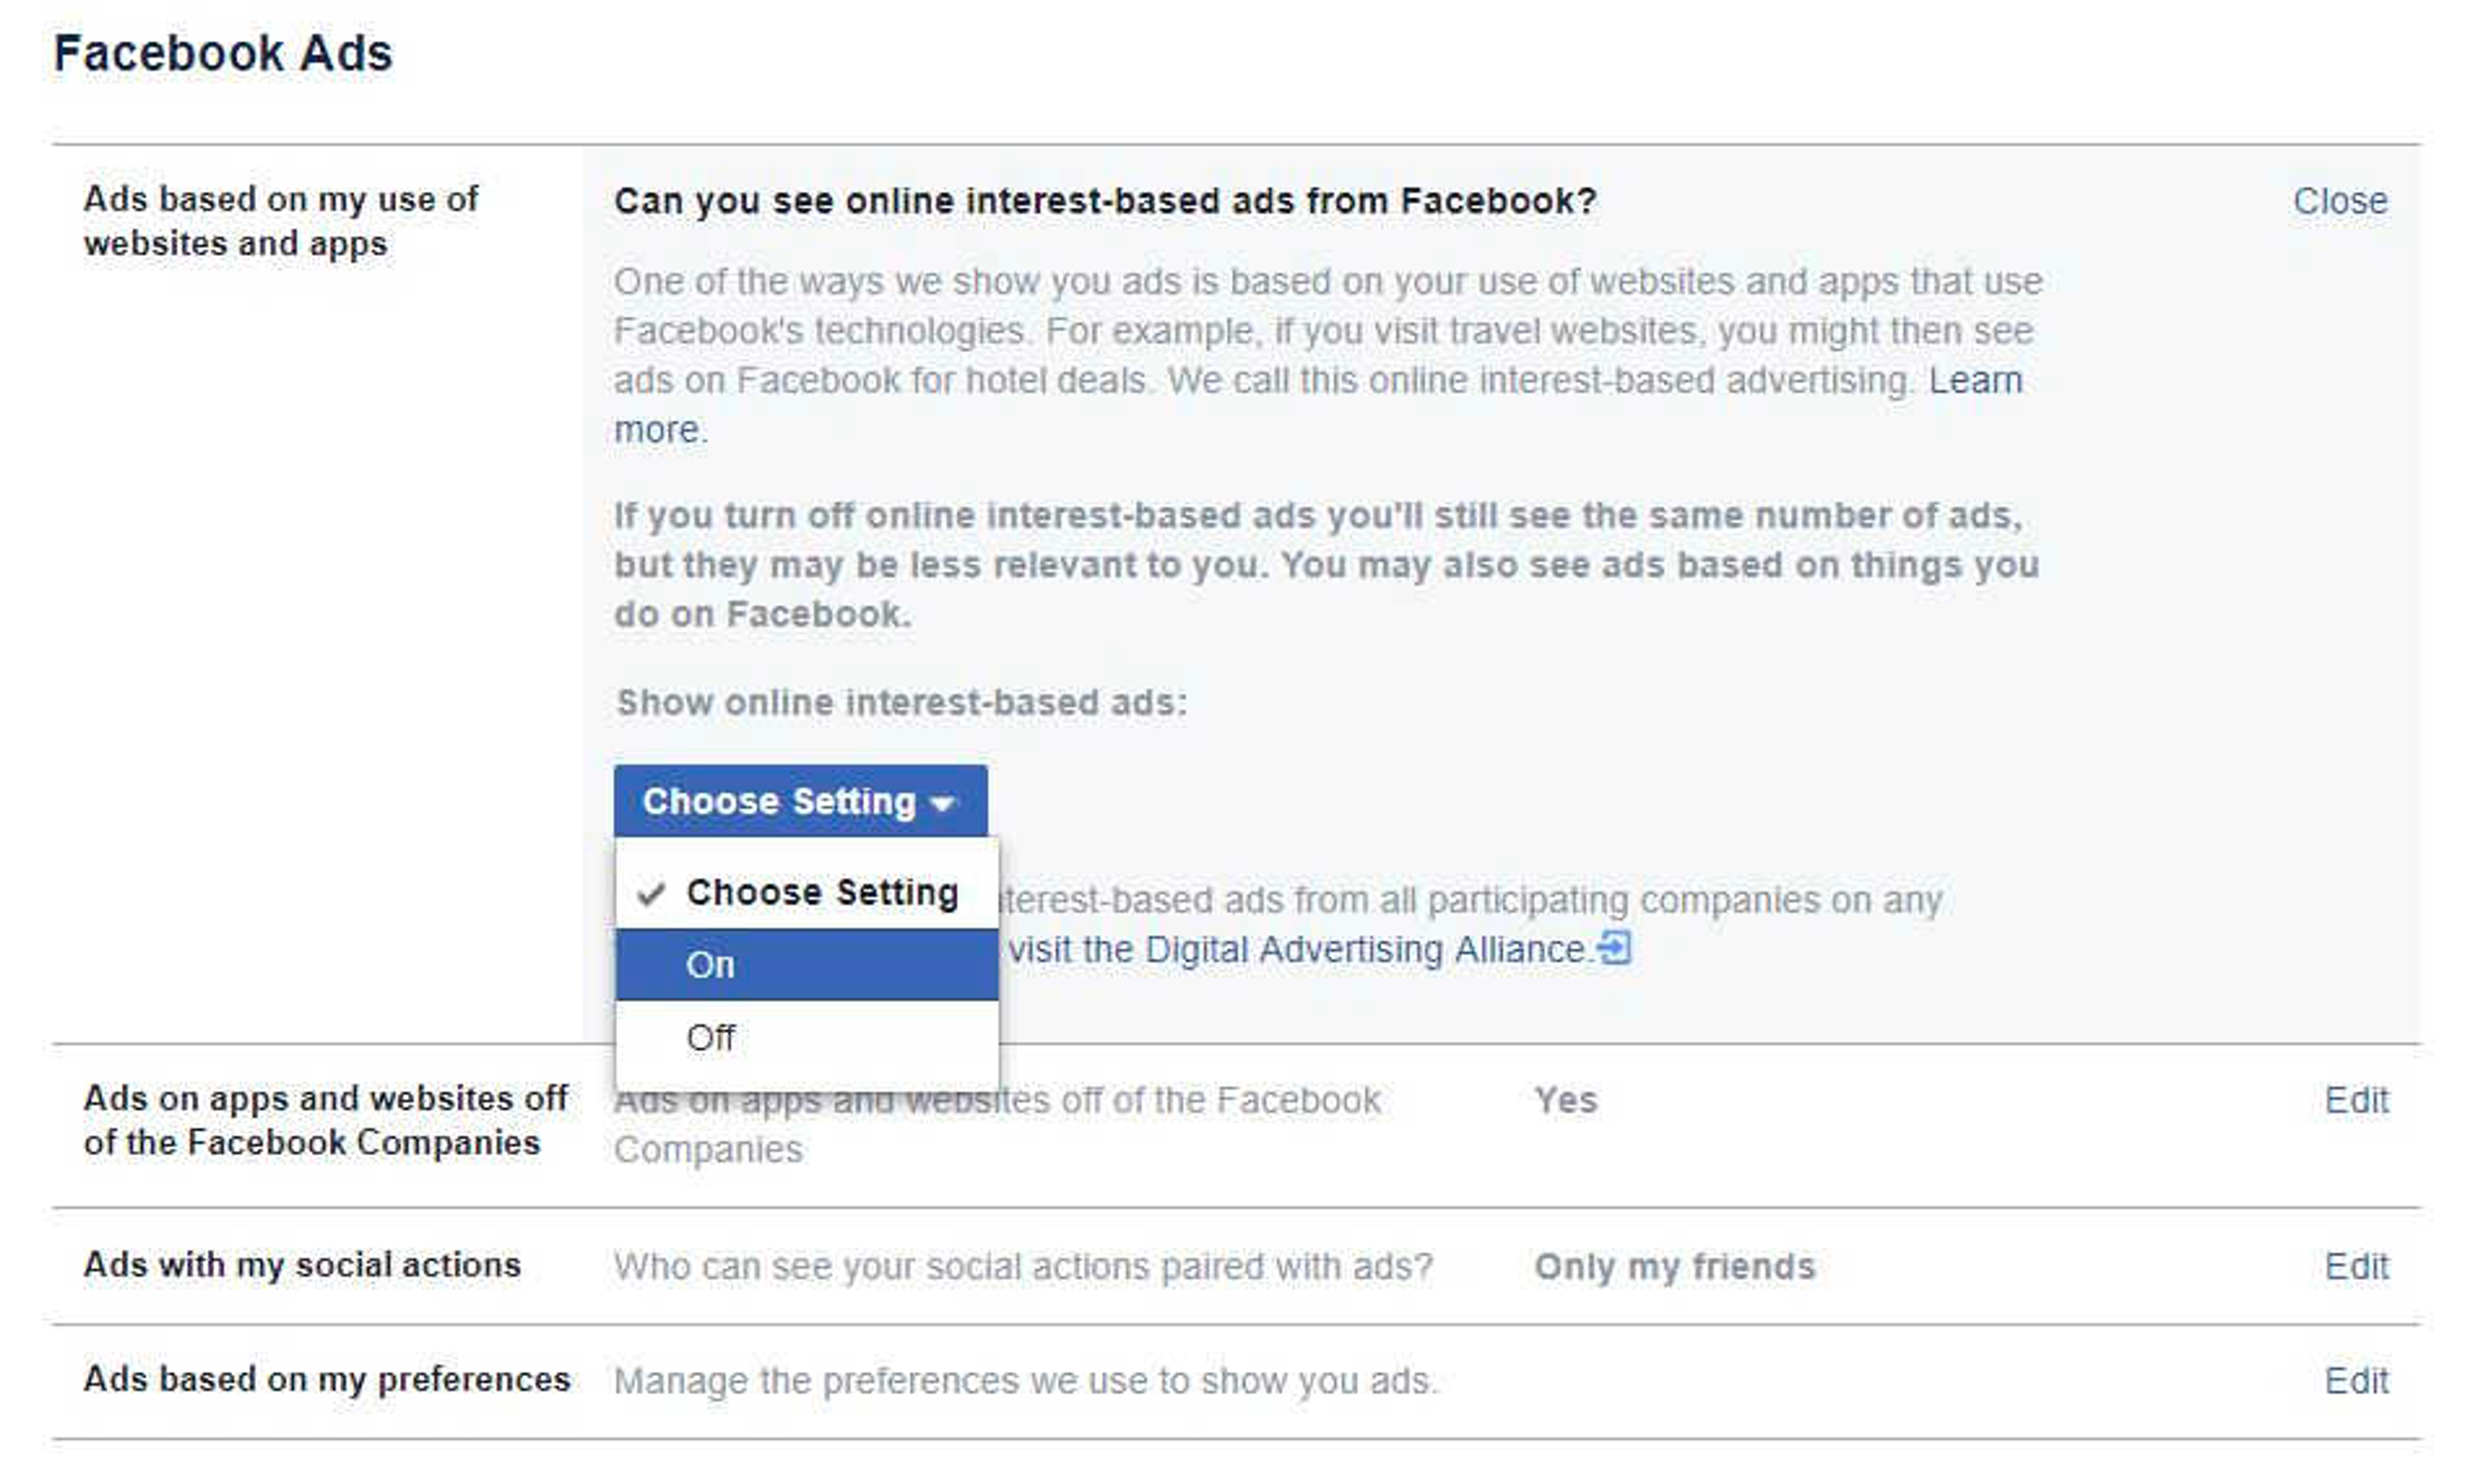
Go to your ad settings and give your consent to see interest-based ads from Facebook.
5 pro tips to maximize your Shopify Facebook Pixel conversions
Now that your Shopify Facebook pixel is up and running (and working properly!), let’s talk about how to maximize your conversions from the pixel.
Tip 1: Make Sure You Have Sufficient Events On Your Pixel
Most Shopify store owners can’t wait to get the ball rolling once they’ve installed their pixel…
…and they’re super excited to start setting up Custom Audiences, creating ads, and optimizing as they go along.
A word of advice?
Patience, grasshopper.
The first step is to make sure you have sufficient events on your pixel.
Here’s why this is important:
If there are too few pixel events on your website, you don’t have enough data to paint an accurate picture.
For example, eight people visit your website and four of them make a purchase.
Technically speaking that’s a 50% conversion rate - but it isn’t statistically significant. You wouldn’t want to make any predictions or craft any strategies based on this number at this highly premature stage.
So how many pixel events are you aiming to get?
According to Facebook, 500 pixel events or more per week is decent enough for you to get started with conversion optimization.
If you haven’t hit 500 per week?
You’ll probably want to focus on driving more traffic to your site...
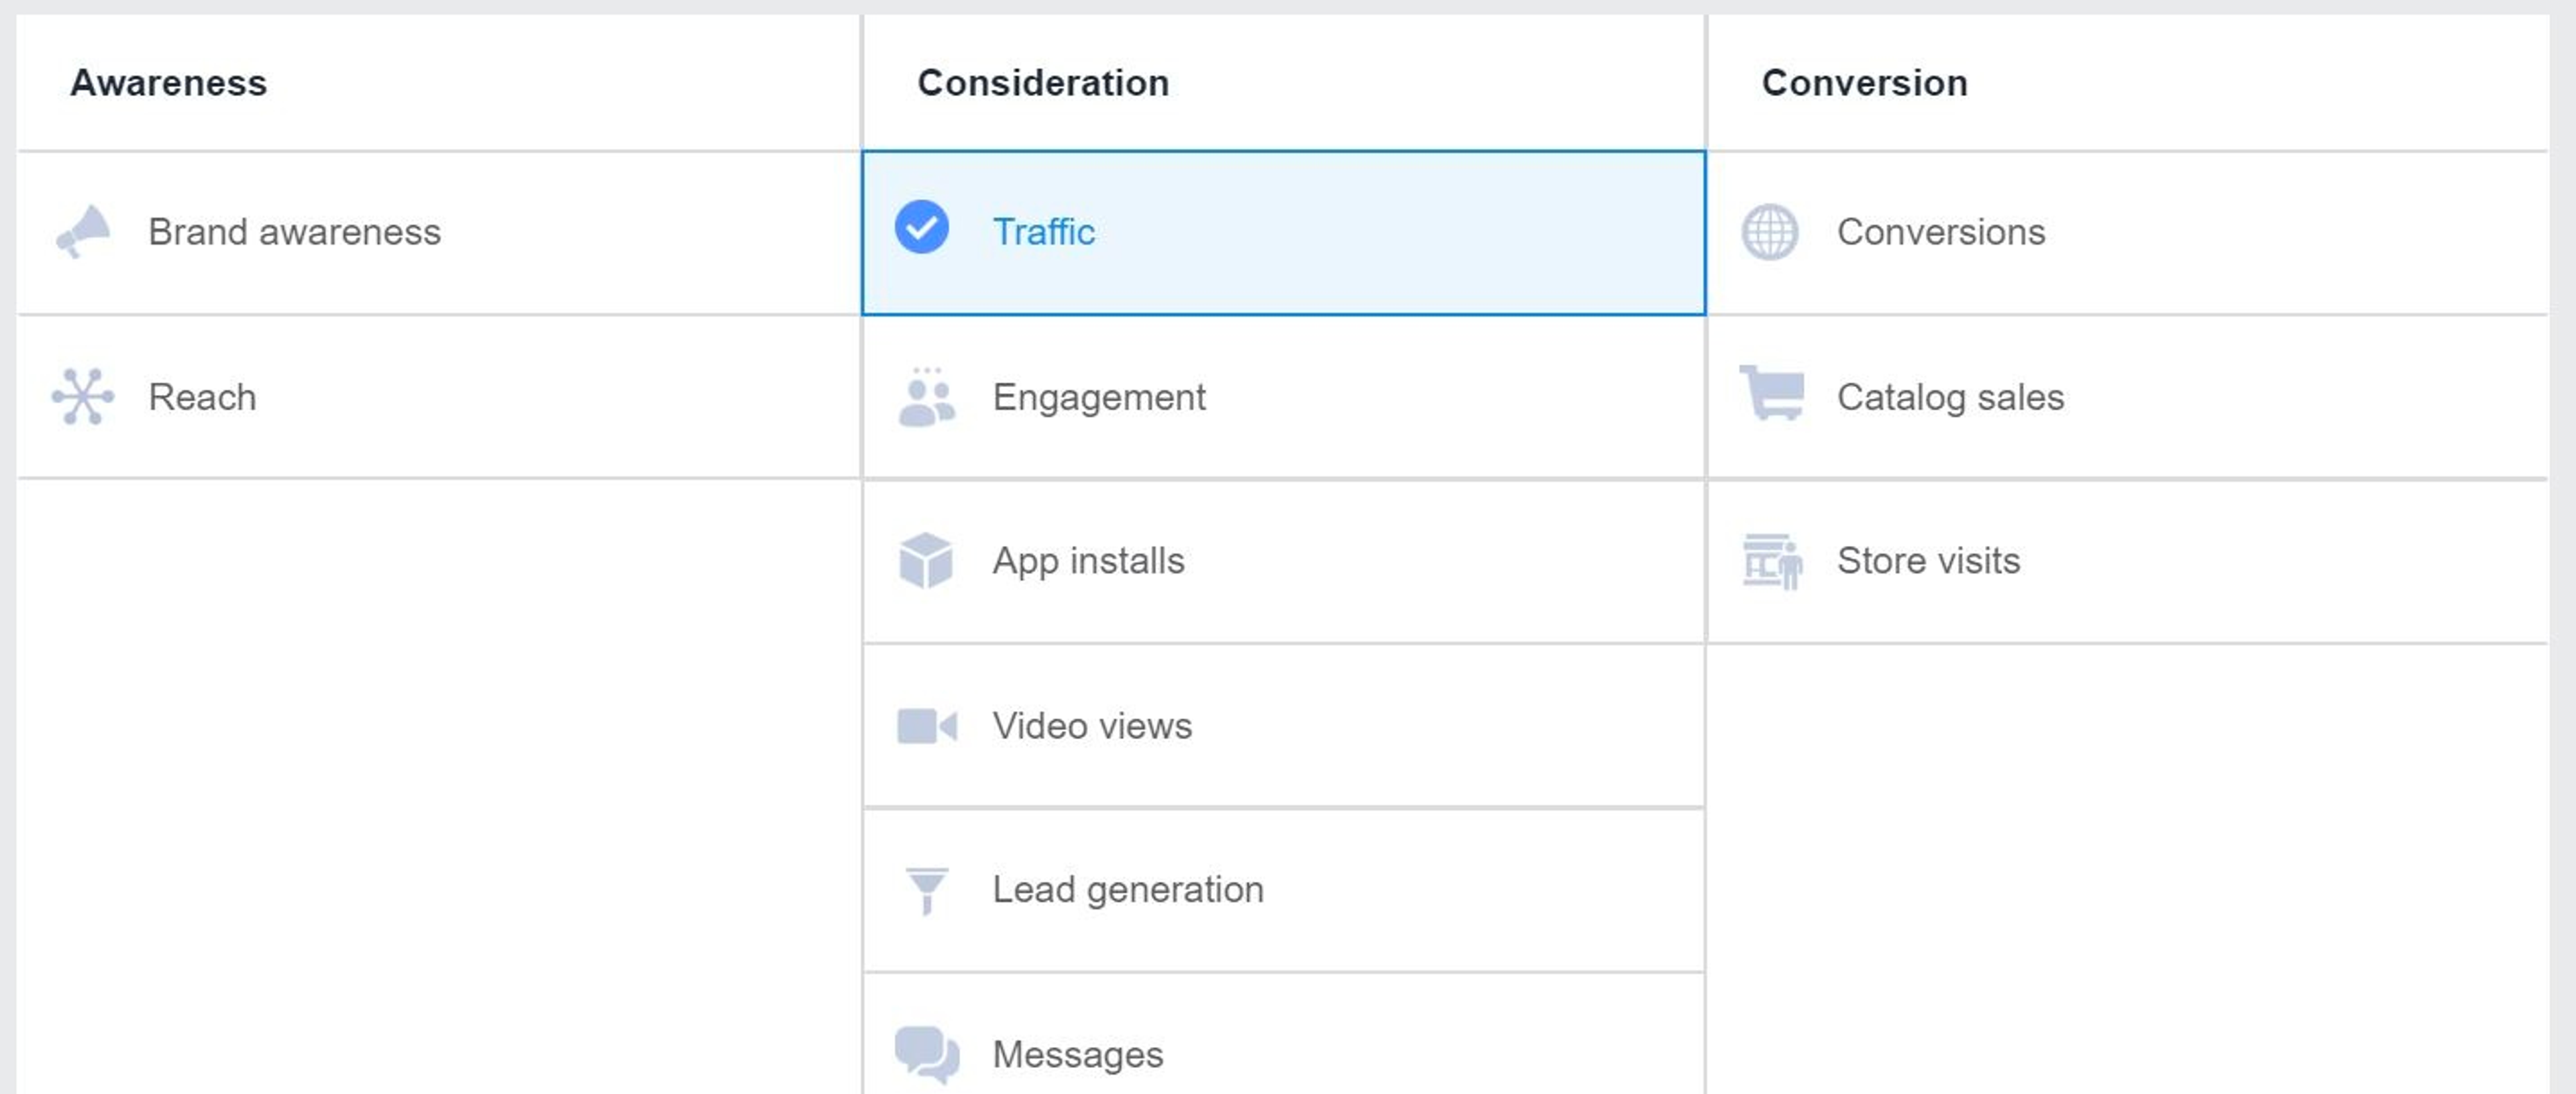
...as opposed to optimizing for conversions (with the “conversions” objective).
For more details, read this guide.
Tip 2: Fix any other problems with your Facebook Pixel
While the Facebook Pixel Helper I previously talked about reports any major errors your Pixel might be experiencing, it doesn’t quite cover everything.
To iron out the other nitty gritty issues, you’ll need to navigate to the Pixel section of your Facebook dashboard, click on the pixel, and then the “Diagnostics” tab.
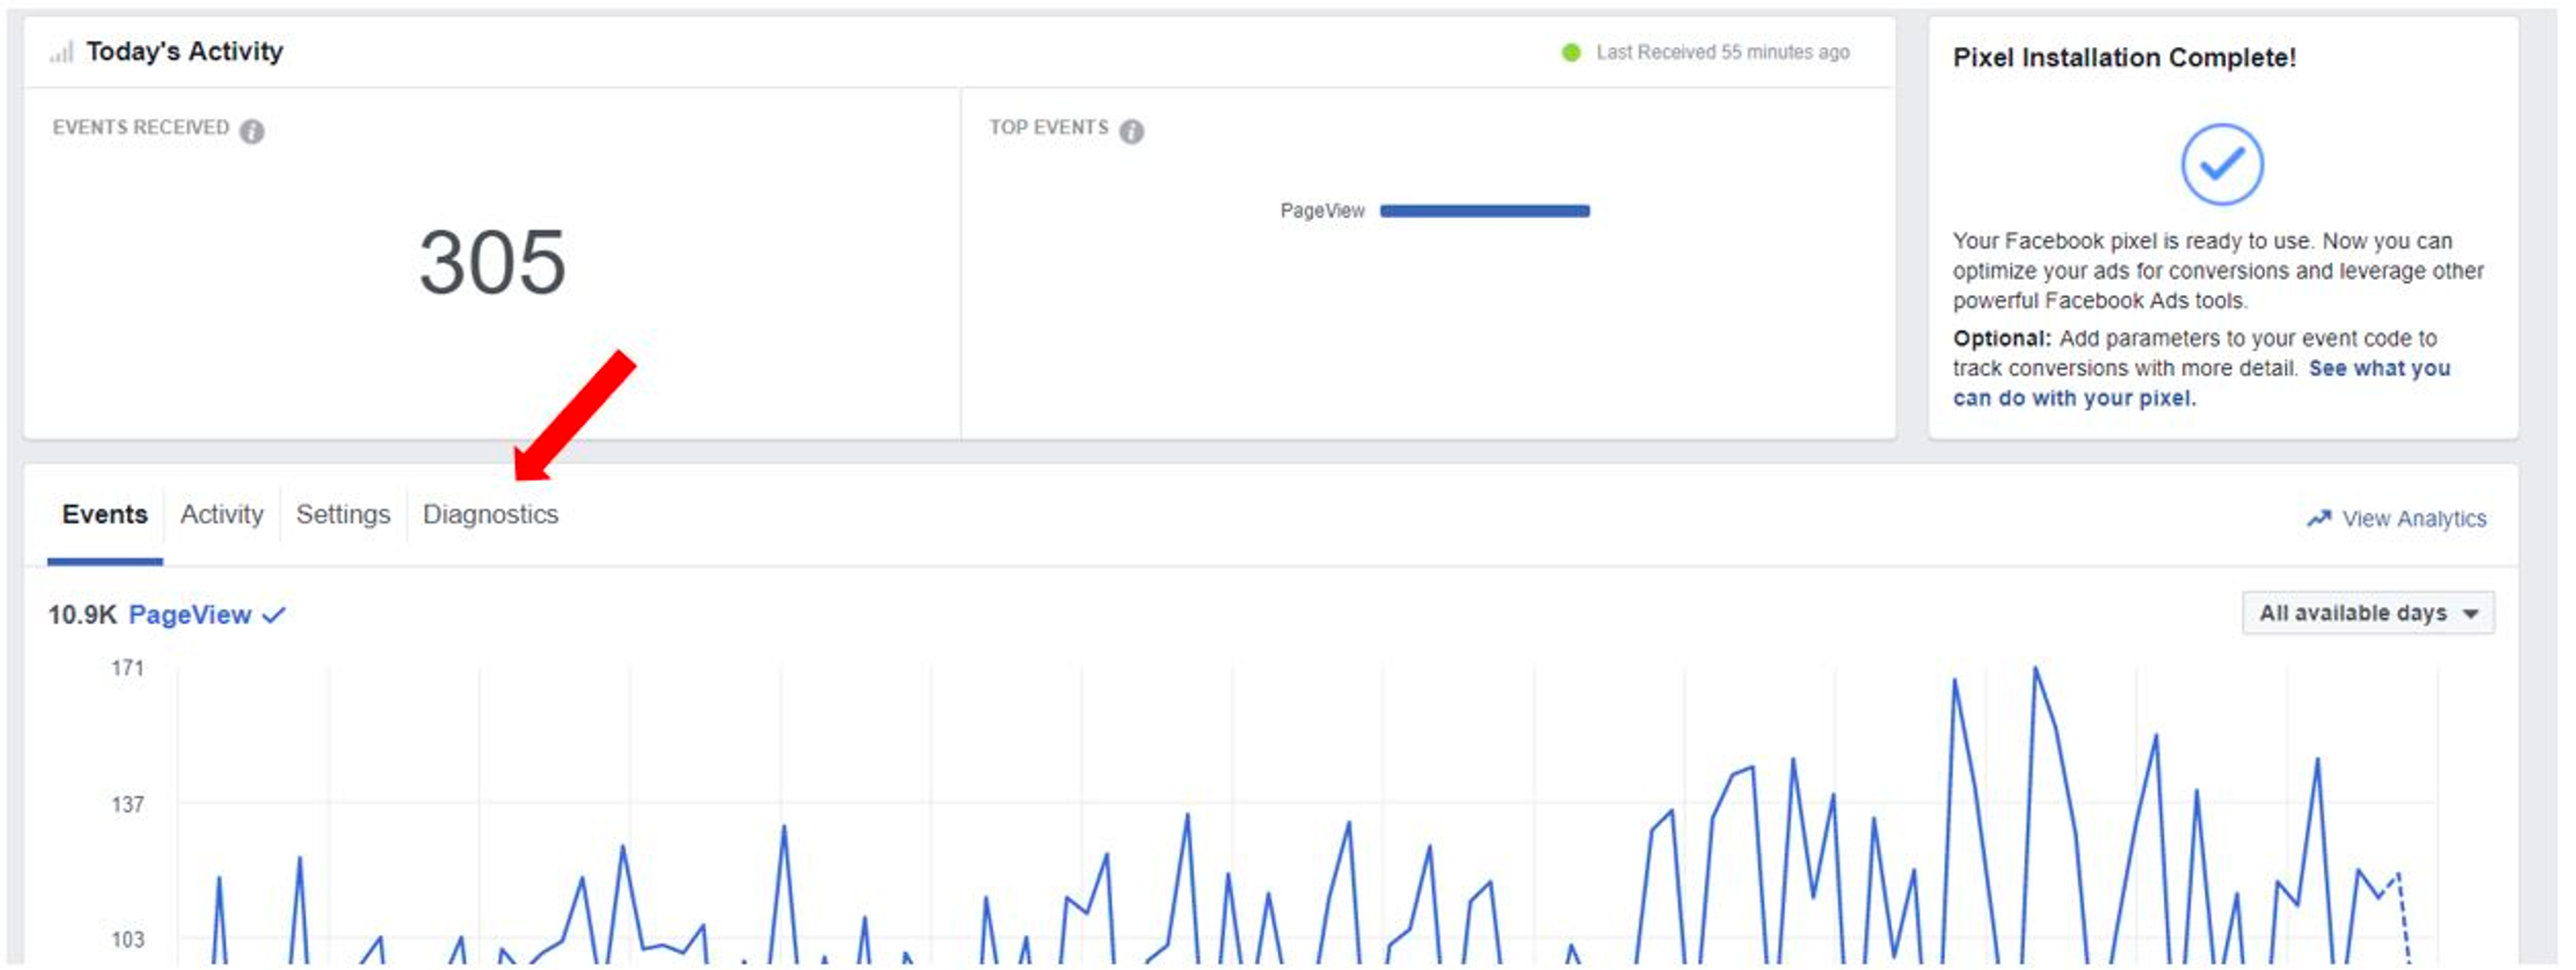
You’re hoping to get this message…
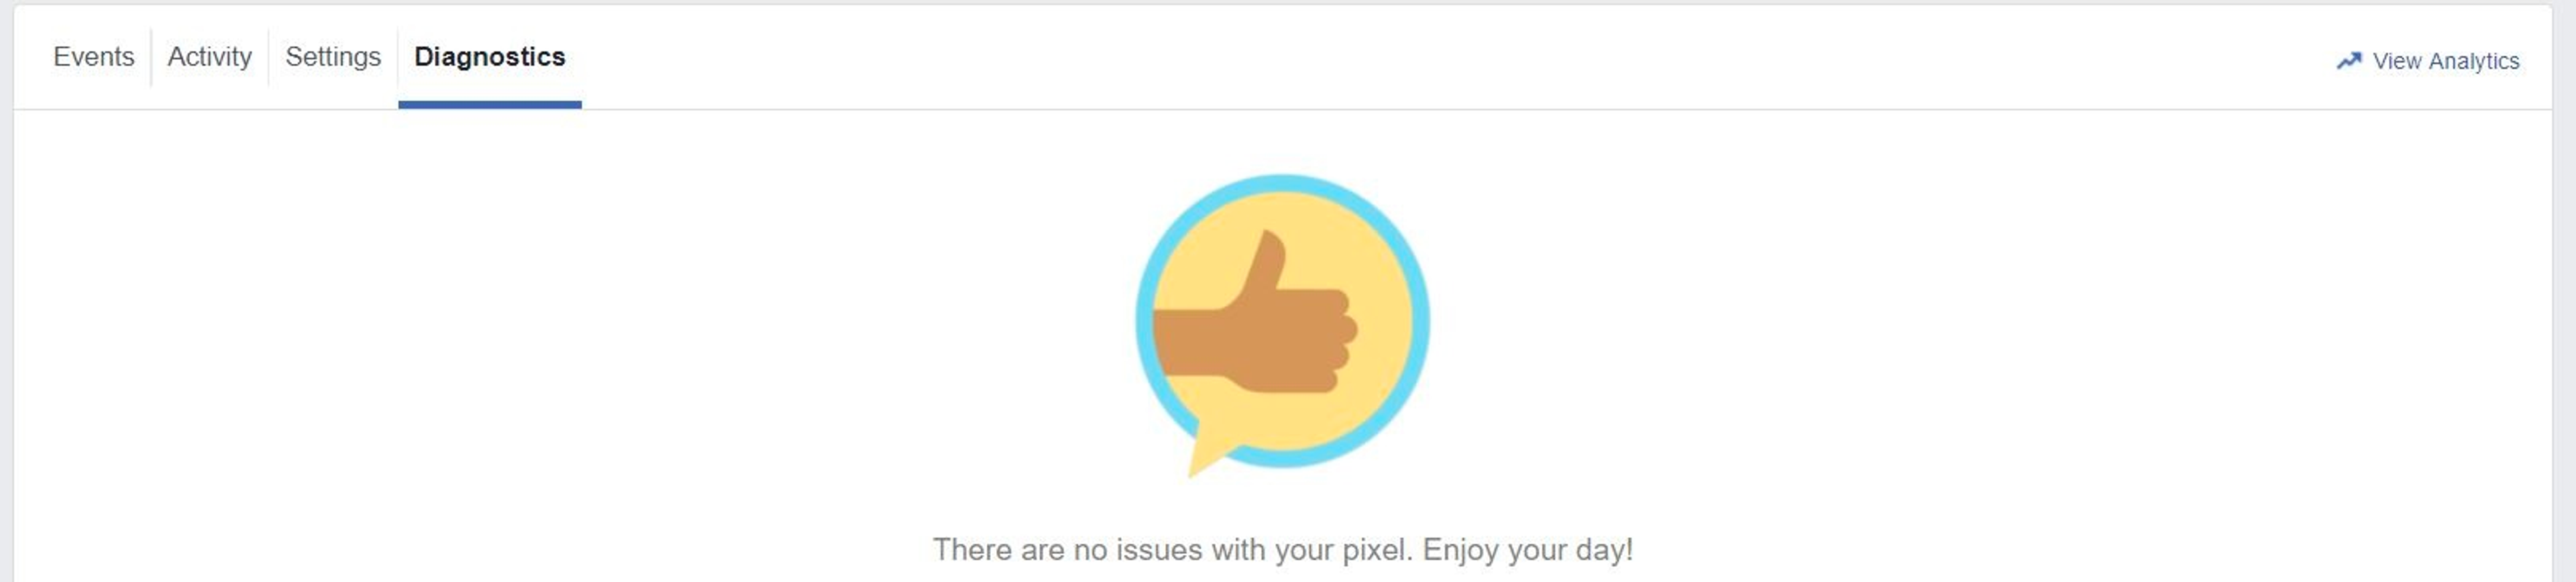
But if what you see is a list of errors, don’t start sweating.
I’ll run through all the problems you might be facing, and teach you how to address them.
“Invalid Currency Code”
This just means the currency code for one (or more!) of your events isn’t formatted correctly.
You can fix this in a jiffy:
Click “View affected URLs”, where you’ll be able to see which pages and parameters are causing this error.
From there, revise the problematic currency codes to match the standard 3-letter ISO currency codes (so “USD” instead of “US” or “US$”).
“No Event Name Specified”
All your events (regardless of whether they’re standard or custom events) require an event name.
Again, click “View affected URLs”, and make sure you’ve filled in the names for all your events.
“Invalid Event Value”
If you’re getting this error message, there are two possibilities:
Either your value or currency parameter is completely missing for an event…
...or the value or currency parameter isn’t formatted correctly.
In this case, make sure your code snippets contain both a value and currency parameter.
On top of that, check the value field of the event, and ensure that it contains a decimal number greater than or equal to zero (letters, special characters, currency symbols or commas are not allowed).
“Almost Standard Event”
This is Facebook telling you that one or more of your standard events is similar (but not completely identical!) to one of Facebook's standard events.
If you intend to measure the action in question as a standard event, go ahead and update the event code snippet to match the standard event formatting.
I’ve mentioned this before, but bear in mind that the event code is case-sensitive, and that Facebook reads “Purchase” and “purchase” as two different things!
“Missing Event Value”
This means you don't have a specific monetary amount defined for your event.
While the default value in the standard event code is set to $0.00 USD, it makes sense for you to update this value.
Why? This helps you better track the value of your conversions, so that you can figure out your Return On Ad Spend.
“Redundant Events on Page Load”
This error appears when your pixel measures five or more different events when someone takes a single action on your website.
If you previously installed the Facebook Pixel Helper and addressed all the issues that you found via this tool, then you shouldn’t be seeing this message.
But if this error message does appear, it’s a sign that you need to clean up your code and remove extra code snippets from pages where that action is not occurring.
“Redundant Purchase Events”
This is one of the more critical errors you can encounter, so take note:
The “Redundant Purchase Events” tells you that your pixel is measuring 3 or more purchase events when someone makes a single purchase on your website.
This error typically leads to over-reporting of purchases, which makes it impossible for you to tally your figures from Facebook and Shopify.
To avoid this, make sure you’re adding your purchase event code only to the pages on your store which indicate that someone has completed a purchase…
...and not to multiple parts of your website (for example: thank you pages, check out pages, and inline actions such as “Buy Now” button clicks).
And that’s it for diagnostic errors!
Tip 3: Play around with custom audiences and lookalike audiences
Ask any Facebook marketer, and they’ll tell you that Custom Audiences are great.
If you don’t have the Shopify Facebook Pixel, you’ll need to upload a list of email addresses, phone numbers, or Facebook user IDs in order to create your Custom Audiences…
...which is a pain in the ass for some Shopify store owners, and downright impossible for others (those who haven’t built up a large base of newsletter subscribers yet).
But with your Pixel installed, creating your list(s) of Custom Audiences is insanely easy.
Navigate to “Audiences”...

Click on “Create Audience” > “Custom Audience”...
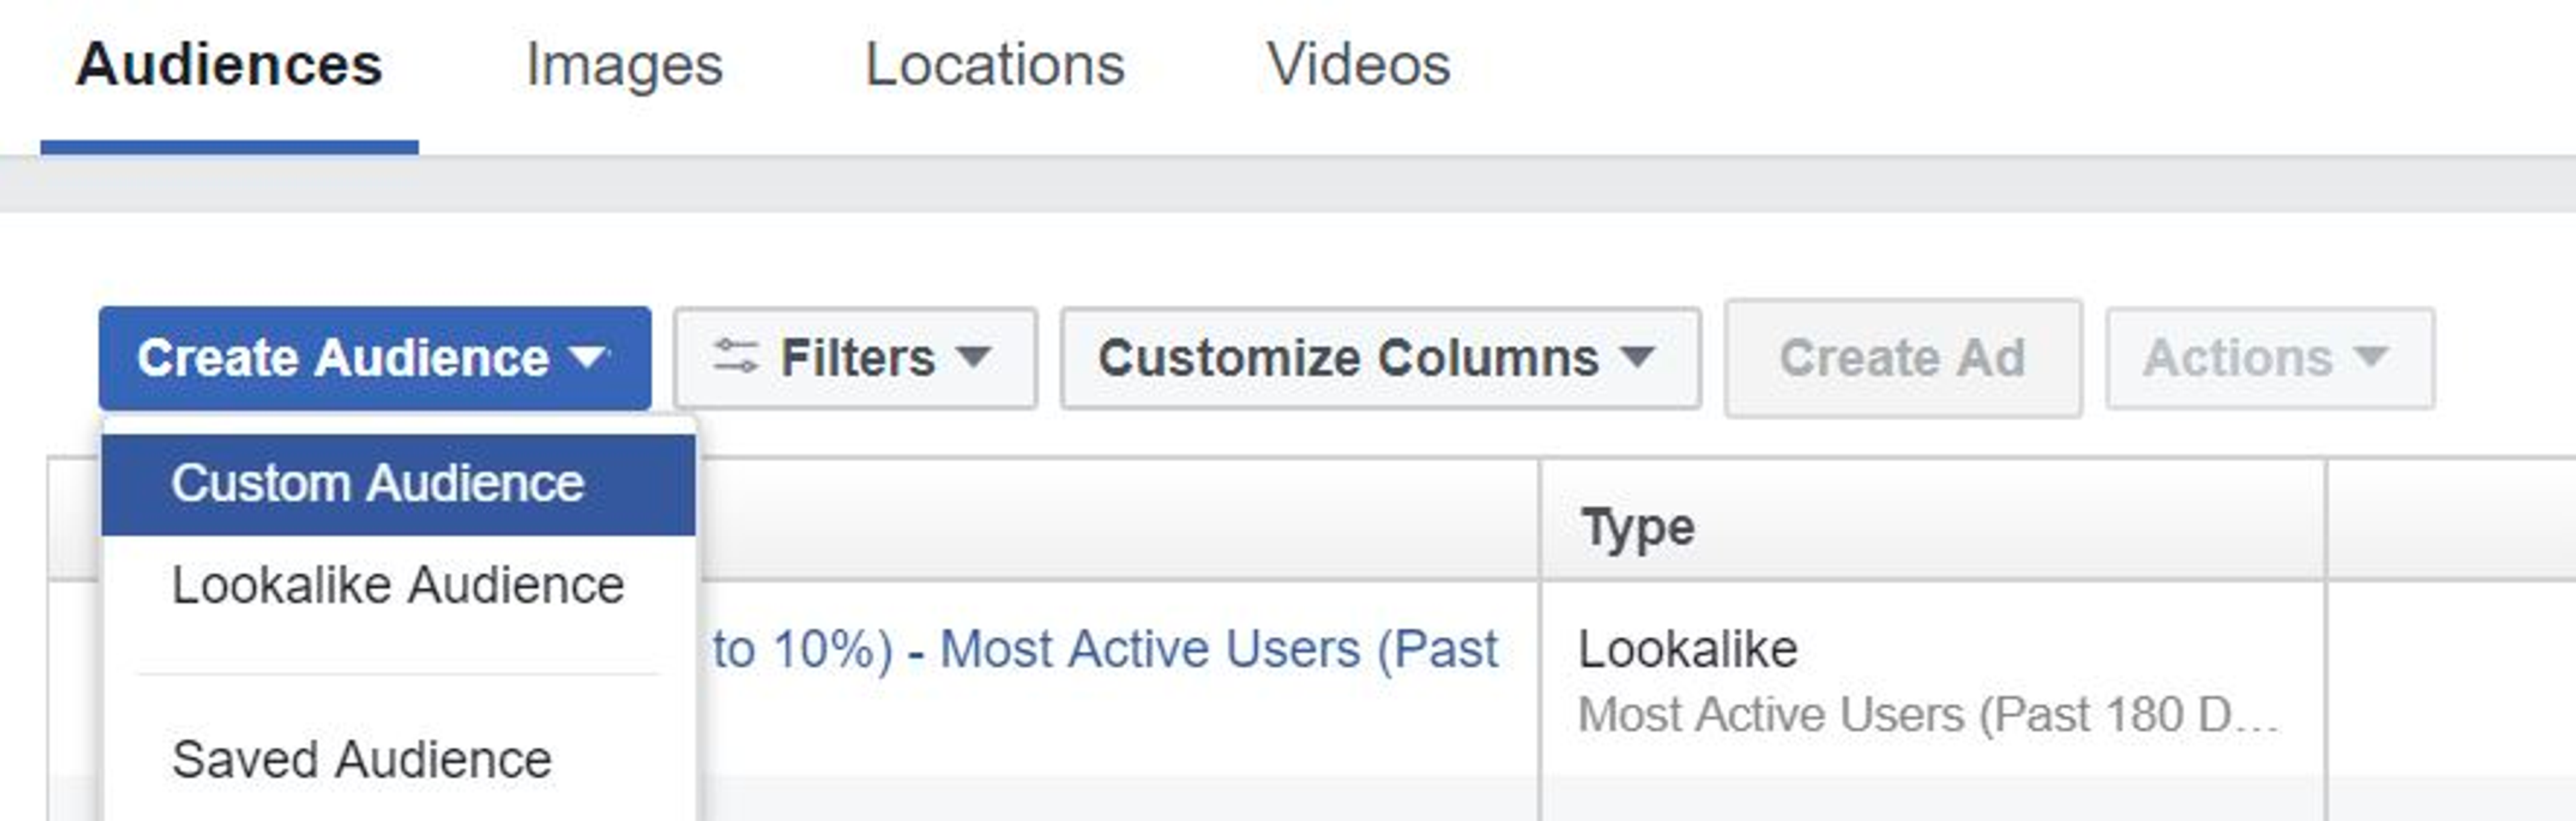
And then “Website Traffic”.
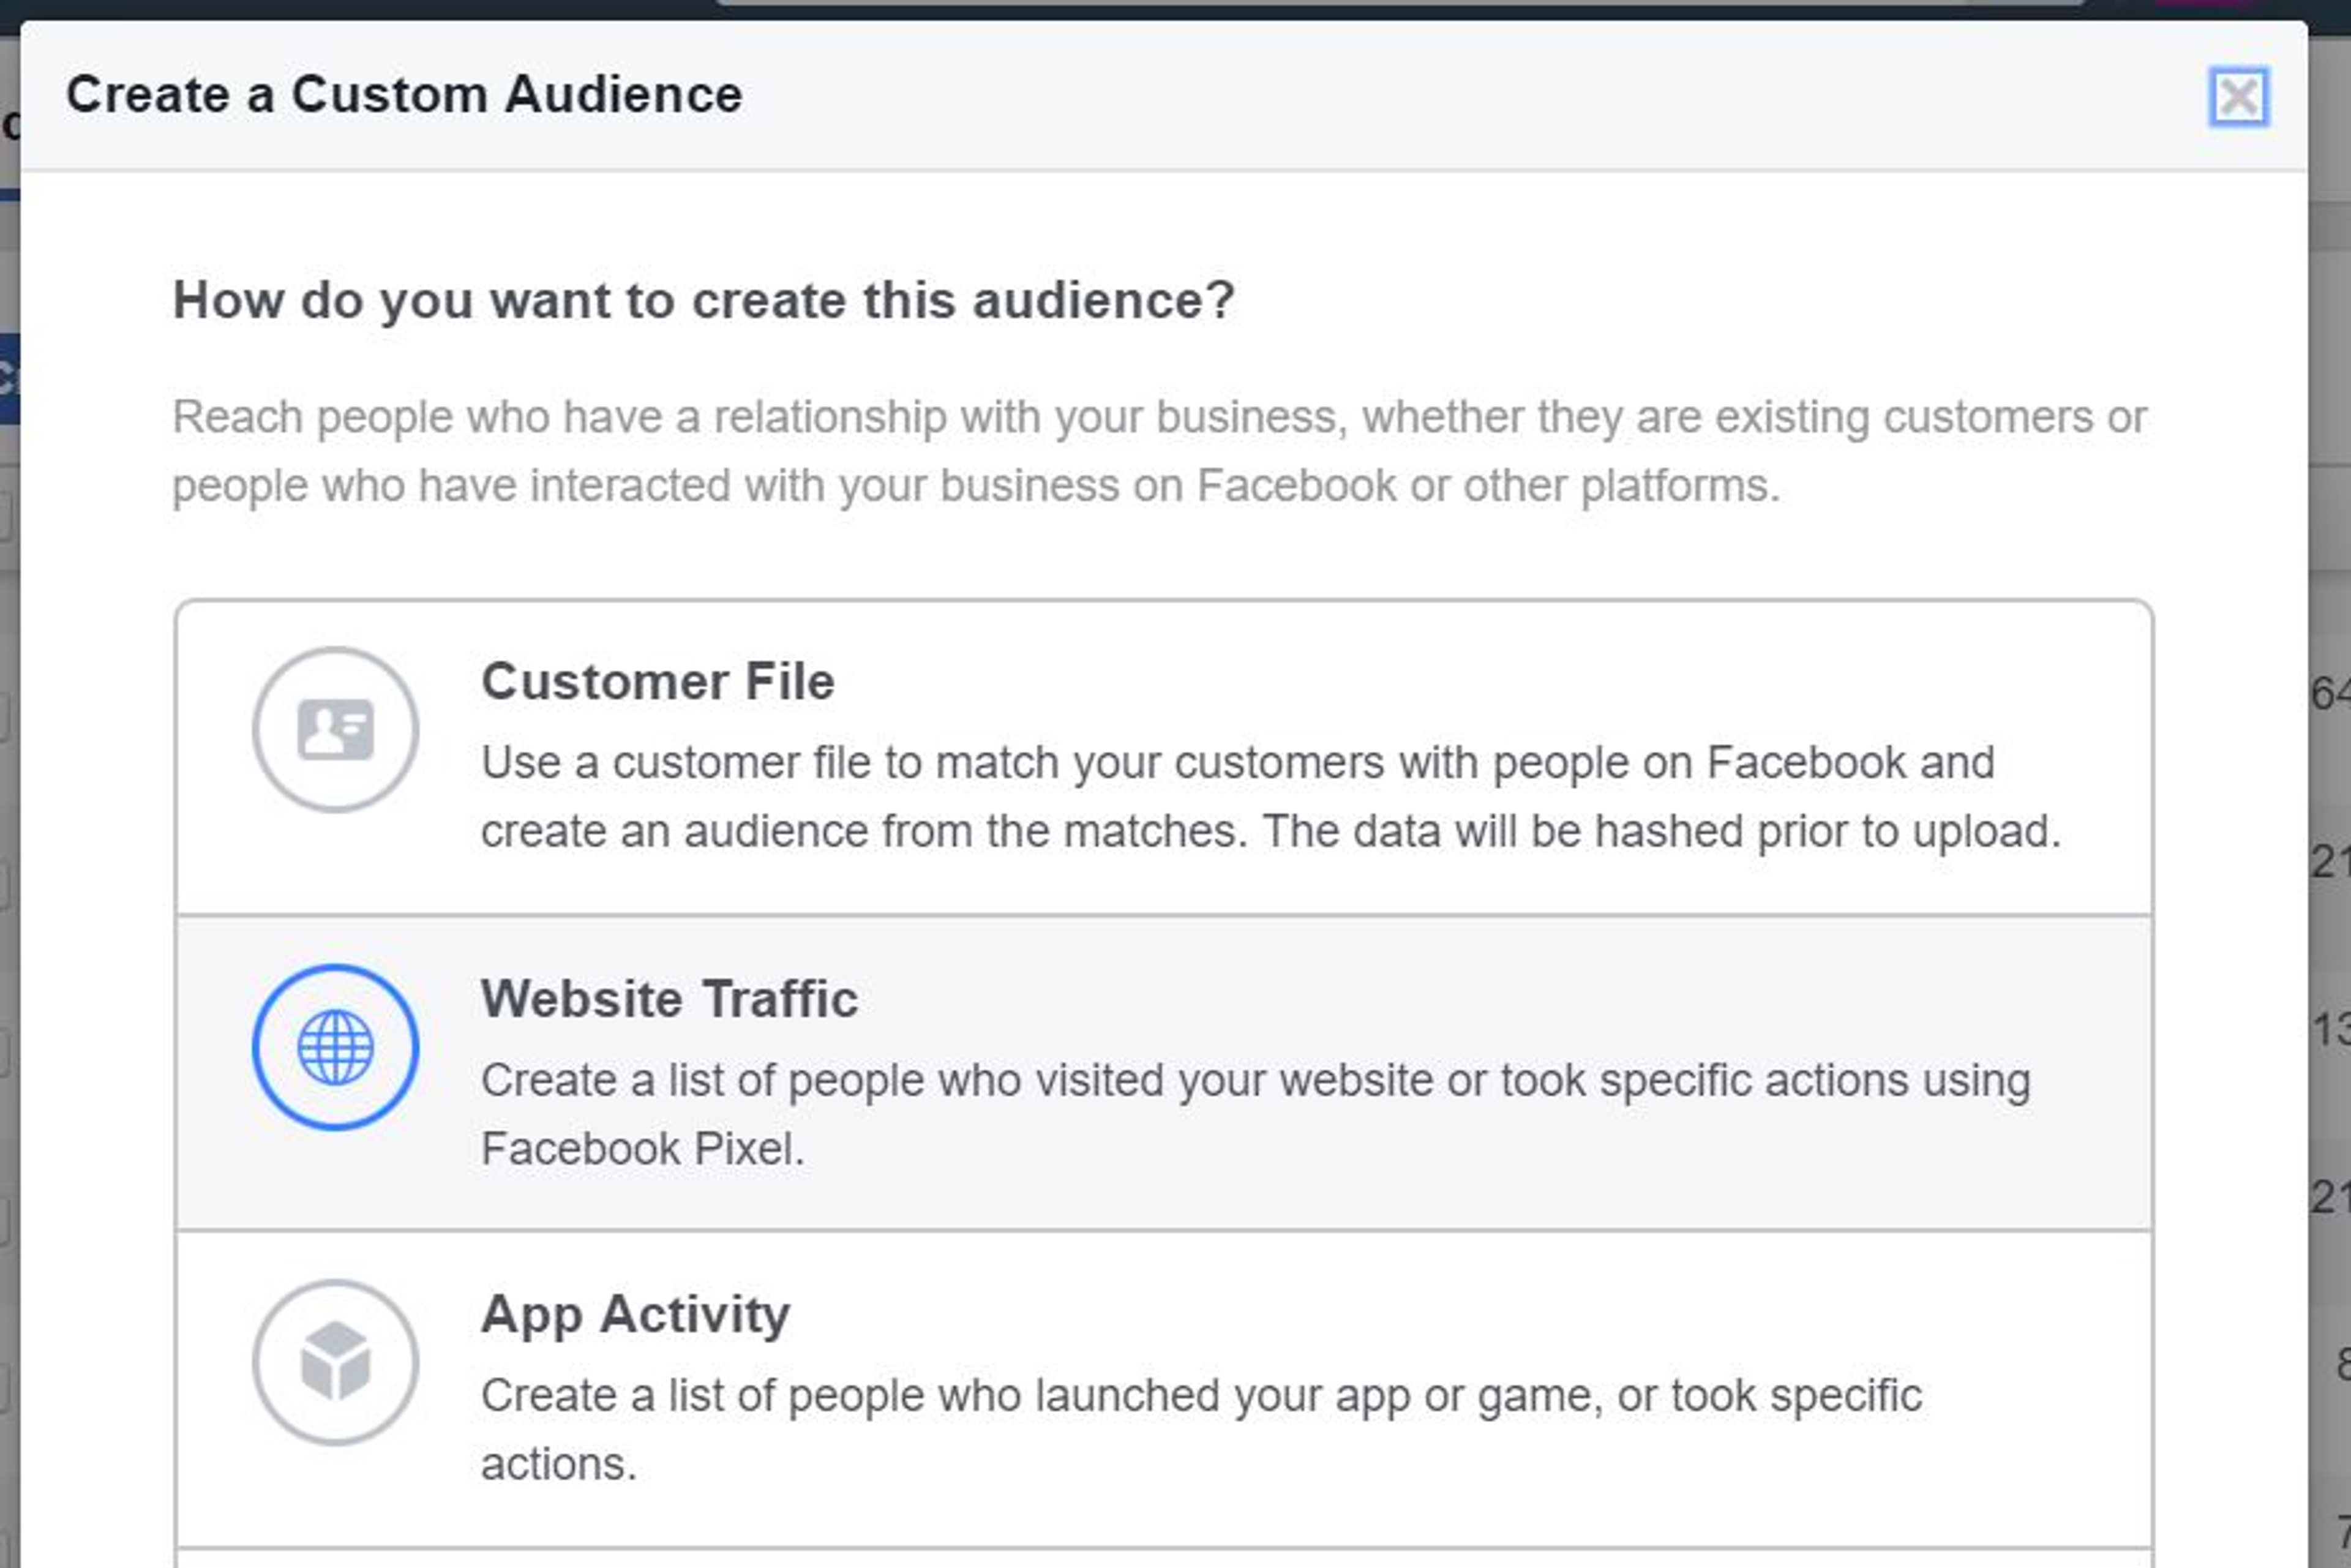
From there, you can specify if you’d want your list to consist of:
- Everyone that has been to your Shopify store
- Everyone that has been to a specific page in your store
- Or those who have spent the most amount of time browsing through your store
Regardless of what type of ads you serve to these guys, it’s likely that they’ll perform well (better than ads which you show to a non-targeted audience, at the very least!).
But for best results, I recommend Dynamic Product Ads.
I’ll talk about this in greater detail later on, but let’s go through Lookalike Audiences before we call it a day.
Lookalike Audiences are a great way of tackling the conversions vs exposure dilemma.
Basically, if you spend all your ad budget on Custom Audiences, you’ll definitely be able to get more conversions and sales...
...but you’ll be advertising to (mostly!) the same folks, again and again, meaning that you don’t expose your brand to new audiences.
If you run ads without using Custom Audiences, you’ll typically be putting your brand in front of a wider audience, but this audience is probably less qualified, which will pull down your conversion rate.
Enter Lookalike Audiences.
In a nutshell, Lookalike Audiences consist of people who are extremely similar - in terms of their demographics, likes and dislikes, and browsing/shopping patterns - to the people currently in your Custom Audiences.
They probably haven’t interacted with your brand before, but they’re still highly likely to make a purchase.
So, how do you create a Lookalike Audience?
Once you have your Custom Audience set up, go back to the same Audiences tool and click on “Create Audience” > “Lookalike Audience”.
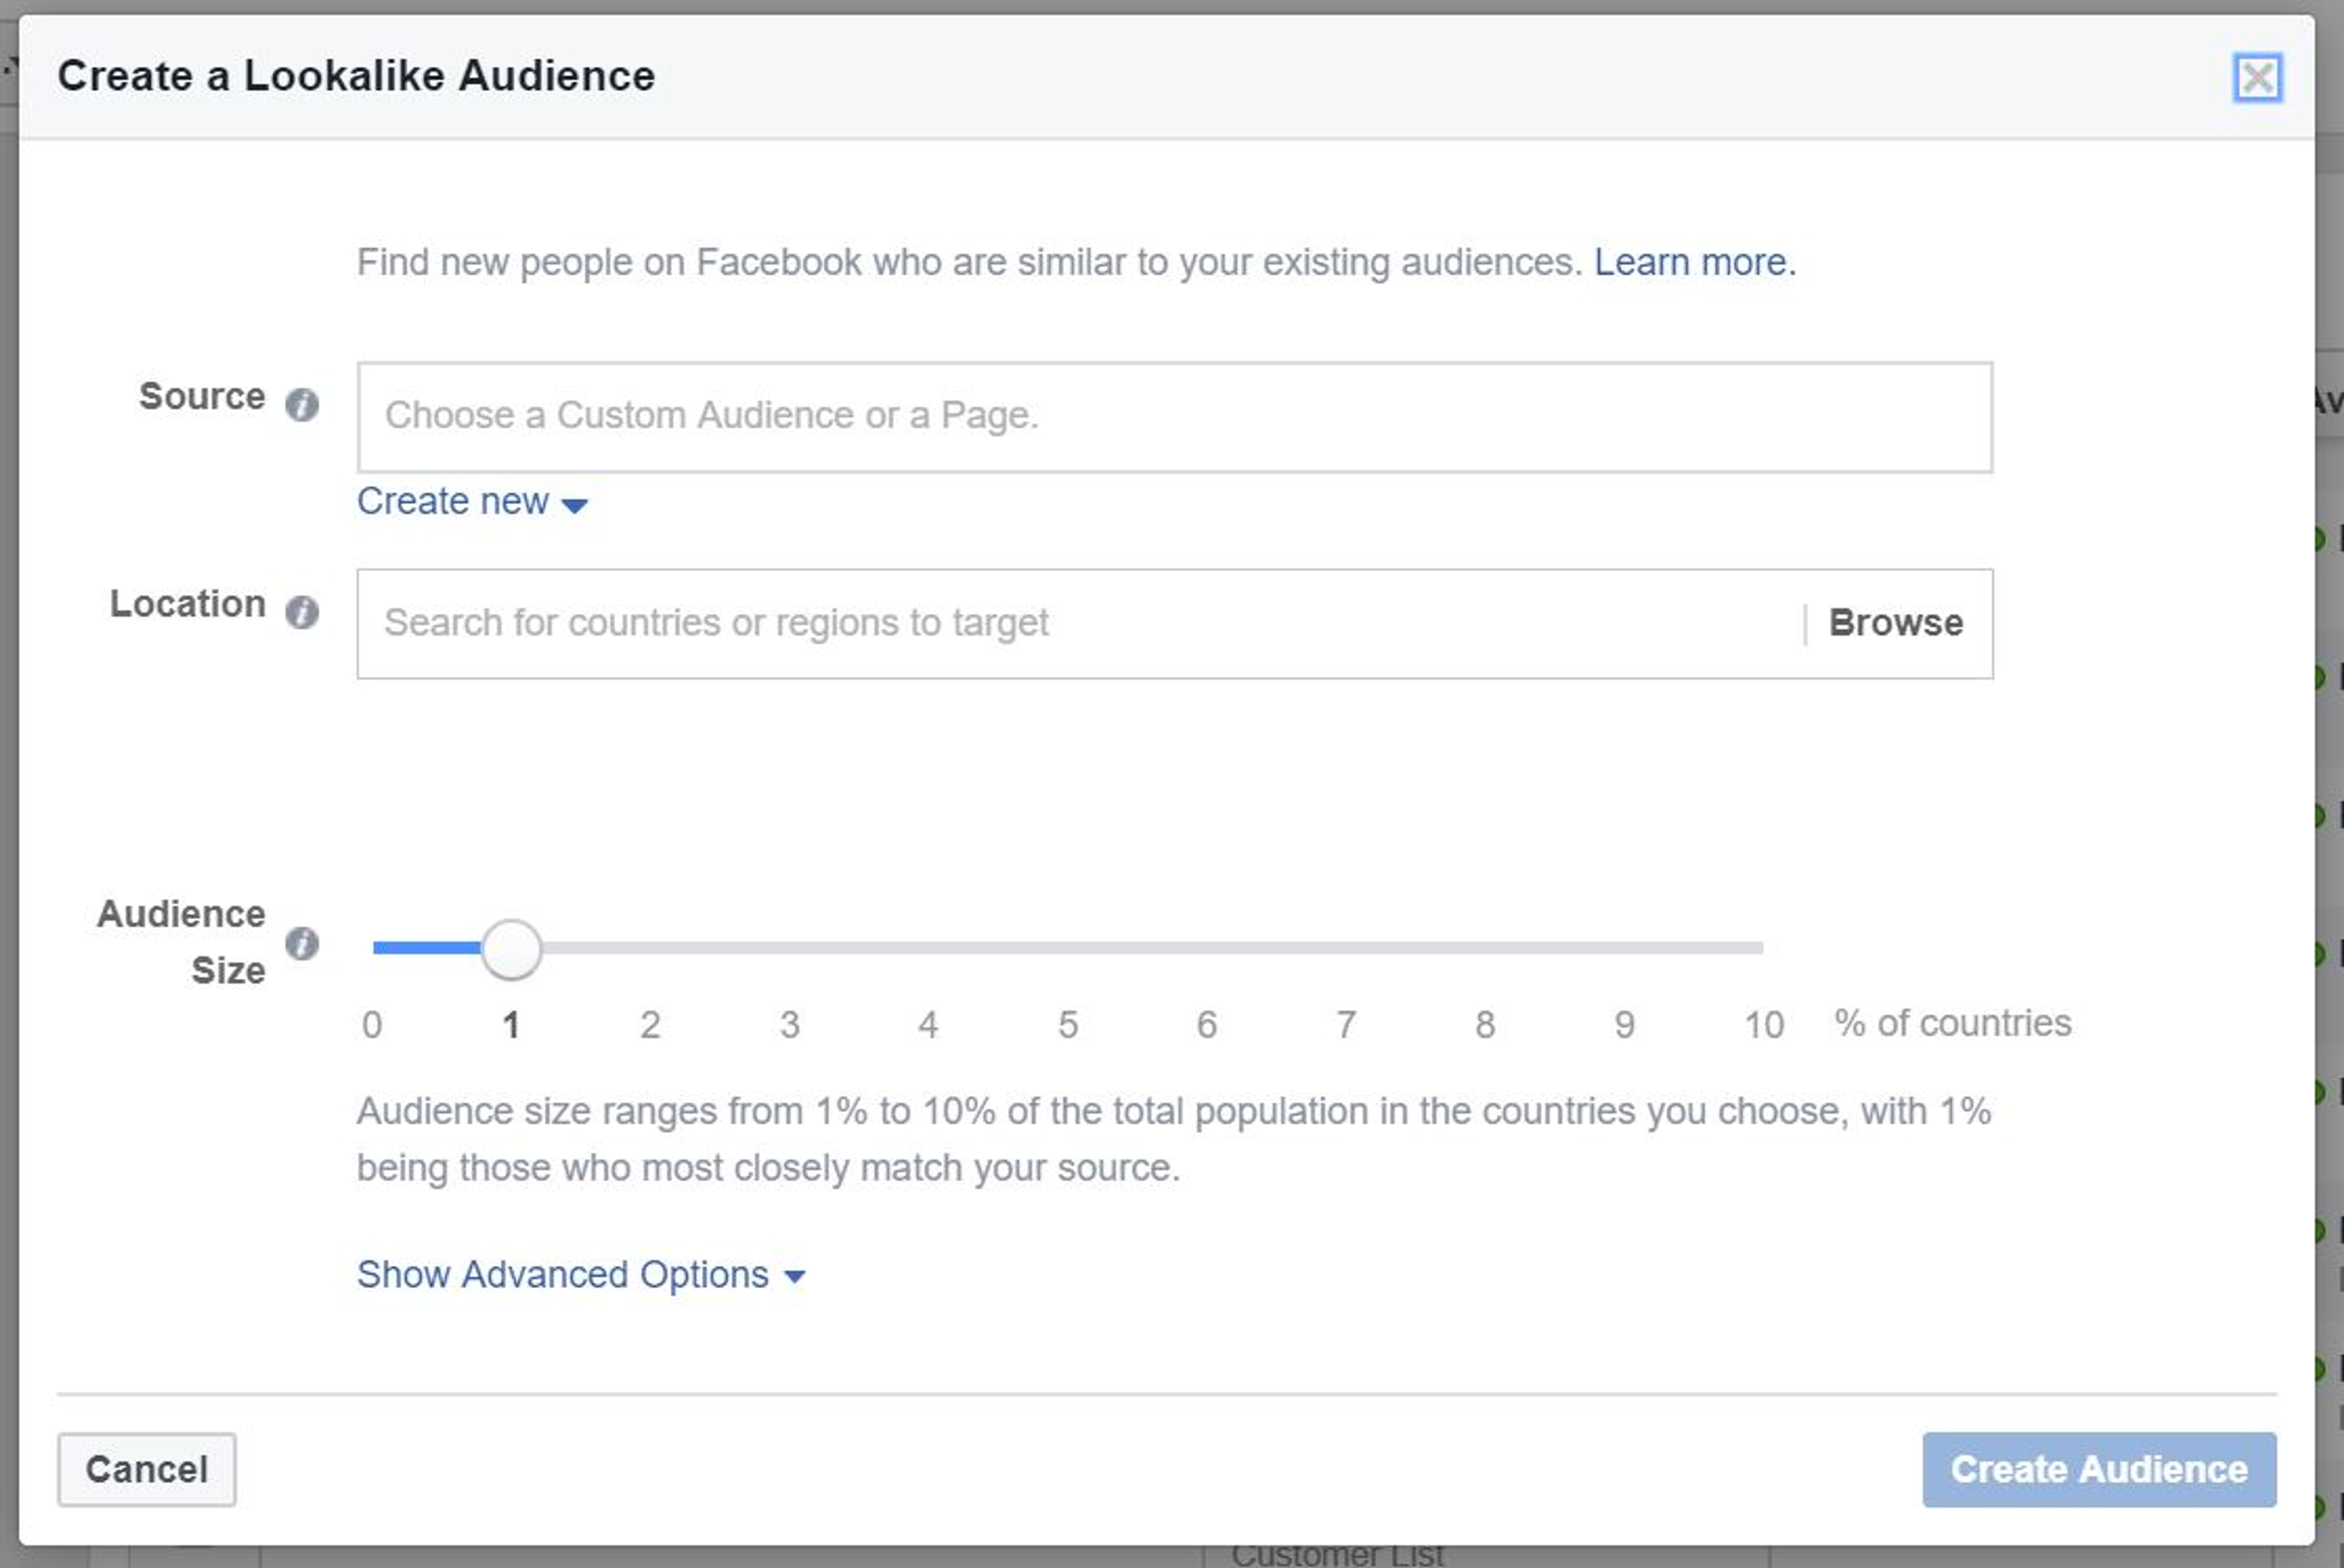
Choose the Custom Audience list that you want to base your Lookalike Audience on.
Then specify the location that you want your Lookalike Audience to be from.
And decide on your audience size. (1% gives you a Lookalike Audience which is super similar to your Custom Audience, but it also limits your audience size. On the other end of the spectrum, 10% gives you a Lookalike Audience which is way bigger, but is less similar to your Customer Audience.)
Pro Tip: There’s no such thing as the “perfect” audience size - it really differs across industries and brands. I recommend creating multiple Lookalike Audiences (you can start with 1%, 5%, and 10%) and A/B testing to see which gives you the best results.
Tip 4: Use your Facebook Pixel to run dynamic product ads
If you’re unfamiliar with Dynamic Product Ads, think of them as a highly specific application of your Custom Audiences.
These are especially great for Shopify merchants who are new to running ads, because they’re a tried and tested way of increasing your sales and conversion rates.
Let’s say you’re a Shopify merchant who sells men’s shoes, and you want to do something about your dismal cart abandonment figures.
Dynamic Product Ads allows you to retarget the customers who were previously browsing (or even adding items to the cart!) on your website, and get them to complete their purchase.
Here’s how it works:
Someone is browsing on your website, and this beautiful pair of leather shoes catches their eye.
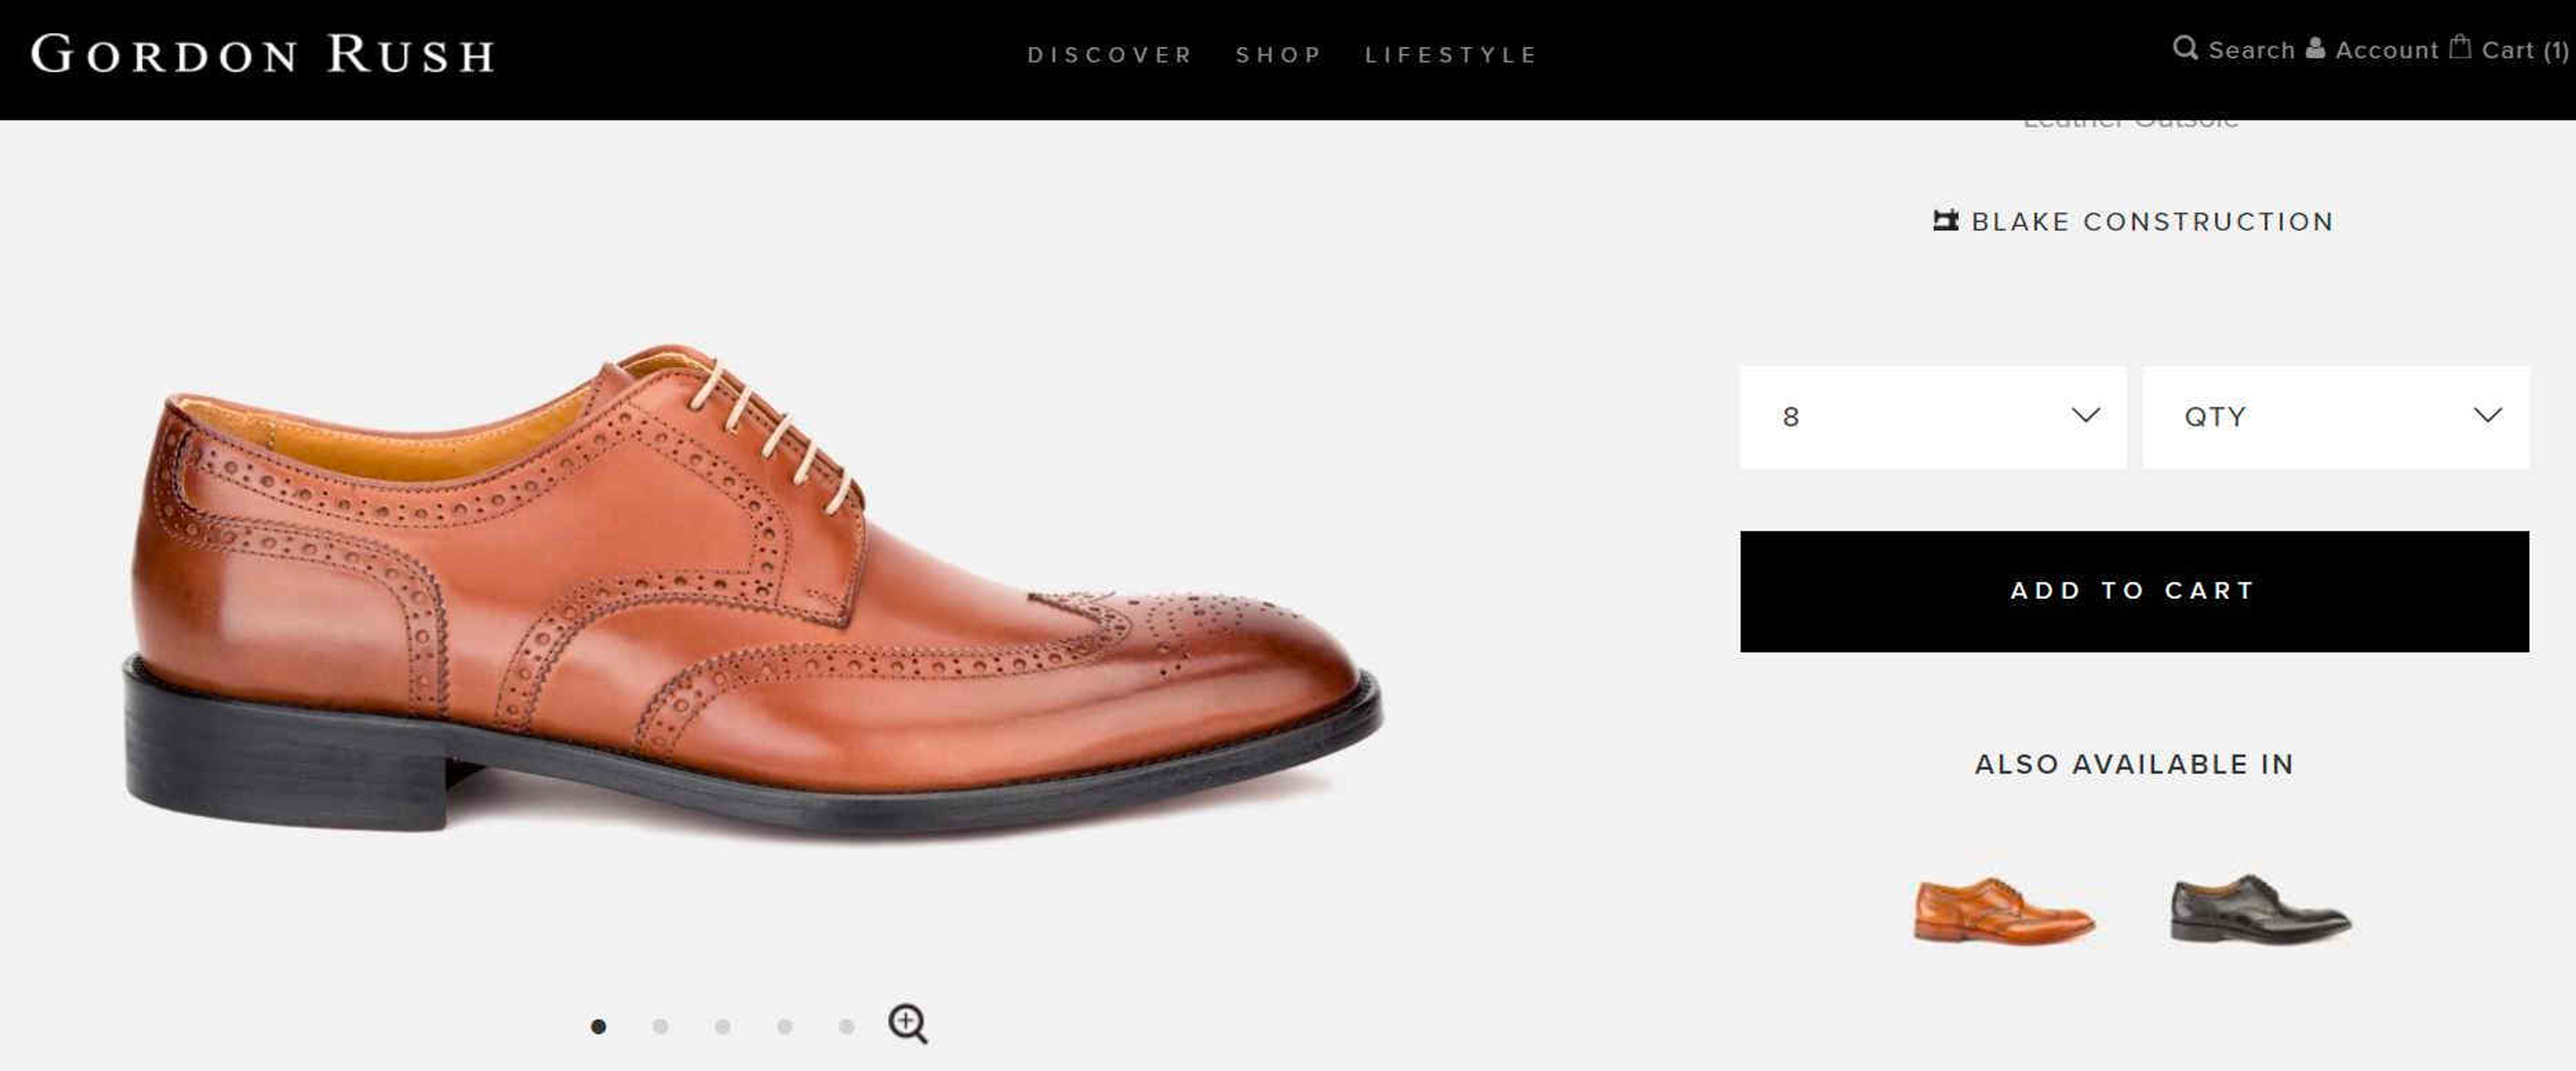
They hit the “add to cart” button and they’re just about to take out their credit card and make payment…
...but then their boss texts them and asks about that 10-page report that’s due today, and they get distracted.
Without Dynamic Product Ads, you’d definitely have to kiss that sale goodbye.
But with Dynamic Product Ads, you can put the very same item your customer was looking at in front of their eyes again (on their Facebook newsfeed!).
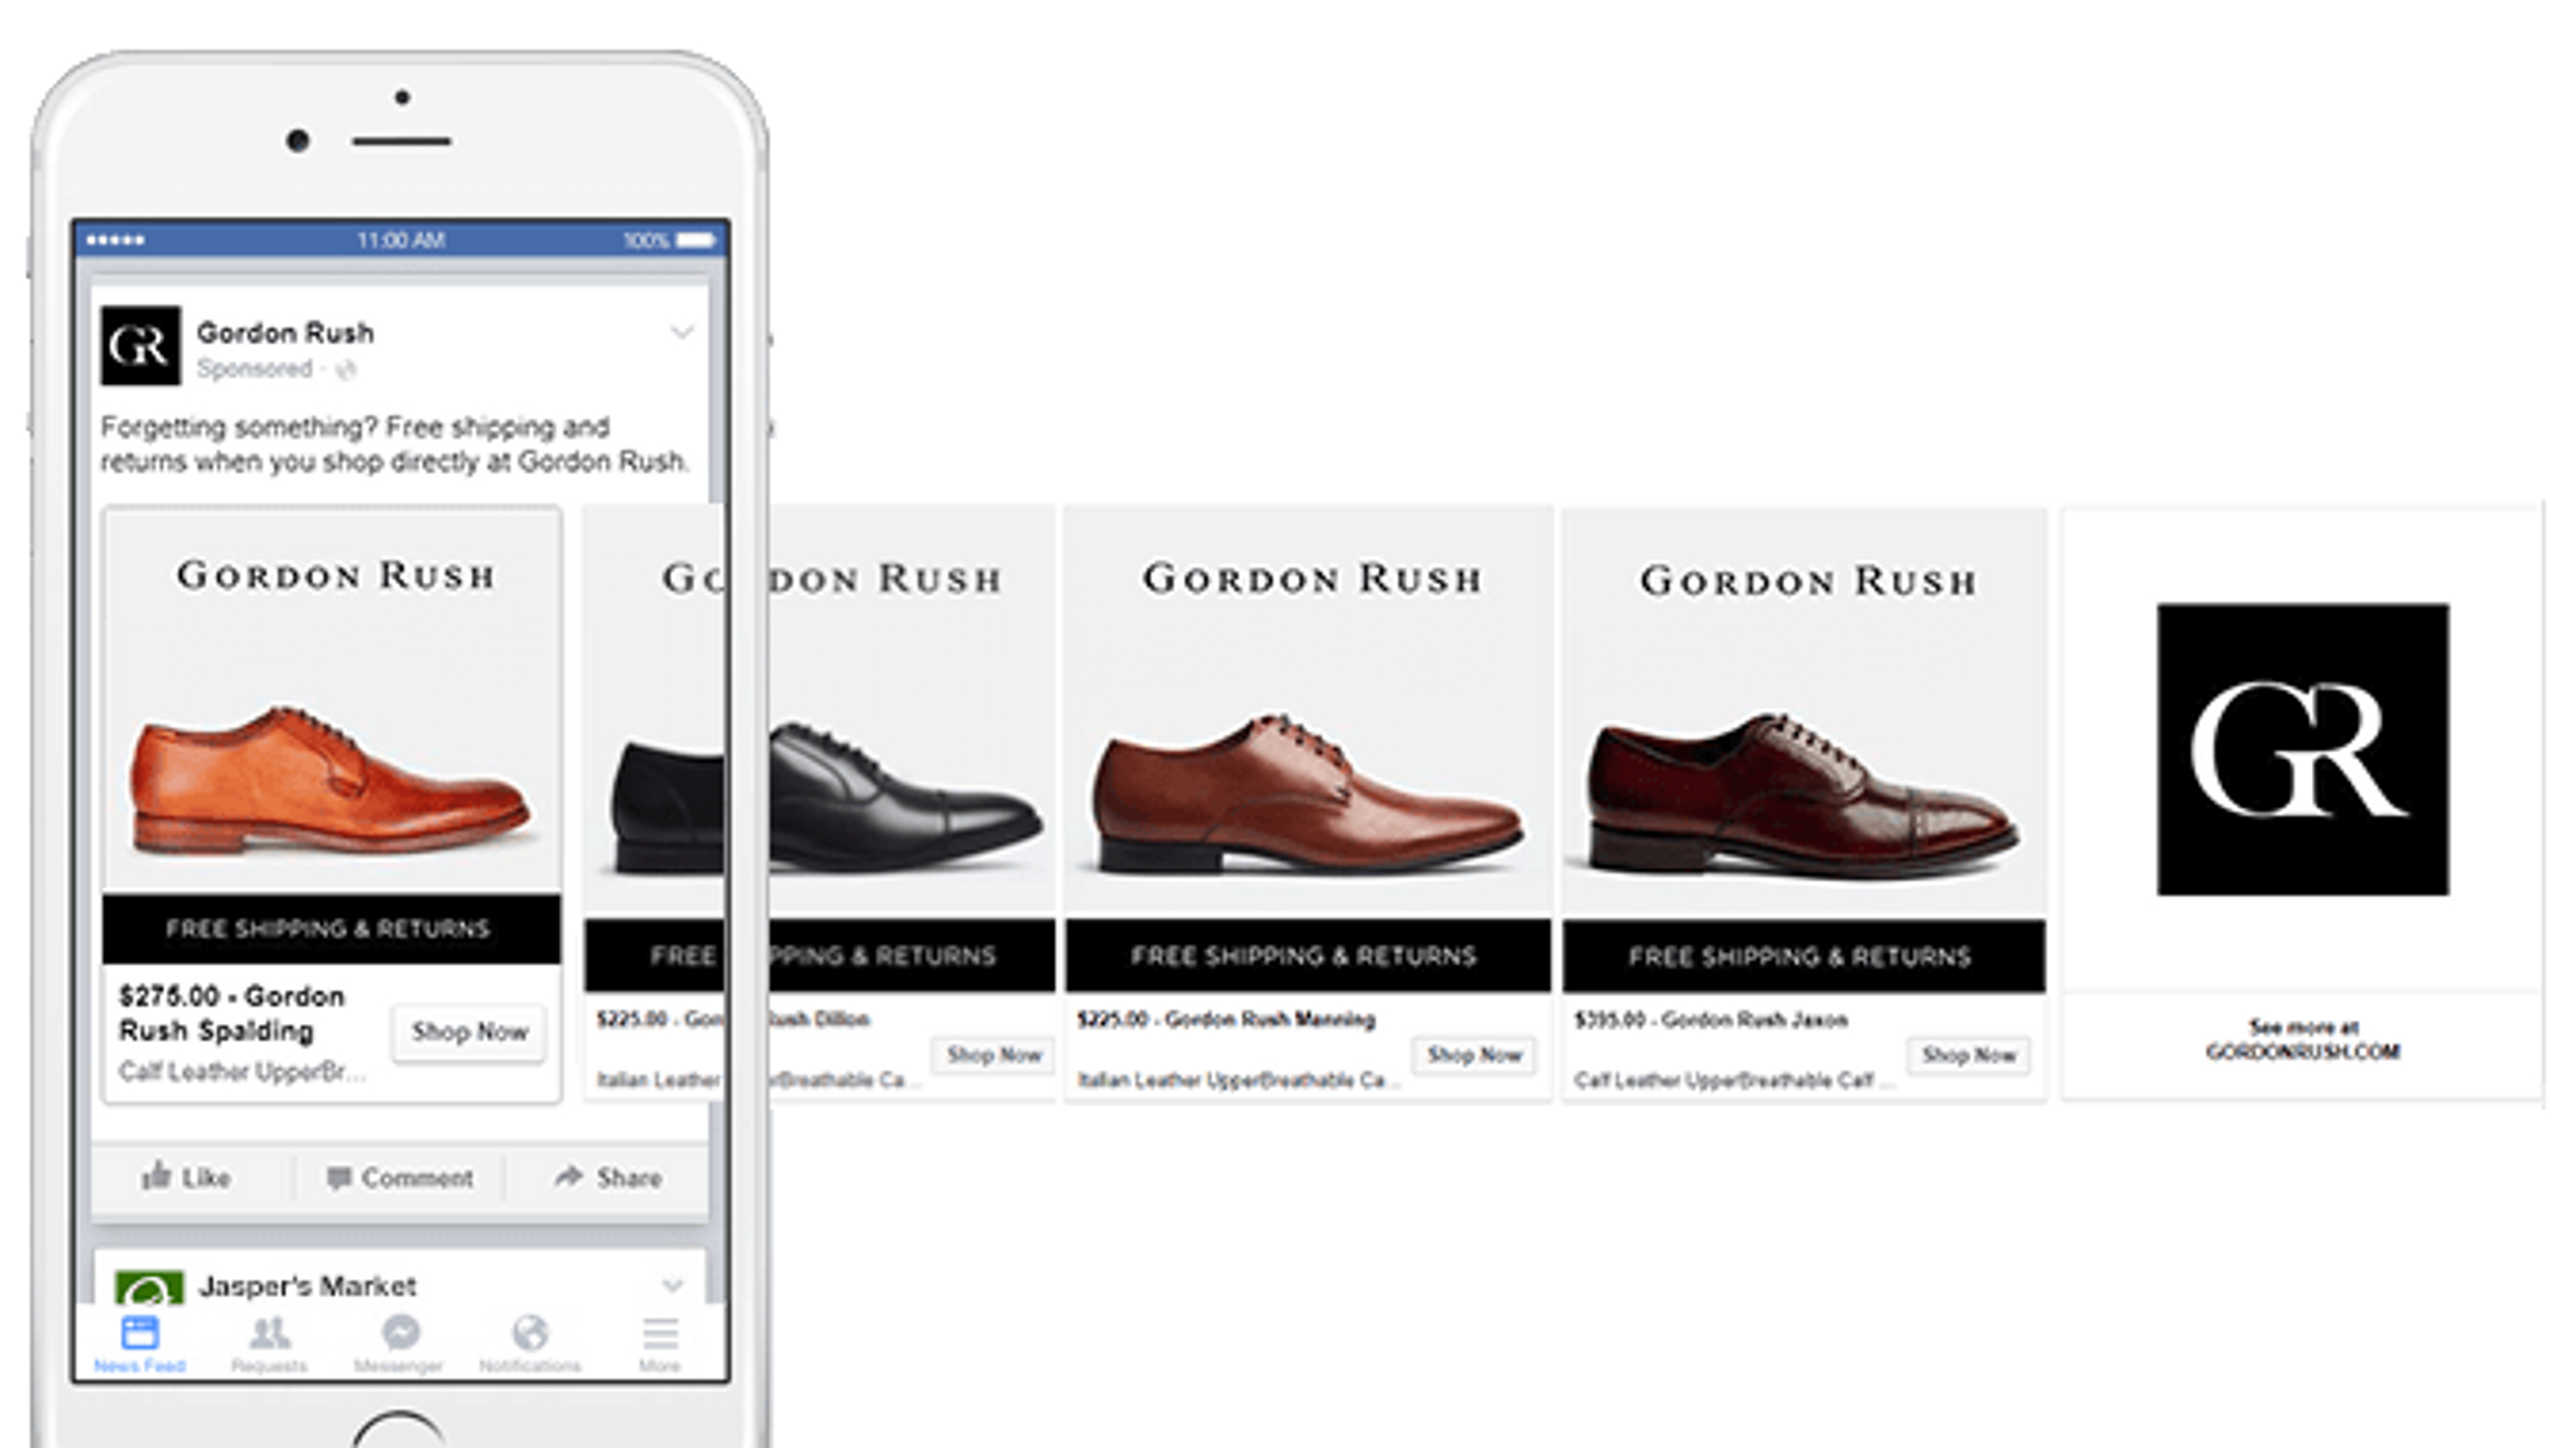
And there’s a high chance that this customer will return to your website and complete their purchase:
Statistics show that consumers are 50 to 60% more likely to convert when looking at a retargeting ad, versus a non-retargeting ad.
Plus, the visitors who land on your website via retargeting ads are 70% more likely to convert as well.
Those are some pretty good odds, huh?
To get started with Facebook Dynamic Ads, you’ll need to create and upload a product catalog to your Business Manager.
This product catalog should contain all the products you’d like to advertise; among other things, you’ll need to provide the ID, name, category, availability, product URL, and image URL of each item.
Pro Tip: When setting up your product catalog, you’ll need to specify whether you’re going with Scheduled Recurring Uploads or a Single Upload.
If your industry dictates that you need to update your products on an extremely regular basis (if you’re a fast-fashion brand which launches new collections every week, for example), you’ll want to opt for Scheduled Recurring Uploads...
...which allow you to upload your feed at scheduled intervals from a website where your feed is hosted.
If your product catalog is more or less fixed, and you don’t launch new items frequently, go ahead and choose Single Upload.
(If you ever need to update your product catalog following this, you’ll still have the option to upload your feed manually.)
Tip 5: Set -up custom conversions
Facebook’s standard conversions are pretty comprehensive, but there are certain cases in which Shopify stores might benefit from setting up their own custom conversions.
Let’s say you own a Shopify store selling dog accessories and toys.
Business has been pretty good, but you’re setting your sights higher, and you want to start selling cat accessories and toys as well.
Here’s what’s going to happen:
If you sell 5 cat-related items and 10 dog-related items on your store on any given day, your Facebook pixel will track these as 15 purchase events, without distinguishing between the product categories.
Why is this problematic?
Well, you won’t know how your different ad creatives and copies affect the sales of each product category.
If you feature two dogs and a cat in your product banner, will this get you more purchases for dog-related items as opposed to if you were to feature one dog and two cats?
If you use the term “Pet accessory store” as opposed to “Dog and cat accessory store”, how does this affect the conversion rates for each product category?
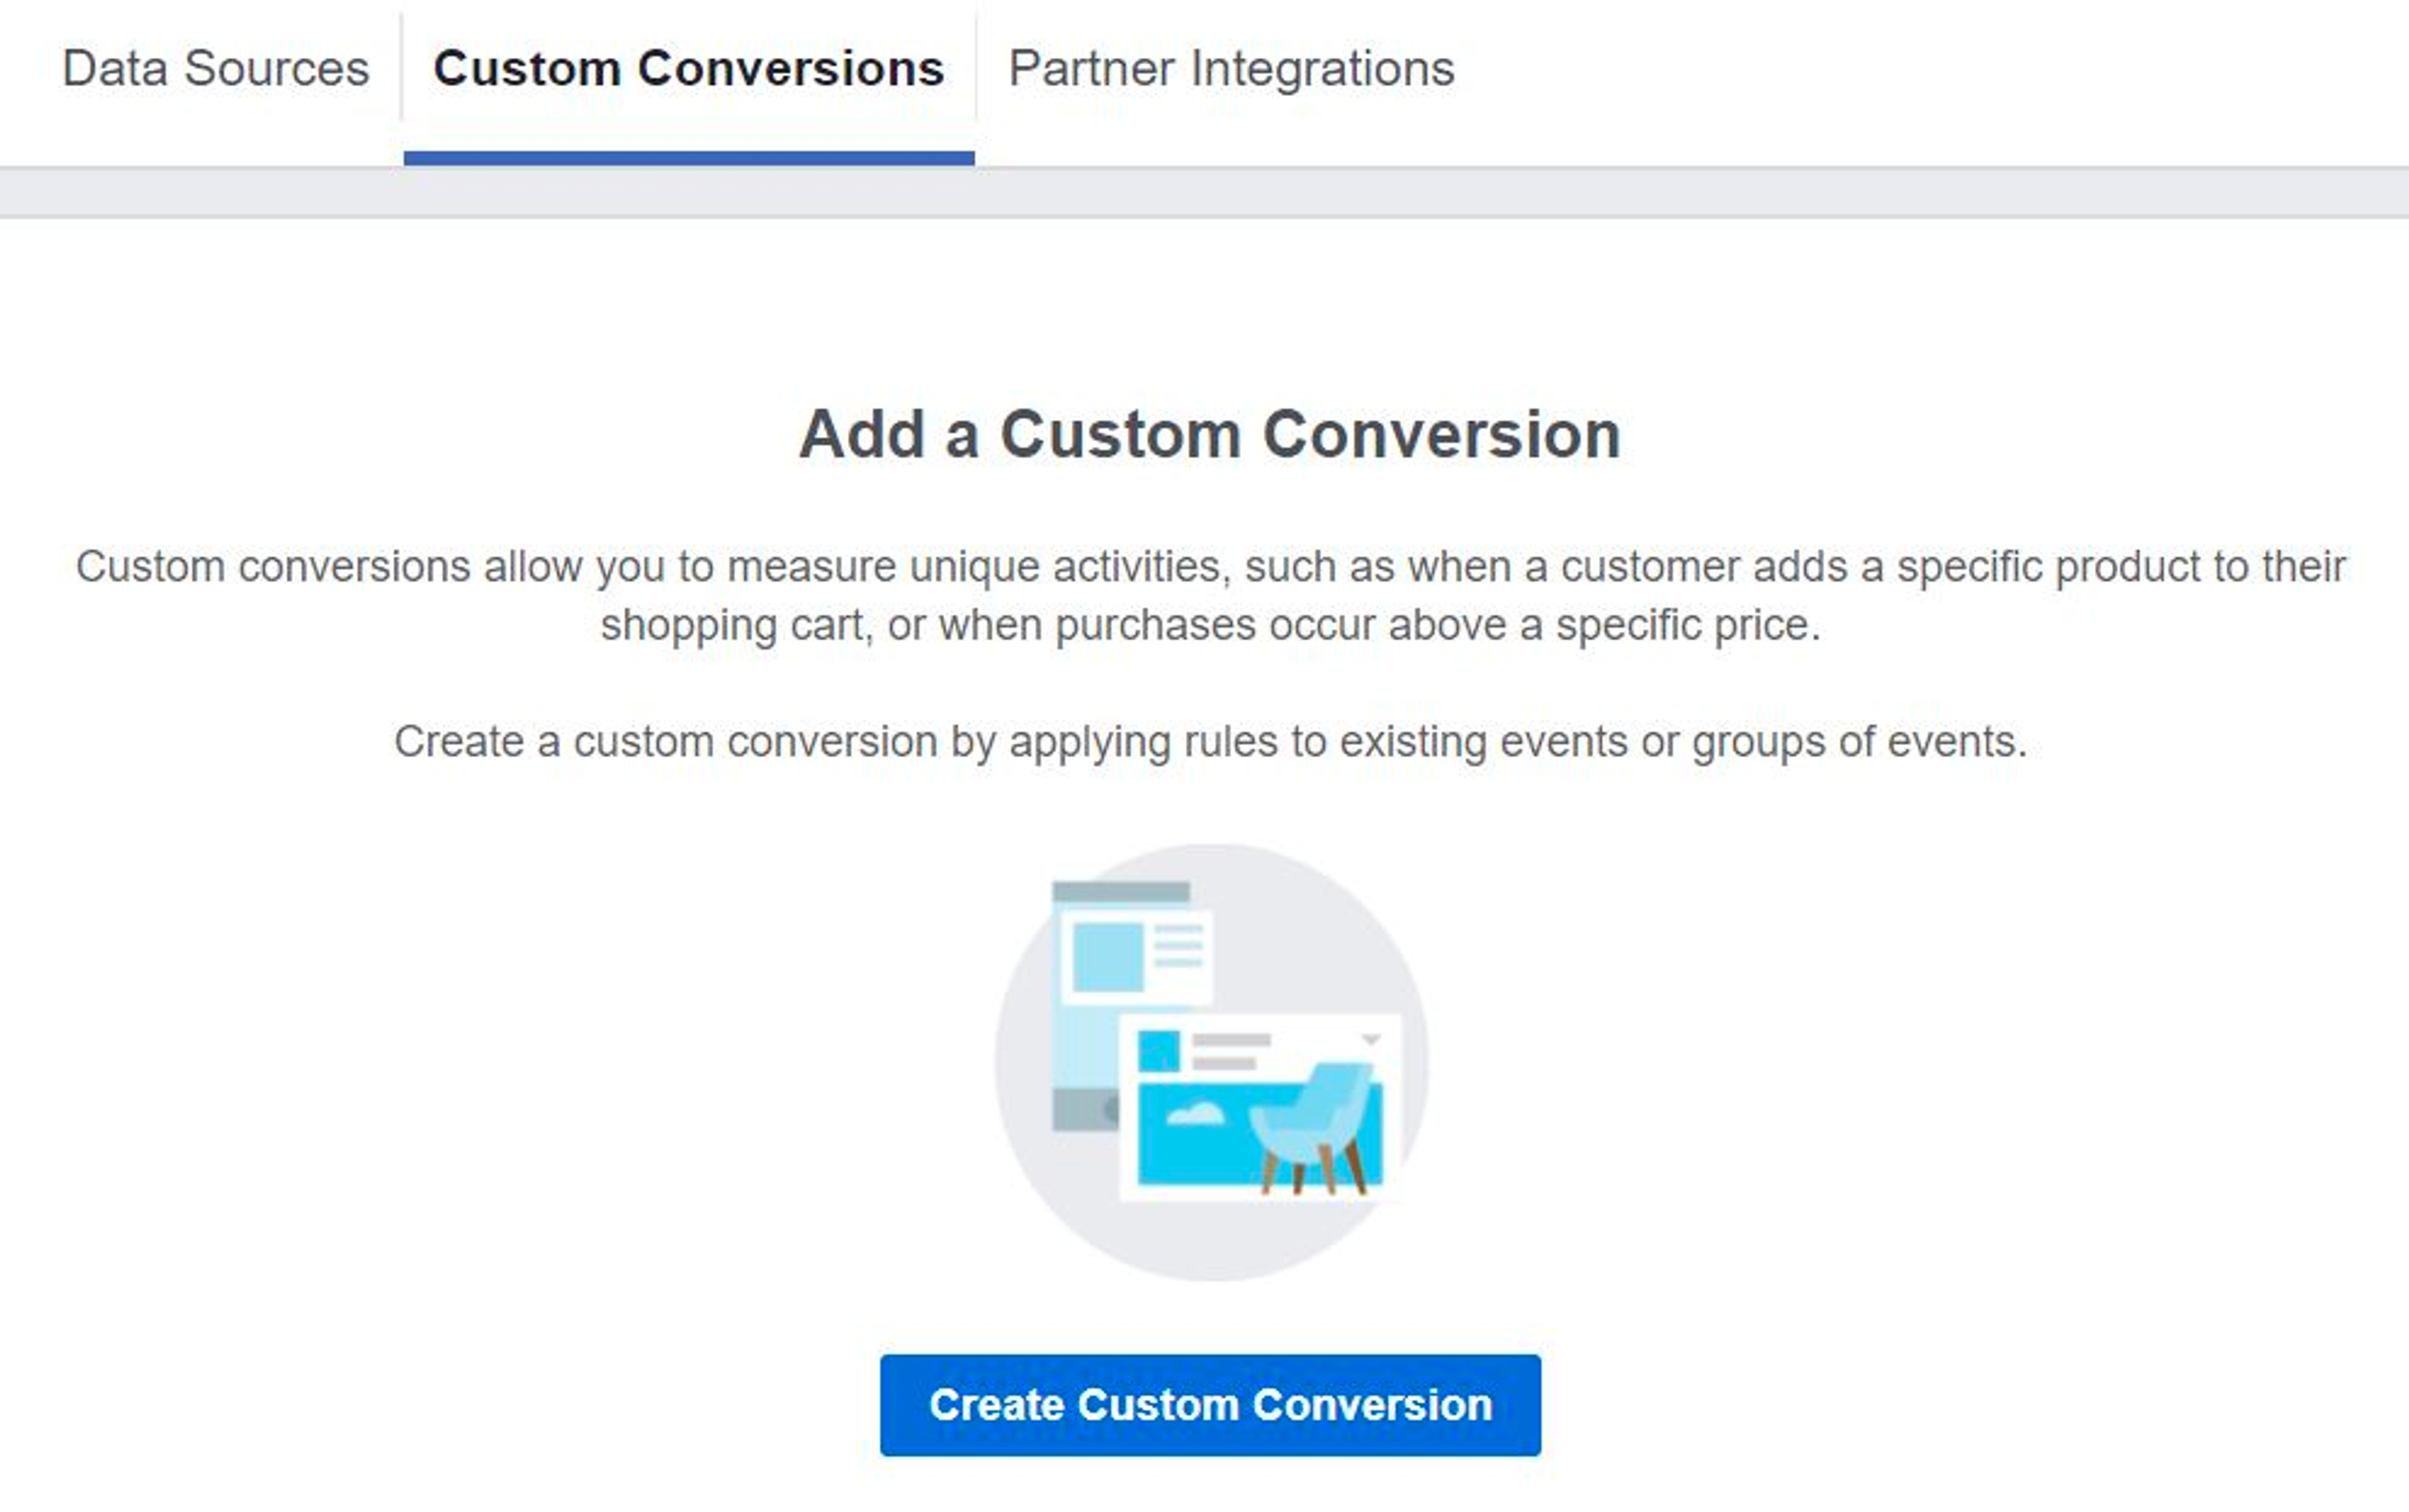
The only way to find out is the set up your custom conversions - so that you can get hold of the relevant numbers.
To do this, navigate to the “Pixels” tool once again, and click on “Custom Conversions”.
Set your base rule as “URL contains”, then decide on your trigger rule.
If you want to create a custom conversion for a specific category (like in the example I outlined above), it’ll look something like this:
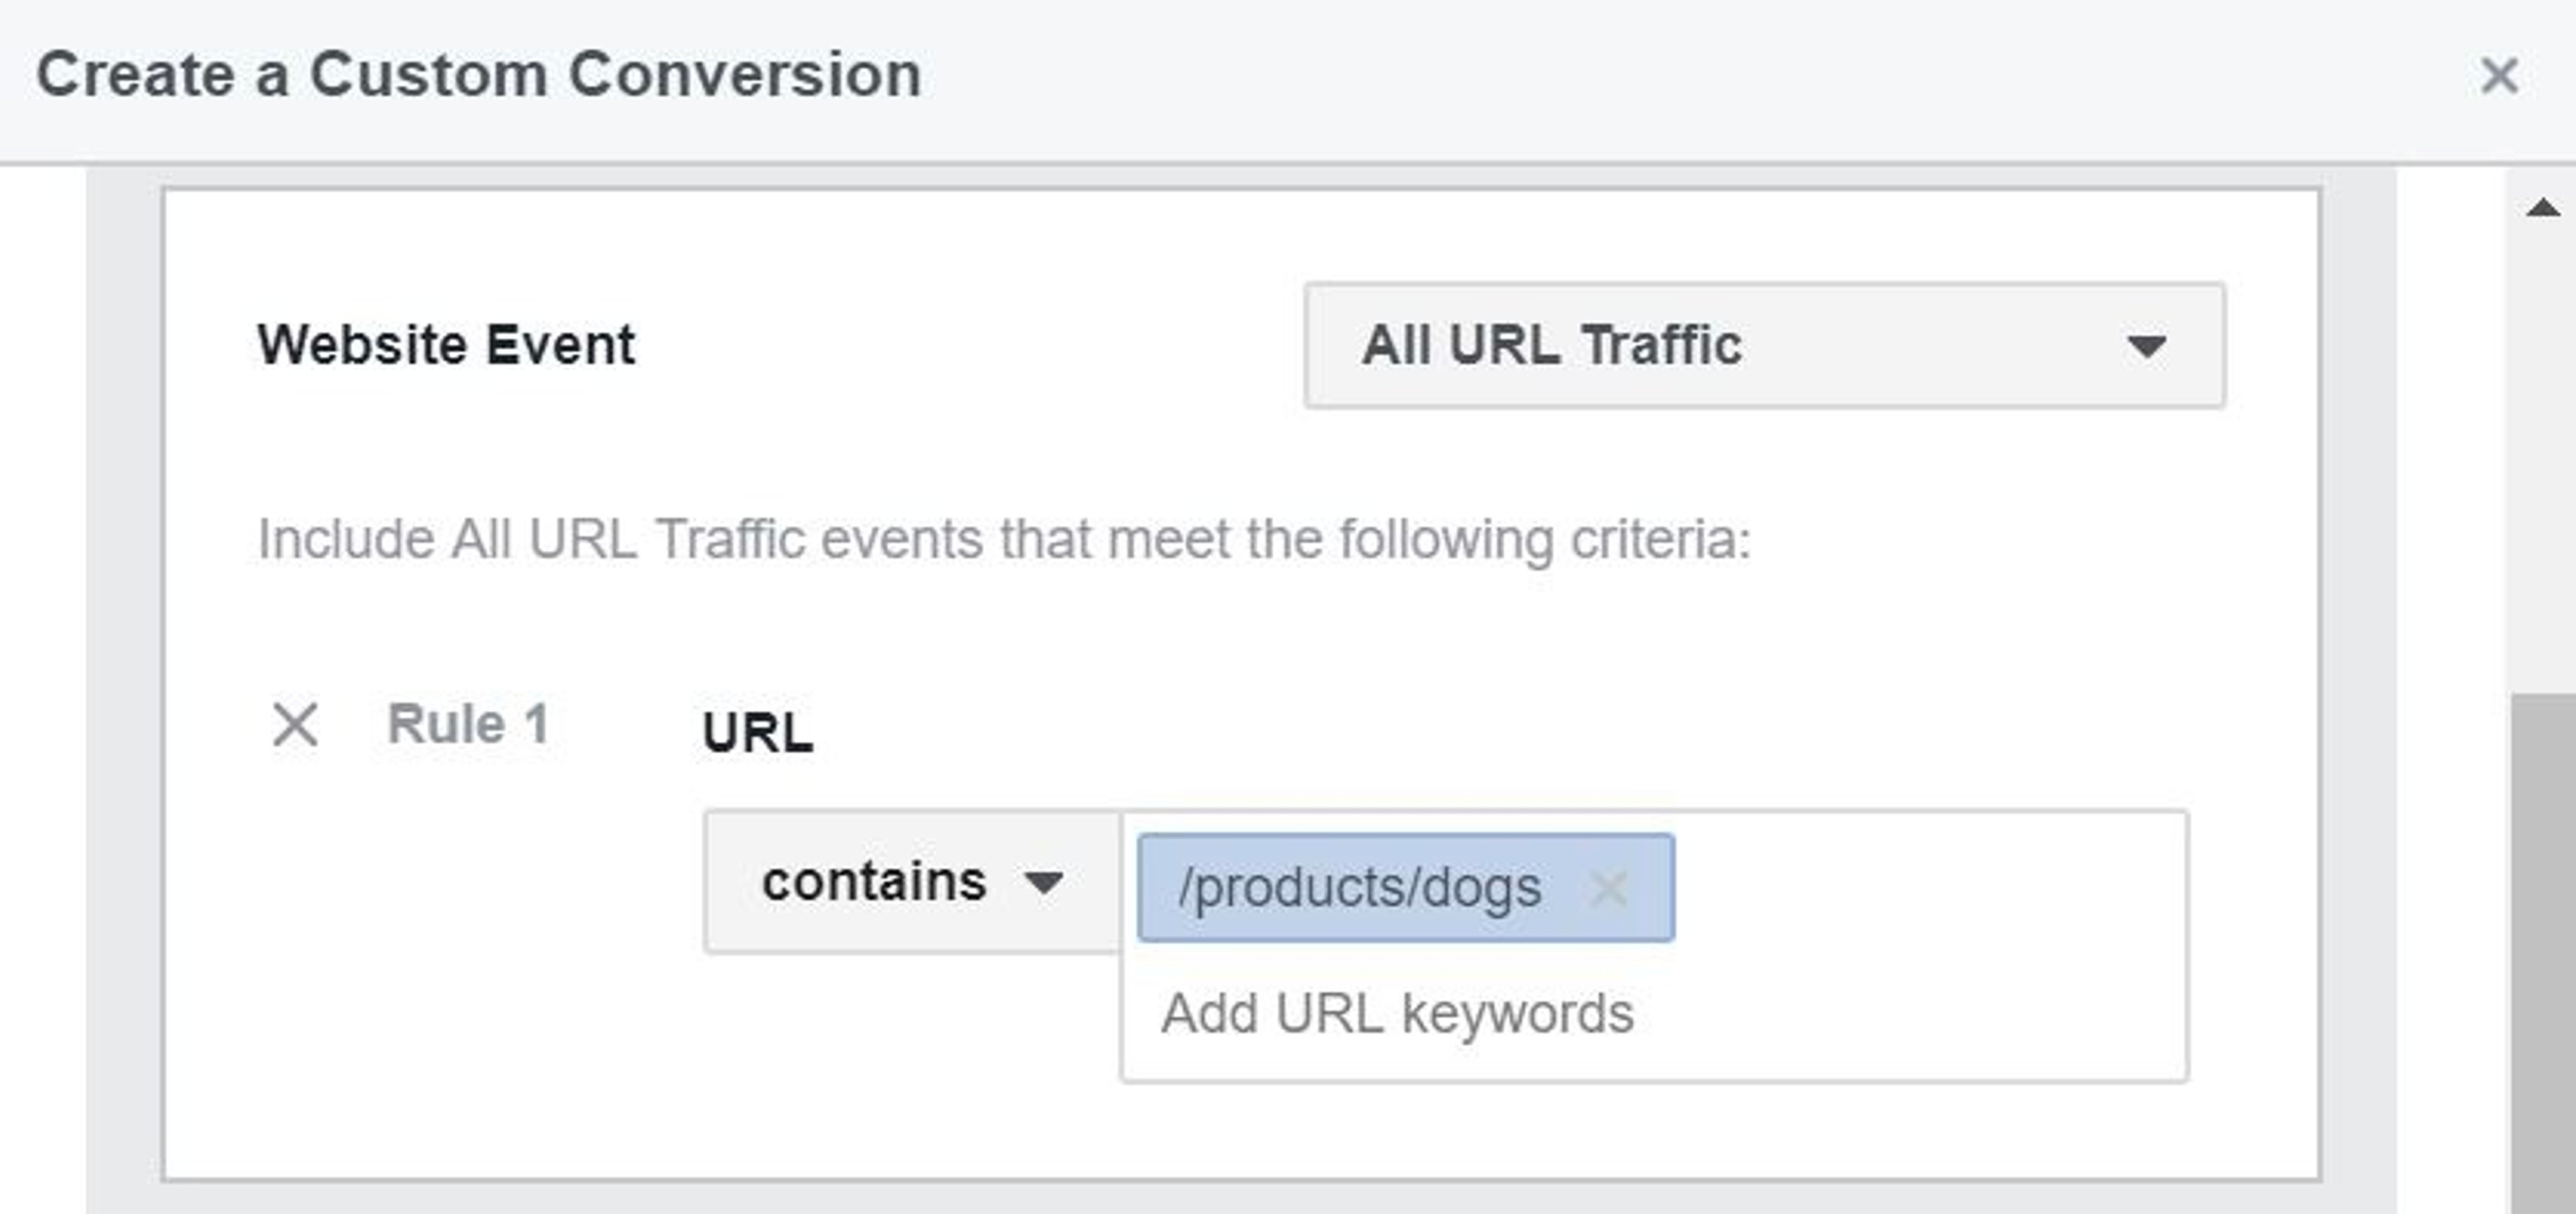
For more information on setting up your custom conversions, read this guide.
A final word on setting up and using your Facebook Pixel on Shopify
Congrats on installing the Facebook pixel on your online store!
If you’re feeling a tad overwhelmed, don’t worry.
I know this is a lot to wrap your head around, but the key is just to take it a step at a time.
For starters, all you need to do is to set up your Facebook Pixel.
It’s a pretty foolproof process that I’ve outlined up there - just follow the steps and you’ll be able to get it done.
After that, the next thing you’ll want to do is decide on your Facebook ads budget.
Since you’ll probably be focusing on acquiring more traffic (which is cheaper!) instead of conversions, you can start as small as you’d like…
...even if all you’ve got is five bucks a day, this can get you a decent amount of data and results.
Once you hit your 500 events per week, it’s time to start optimizing your ads and targeting, and getting more creative.
By this point, you’ll be a lot more familiar with Facebook’s advertising platform, so it won’t seem as huge of a leap as it does right now.
Before you know it, you’ll be a full-fledged Facebook ads expert, and your Shopify store will be raking in the profits.
So take the first step (installing that Facebook pixel!) today, and I’ll see you on the other side. As always, if you have any questions or concerns, leave a comment below!
Get the knowledge and inspiration you need to grow your business.
Bold Commerce needs your email to send newsletters. For more information, read our Privacy Statement.
About the author
Bold Editors
Copywriter
We are a dynamic team of B2B writers and champions of global ecommerce brands.